...

December 2025

How Do You Replace an Electric Scooter Throttle? Step-by-Step Repair Guide

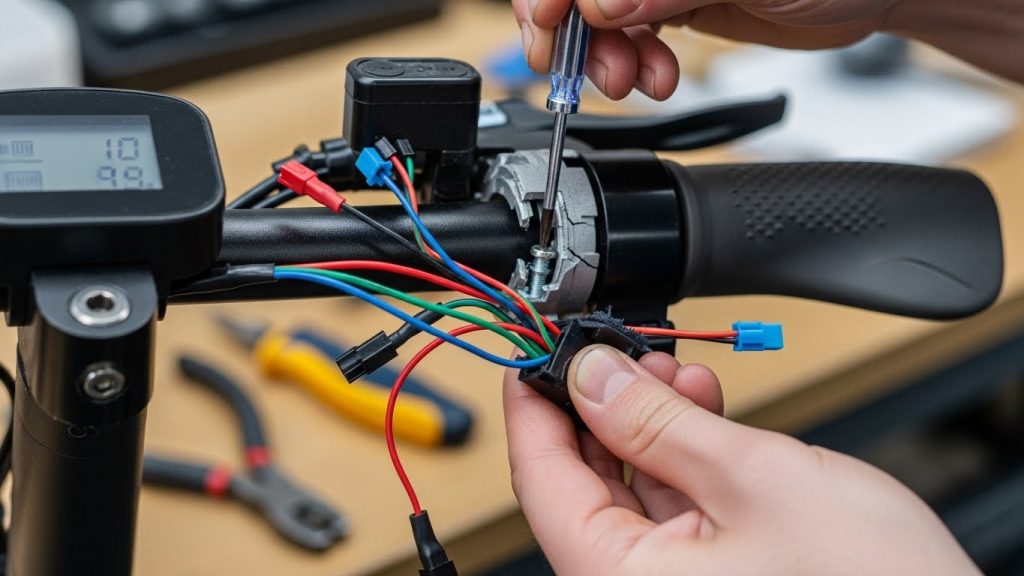
A broken electric scooter throttle leaves you stranded. You press the lever, but nothing happens. This common problem can ruin your commute and, if left unfixed, could point to deeper electrical issues. Finding a clear, step-by-step guide can be a challenge, leaving you frustrated and without a ride. To change the throttle on an electric scooter, you must first power off the scooter and disconnect the battery. Then, remove the handlebar grip and the old throttle assembly, unplug its wiring connector, and install the new throttle. After connecting the new throttle’s wiring, you must test it for proper function before fully reassembling the components. This process requires basic tools and careful attention to the wiring. But what if the wires don’t match? Let me explain… This guide will cover every step in detail, from choosing the right part to troubleshooting common issues. 1. Why Would You Need to Change an Electric Scooter Throttle? An electric scooter throttle is your connection to the motor, but it doesn’t last forever. The most common reason for replacement is simple wear and tear. Over time, the internal components, like the hall sensor or the spring mechanism, can fail. You might notice the throttle becoming unresponsive, feeling sticky, or not springing back to its original position. These are clear signs that it is time for a change. Safety and performance are also major factors. A faulty throttle can cause jerky acceleration or a complete loss of power, which is dangerous in traffic. This is important because… a malfunctioning throttle might also send incorrect signals to the controller, leading to error codes on your display or even damaging the scooter’s electronic system over time. Differentiating a throttle issue from a controller or motor problem is key. If the scooter powers on but doesn’t move, and you’ve ruled out brake sensor issues, the throttle is the next logical component to inspect. Sometimes, the need for a change is about upgrading. Some riders prefer a different style of throttle, like switching from a thumb lever to a twist grip for better control. An upgrade can improve your riding experience and provide more precise acceleration. Whether for repair or an upgrade, changing the throttle is a manageable DIY task that can get your scooter running like new again. Symptom Possible Cause Recommended Action Unresponsive Throttle Failed hall sensor or broken wire Replace throttle assembly Sticky or Slow Return Worn out spring or physical damage Replace throttle assembly Jerky Acceleration Intermittent sensor signal Check wiring, then replace throttle 2. What Tools and Materials Are Required for the Job? Before you start, gathering the right tools will make the job much smoother. You don’t need a professional workshop, but a few essential items are necessary. The most important tools are a set of Allen keys (hex wrenches) and a Phillips head screwdriver. These will be used to remove the handlebar grips, the old throttle housing, and any other panels you might need to open. Wire cutters and strippers are also on the essential list. You may need to cut zip ties holding the throttle cable, and if your new throttle doesn’t have a matching plug, you will need to splice wires. Here’s the deal… having a multimeter is also extremely helpful. It allows you to test the wiring and confirm that the new throttle is sending the correct voltage signals before you put everything back together. It’s a great tool for diagnosing electrical issues with confidence. Finally, you will need the replacement throttle itself and some zip ties to secure the new cable neatly to the scooter’s frame. Make sure you have purchased the correct throttle for your specific scooter model. This is the most critical part of the preparation. Having all your tools and materials ready before you begin will save you time and prevent frustration during the process. Tool/Material Purpose Essential/Optional Allen Key Set Removing throttle housing and grips Essential Screwdriver Opening display panels or housing Essential Wire Cutters/Strippers Cutting zip ties and preparing wires Essential Multimeter Testing voltage and connections Optional (but recommended) Zip Ties Securing the new throttle cable Essential 3. How Do You Select the Right Replacement Throttle? Choosing the correct replacement throttle is the most important step to ensure a successful repair. Not all throttles are created equal. The first thing to consider is the type of throttle your scooter uses. The most common types are thumb throttles, twist throttles (like on a motorcycle), and trigger or finger throttles. You should generally stick with the same type your scooter came with to ensure compatibility with your handlebars and display. Next, you must check the technical specifications. The voltage of the throttle must match your scooter’s system voltage (e.g., 36V, 48V, 52V). Using a throttle with the wrong voltage rating can damage your controller. Now, you might be wondering… what about the wiring? You need to check the connector. Throttles come with various multi-pin connectors. The easiest replacement is one with the exact same plug as your old throttle. If you can’t find an exact match, you will have to cut the wires and splice them, which requires more work. Finally, decide whether to buy a genuine part from the original manufacturer (OEM) or an aftermarket option. OEM parts are guaranteed to be compatible and are the safest choice, especially for scooters under warranty. Aftermarket parts can be cheaper but may require modifications to the wiring. For a reliable repair, especially on a premium scooter like a Dynamic Scooter, we always recommend using genuine parts to ensure safety and performance. Throttle Type Description Common On Thumb Throttle A small lever pressed by the thumb Most commuter scooters Twist Throttle A grip that you twist to accelerate High-performance scooters Trigger Throttle A small trigger pulled by the index finger Some compact and lightweight scooters 4. What Safety Precautions Must Be Taken Before Starting? Safety should always be your top priority when working on any electric vehicle. Before you even pick up a tool, you must ensure

How Do You Replace an Electric Scooter Throttle? Step-by-Step Repair Guide Read More »
What Does the E3 Error on Electric Scooter Mean? Everything You Need to Know

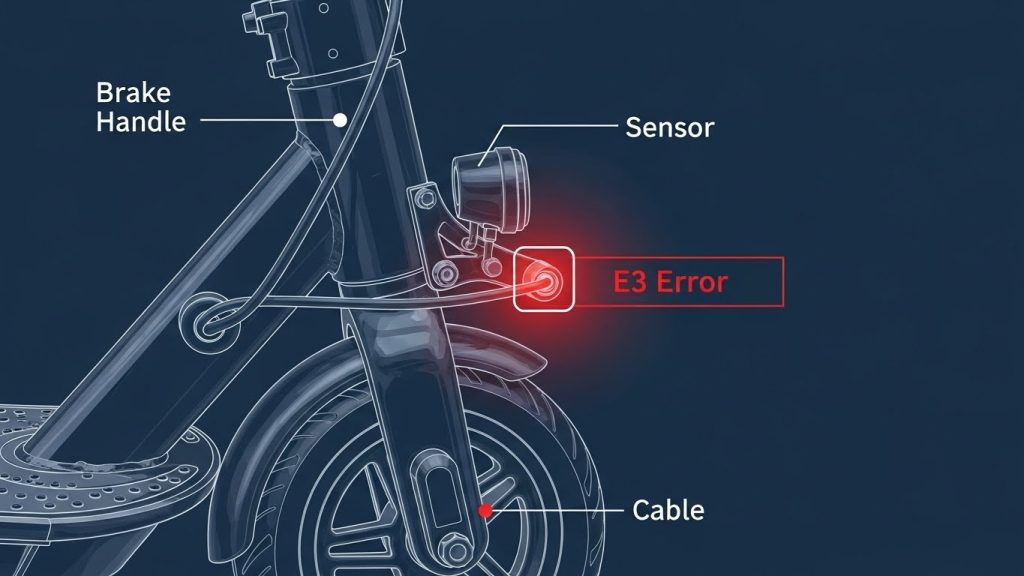
An E3 error on your electric scooter is frustrating. It signals a brake problem that stops you. Ignoring it risks your safety and can lead to costly repairs. This guide has the answers you need. The E3 error on an electric scooter indicates a fault within the braking system. This is most commonly caused by a malfunctioning brake handle, a disconnected or faulty sensor, a damaged brake cable, or an issue with the scooter’s main controller. To resolve it, you must diagnose the specific component that is failing and then repair or replace it. Continuing to ride with an E3 error is unsafe. But where do you even begin? Here’s the deal… This article will walk you through everything, from identifying the cause to fixing it yourself. 1. What Is the E3 Error Code on an Electric Scooter? Error codes are how your scooter communicates problems. An E3 error signals a critical brake system issue. This safety feature stops you from riding a scooter that can’t brake properly. It’s a direct alert for owners to address a potential problem before it becomes dangerous. The E3 error means the controller has detected a fault in the brake lever’s sensor circuit. This could involve the hall sensor, the wiring, or the controller itself. This is important because… the scooter’s motor will not engage while this error is active. It’s a failsafe designed to protect you from riding a vehicle that cannot reliably stop. Understanding this error is the first step. The scooter is protecting you from a dangerous situation by disabling the motor. This prevents acceleration when the brakes are malfunctioning. The next sections will explore the common culprits behind this error, helping you diagnose and fix the problem efficiently. Error Code Component Function Common Failure Point Brake Lever Sensor Detects when you pull the brake lever Sensor misalignment or failure Wiring Harness Connects the sensor to the controller Frayed wires or loose connectors Controller Processes the signal from the sensor Internal circuit damage 2. What Are the Common Causes of an E3 Error? The E3 error code is triggered by several issues within the brake system. The most frequent cause is a problem with the brake handle’s hall effect sensor. This tiny component tells the controller when you pull the brake lever. If it gets stuck or damaged, the controller thinks the brake is permanently engaged. Another common culprit is the physical connection. The wiring between the brake handle and the controller can become loose or damaged, especially near the handlebars. Now, you might be wondering… could it be more serious? Yes, sometimes the fault lies within the scooter’s main controller. A power surge or water damage can cause it to misread the brake sensor’s signals. Physical damage is also a frequent source of the E3 error. If the scooter was dropped, the sensor or its magnet could be knocked out of place. Water ingress is another enemy of scooter electronics. If moisture gets into the brake lever or controller, it can short-circuit sensitive components and lead to the E3 fault. Checking for these common causes is the first step in troubleshooting. 3. How Can I Diagnose the Source of the E3 Error? Diagnosing the E3 error is a process of elimination. Start with a visual inspection. Look at the brake lever, cable, and visible wiring. Check for obvious damage like bent parts, frayed wires, or disconnected plugs. Often, the problem is something you can spot right away. Next, focus on the brake lever. Pull and release it several times. Does it move smoothly, or does it feel sticky? A lever that doesn’t return to its resting position can cause the sensor to send a continuous signal. Let me explain… this tells the controller the brake is always on. Try gently wiggling the handle to see if the error code disappears, which suggests a loose connection. If the lever seems fine, trace the brake cable from the handlebar to the controller. Check for loose connections where the sensor plugs into the main wiring harness. Unplug and replug the connector to ensure it is secure. If you are comfortable, you can also inspect the controller for burn marks or water damage, which indicate a more serious problem. Diagnostic Step What to Look For Action if Problem is Found Visual Inspection Obvious damage, frayed wires, bent lever Proceed to specific component repair Brake Lever Test Sticking, lack of smooth movement Lubricate or replace the brake lever Connection Check Loose or disconnected plugs Unplug and securely reconnect 4. What Are the Initial Steps to Fix an E3 Error? Before complex repairs, try a few simple steps. First, perform a full power cycle. Turn the scooter off, wait a minute, and then turn it back on. This can sometimes clear temporary system glitches. If a restart doesn’t work, adjust the brake handle. A loose screw can cause the lever to sit at an angle and improperly activate the sensor. Also, check the brake cable tension. Here’s why it matters… a cable that is too tight can pull on the lever just enough to trigger the sensor. Loosening it slightly might resolve the issue. Another simple fix is to reset the scooter’s electronic system. Some models have a specific reset procedure in the user manual, often involving a combination of buttons. This can clear persistent error codes. These initial steps are quick and can often save you a trip to a repair shop. If the error persists, you will need to investigate the components more deeply. 5. How Do I Address a Faulty Brake Lever or Sensor? If the E3 error comes from the brake lever, you may need to replace it. A faulty lever or sensor is a very common cause. You can identify a bad lever if it feels loose, fails to spring back, or if the error appears when you wiggle the handle. Replacing the brake handle assembly is straightforward on most scooters. You will need Allen keys and possibly a screwdriver.

What Does the E3 Error on Electric Scooter Mean? Everything You Need to Know Read More »

Which Electric Scooter Suits Women? Comfort, Weight & Safety Checklist

Finding the right electric scooter as a woman involves unique considerations that differ from general recommendations. Women have specific needs regarding weight, comfort, safety, and design. Many scooters on the market are designed without women’s preferences in mind. The right scooter combines lightweight design, comfortable features, and reliable safety systems. This guide addresses women’s specific needs when choosing a scooter. You’ll learn what features matter most for female riders. By the end, you’ll know exactly what to look for in your perfect scooter. Women riders benefit from lightweight scooters with comfortable grips and excellent safety features. Dynamic Scooter models offer the perfect balance of portability and performance for women commuters. The 10 kg weight makes carrying effortless. Responsive brakes and bright lights provide safety confidence. Quality construction ensures reliability for daily use. Ready to find your ideal scooter? Here’s the deal… 1. Why Do Women Need Different Scooter Features? Women riders have distinct needs that affect scooter choice. Understanding these differences helps you select the right model. Weight capacity matters differently for women. Most women weigh less than men on average. Lighter riders can use lighter scooters. A 10 kg scooter is manageable for most women. Heavier scooters become burdensome. The Dynamic Scooter’s 10 kg weight is ideal for women riders. This is important because lighter scooters improve daily usability and portability. Carrying ability is crucial for women riders. Many women carry scooters on public transit. A lightweight scooter fits in small spaces. Heavy scooters require strength to carry. A quality carrying handle is essential. Women appreciate easy portability. Lightweight design matters more for women than men. Comfort features affect riding experience. Smaller hand grips suit women better. Responsive controls are easier to manage. Smooth suspension reduces fatigue. Comfortable seats matter for longer rides. Women prioritize comfort more than men typically do. Safety concerns are paramount for women. Bright lights improve visibility. Responsive brakes provide control. Stable design prevents accidents. Women riders often prioritize safety over speed. Safety features should never be compromised. Aesthetic preferences vary by individual. Some women prefer sleek designs. Others like colorful options. Design matters to many women riders. Scooter appearance affects satisfaction. Quality design enhances the riding experience. Ease of use is important for women. Intuitive controls are easier to learn. Simple operation reduces frustration. Women appreciate straightforward functionality. Complicated features are unnecessary. Simplicity improves satisfaction. Women’s Need Why It Matters Ideal Feature Light Weight Easy to carry and transport Under 12 kg Portability Fits on public transit Compact, foldable Comfort Reduces fatigue Responsive, smooth Safety Peace of mind Bright lights, good grip Design Personal satisfaction Sleek, attractive Ease of Use Reduces frustration Intuitive controls 2. What Weight and Size Specifications Are Best? Weight and size directly affect usability for women. The right specifications make daily use easier. Lightweight scooters under 12 kg are ideal. Most women can comfortably carry scooters under 12 kg. Heavier scooters become tiring to carry. The Dynamic Scooter at 10 kg is perfect for women. Light weight improves daily usability. Consider your strength when choosing weight. Compact folding is essential for women. A compact fold fits in small spaces. Backpacks and bags can’t accommodate large folded scooters. Compact design improves portability. Women appreciate space-saving features. Foldability matters more for women riders. Handlebar height affects comfort. Handlebars at waist height are most comfortable. Too-high handlebars strain shoulders. Too-low handlebars strain wrists. Adjustable handlebars accommodate different heights. Here’s why it matters… Proper handlebar height prevents discomfort and injury. Deck width affects stability. A wider deck provides better balance. Narrow decks feel unstable. Women often prefer wider decks. Stability improves confidence. A stable platform makes riding safer and more enjoyable. Overall dimensions should be manageable. Measure your storage space before buying. Ensure the scooter fits in your apartment or office. Compact dimensions are important for urban living. Space constraints affect scooter choice. Wheel size affects ride quality. Larger wheels handle bumps better. Smaller wheels are lighter. Eight-inch wheels are a good compromise. Wheel size affects comfort and performance. Choose based on your riding terrain. Specification Women’s Preference Why It Matters Weight Under 12 kg Easy to carry Folded Size Compact, backpack-friendly Storage convenience Handlebar Height Waist level, adjustable Comfort and control Deck Width Wide, stable platform Balance and confidence Dimensions Fits in apartments/offices Storage feasibility Wheel Size 8-10 inches Comfort and performance 3. Which Safety Features Matter Most for Women? Safety is paramount for women riders. Specific features provide confidence and protection. Dual-brake systems are essential. Electronic and mechanical brakes provide redundancy. If one system fails, the other works. Dual brakes stop you quickly and reliably. Single-brake systems are less safe. Always choose dual brakes for safety. Bright LED lights are critical. Front lights illuminate your path. Rear lights make you visible to others. Bright lights prevent accidents. Women riders appreciate visibility. Good lighting improves safety significantly. Reflectors add extra visibility. Reflective materials catch light from vehicles. Reflectors work when lights are off. Multiple reflectors improve visibility. Reflectors are inexpensive and effective. The best part? Reflectors provide passive safety. Stable frame design prevents tipping. A low center of gravity improves stability. Wide wheelbase prevents tipping. Stable design builds confidence. Women appreciate stable scooters. Stability matters for safety. Non-slip deck surface prevents slipping. Textured surfaces grip your feet. Smooth decks are slippery. Non-slip surfaces improve control. Slipping causes accidents. Grip is essential for safety. Responsive brakes provide control. Brakes should stop you quickly. Responsive brakes prevent accidents. Poor brakes are dangerous. Test braking before buying. Responsive brakes are non-negotiable. Safety Feature Importance What to Look For Dual Brakes Critical Electronic and mechanical LED Lights Critical Bright front and rear Reflectors Important Multiple reflective areas Stable Frame Important Low center of gravity Non-slip Deck Important Textured surface Responsive Brake Critical Quick, reliable stopping 4. What Comfort Features Improve Riding Experience? Comfort features make riding enjoyable. Women appreciate features that reduce fatigue. Ergonomic grips reduce hand fatigue. Contoured grips fit your hands naturally. Padded grips absorb vibration. Quality grips are comfortable for hours. Poor grips

Which Electric Scooter Suits Women? Comfort, Weight & Safety Checklist Read More »

Why Is My Scooter Making Noise? Key Features Checklist (2026)

A rattling noise from your electric scooter is annoying and concerning. You wonder if something is broken or if it’s a minor issue. Ignoring strange noises can lead to bigger problems and safety hazards. Understanding what causes rattling helps you fix it quickly. This guide identifies common sources of scooter noise and provides solutions. You’ll learn how to diagnose the problem and determine if professional help is needed. Most rattling issues are simple to fix yourself with basic tools and knowledge. Electric scooter rattling typically comes from loose components, worn parts, or improper assembly. Dynamic Scooter models are built with quality materials that resist rattling when properly maintained. Common causes include loose bolts, worn bearings, and damaged decks. Most issues are preventable through regular maintenance and inspection. Ready to silence that annoying noise? Here’s the deal… 1. What Are the Most Common Causes of Scooter Rattling? Rattling noises have specific causes. Identifying the source helps you fix it effectively. Most rattling comes from loose or worn components. Loose bolts and fasteners are the most common culprit. Vibration from riding gradually loosens bolts over time. Bolts securing the deck, handlebars, and wheels can loosen. Regular tightening prevents most rattling. Check all bolts monthly. A simple wrench tightens loose bolts in minutes. This is important because loose bolts can worsen and cause component failure. Worn wheel bearings create a grinding or rattling sound. Bearings allow wheels to spin smoothly. When worn, they create noise and friction. Bearing replacement is necessary when worn. Quality bearings last years with proper care. Poor maintenance accelerates bearing wear. Deck damage causes rattling when the deck flexes. Cracks or splits in the deck rattle during riding. Impact damage can crack the deck. Deck replacement is necessary for safety. Avoid impacts and ride carefully to prevent deck damage. Loose cable connections rattle and buzz. Cables connecting the battery and motor can loosen. Loose connections create electrical noise. Check connections regularly. Tighten any loose cables. Proper connections prevent noise and electrical issues. Worn suspension components create rattling. If your scooter has suspension, worn parts rattle. Suspension maintenance is important. Replace worn suspension components promptly. Quality suspension lasts years with care. Motor issues sometimes cause rattling. Worn motor bearings create grinding sounds. Motor problems require professional repair. If rattling comes from the motor, seek professional help. Motor issues are serious and need expert attention. Cause Sound Type Severity Fix Difficulty Loose Bolts Rattling Low Easy Worn Bearings Grinding/Rattling Medium Moderate Deck Damage Rattling/Creaking Medium Moderate Loose Cables Buzzing/Rattling Low Easy Worn Suspension Rattling/Clunking Medium Moderate Motor Issues Grinding/Whining High Hard 2. How Do You Locate the Source of Rattling? Finding where the noise comes from is the first step. Once you identify the source, fixing it becomes straightforward. Listen carefully to the noise. Does it come from the front, back, or middle? Does it occur when accelerating, braking, or hitting bumps? Different sources create different sounds. Pay attention to when the noise happens. This information narrows down the cause. Inspect the deck visually. Look for cracks, splits, or damage. Run your hand over the surface. Feel for rough spots or gaps. Deck damage is usually visible. A damaged deck needs replacement. Check all visible bolts and fasteners. Grab each bolt and try to turn it. Loose bolts turn easily. Tight bolts don’t move. Mark any loose bolts. Tighten them with appropriate tools. Here’s why it matters… Loose bolts are the easiest fix. Test the wheels by spinning them. Spin each wheel by hand. Listen for grinding or roughness. Smooth spinning indicates good bearings. Grinding or resistance indicates bearing wear. Worn bearings need replacement. Shake the handlebars gently. Feel for movement or looseness. Loose handlebars rattle. Tight handlebars don’t move. Tighten any loose connections. Handlebar tightness affects control and safety. Inspect cable connections. Look for loose wires or disconnected cables. Loose connections are visible. Tighten any loose connections. Proper connections prevent electrical noise and issues. Inspection Step What to Look For Indicates Problem If Listen Noise location and timing Specific source Deck Cracks, splits, damage Visible damage Bolts Loose fasteners Turn easily Wheels Grinding or resistance Not smooth spinning Handlebars Movement or looseness Moves when shaken Cables Loose or disconnected Visible looseness 3. What Tools Do You Need for Scooter Maintenance? Having the right tools makes maintenance easier. Most scooter maintenance requires basic tools. Wrenches are essential for tightening bolts. A set of metric wrenches covers most scooters. Adjustable wrenches work if you don’t have a set. Quality wrenches last for years. Cheap wrenches slip and damage bolts. Invest in good tools. Screwdrivers are needed for various fasteners. Phillips and flathead screwdrivers are most common. A multi-bit screwdriver saves space. Quality screwdrivers don’t strip screws. Poor quality screwdrivers damage fasteners. Hex keys are common on scooters. A set of metric hex keys covers most needs. Hex keys are inexpensive and essential. Keep them organized for easy access. The best part? Hex keys are affordable and durable. Lubricants reduce friction and noise. Silicone spray lubricates moving parts. WD-40 prevents rust. Grease lubricates bearings. Use appropriate lubricants for each application. Over-lubrication attracts dirt. Cleaning supplies keep your scooter maintained. Brushes remove dirt and debris. Cloths dry and polish. Compressed air blows out dust. Regular cleaning prevents problems. Replacement parts are sometimes needed. Spare bolts, cables, and bearings are useful. Keep common replacement parts on hand. This lets you fix problems immediately. Tool Type Purpose Cost Range Wrenches Tighten bolts and fasteners $10-30 Screwdrivers Adjust screws $5-15 Hex Keys Tighten hex bolts $5-10 Lubricants Reduce friction and noise $5-15 Cleaning Supplies Maintain cleanliness $10-20 Replacement Parts Fix worn components $20-50 4. How Do You Tighten Loose Bolts Properly? Tightening bolts correctly prevents damage and ensures proper function. Follow proper technique for best results. Identify all bolts on your scooter. The deck has multiple bolts. The handlebars have bolts. The wheels have bolts. The motor has bolts. Check all visible bolts regularly. A monthly check prevents most problems. Use the correct tool size. A

Why Is My Scooter Making Noise? Key Features Checklist (2026) Read More »

What Makes a Good Electric Scooter? A Quick Buyer’s Checklist

Choosing the right electric scooter is confusing with so many options available. Poor choices lead to frustration, wasted money, and unused equipment. You need clear guidance on what separates quality scooters from mediocre ones. This guide explains the essential features that define a good scooter. You’ll learn what to look for in performance, safety, durability, and value. Understanding these factors helps you make an informed purchase that you’ll enjoy for years. By the end, you’ll know exactly what makes a scooter worth buying. A good electric scooter combines reliable performance, safety features, and durability at a fair price. Dynamic Scooter models exemplify quality with balanced speed, adequate range, and robust construction. The best scooters prioritize rider safety while delivering consistent performance. Value matters more than flashy features. Ready to find your perfect scooter? Here’s the deal… 1. What Performance Metrics Define a Quality Scooter? Performance metrics tell you how well a scooter actually works. Understanding these numbers helps you compare models objectively. Don’t just look at specs; understand what they mean for real-world use. Top speed matters for urban commuting. Most good scooters reach 20-25 kph. This speed is fast enough for city travel but safe for pedestrian areas. Faster isn’t always better. Speeds above 30 kph are unnecessary for most riders and create safety risks. The Dynamic Scooter Model B reaches 25 kph, perfect for urban commuting. This is important because speed directly affects how quickly you reach your destination. Range determines how far you can travel on one charge. A good scooter covers at least 15-20 km per charge. This distance covers most daily commutes without needing midday charging. Longer range is nice but comes with heavier batteries. The Dynamic Scooter offers 20 km range, sufficient for typical commutes. Real-world range is often less than advertised, so choose a scooter with more range than you think you need. Motor power affects hill climbing and acceleration. A 250-500W motor handles most urban terrain. Larger motors provide better performance but consume more battery. Smaller motors struggle on hills. A quality scooter has adequate motor power for your terrain. Test the scooter on hills before buying if possible. Acceleration speed matters for traffic safety. Good scooters accelerate smoothly and quickly. Poor acceleration makes merging into traffic dangerous. Quick acceleration gets you moving when you need to. Responsive acceleration improves your overall riding experience. Braking performance is critical for safety. Good scooters have responsive, reliable brakes. Brakes should stop you quickly without skidding. Test braking before purchasing. Dual-brake systems are superior to single brakes. The best part? Quality brakes give you confidence in any situation. Performance Metric Good Range Why It Matters Top Speed 20-25 kph Safe for urban areas Range 15-25 km Covers daily commutes Motor Power 250-500W Handles hills and acceleration Acceleration Smooth, quick Safe traffic merging Braking Responsive Reliable stopping power 2. How Important Is Build Quality and Materials? Build quality determines how long your scooter lasts. Good materials and construction mean years of reliable use. Poor quality leads to breakdowns and frustration. Frame material is fundamental. Aluminum alloy is the best choice for most riders. It’s light, strong, and durable. Steel frames are heavier and rust-prone. Plastic components reduce weight but sacrifice durability. Quality aluminum frames last for years. The Dynamic Scooter uses aluminum alloy for optimal performance. Welds and joints should be clean and solid. Inspect the frame carefully before buying. Poor welds indicate rushed manufacturing. Solid welds show quality craftsmanship. Check that joints are tight with no movement. A well-constructed frame feels solid and secure. Tire quality significantly affects your experience. Air-filled tires provide comfort but need maintenance. Solid tires are maintenance-free but less comfortable. Good tires have adequate tread for traction. Tire quality affects safety and comfort. Quality tires last longer and perform better. Bearing quality affects smoothness and longevity. Quality bearings allow smooth rolling. Poor bearings create friction and noise. You’ll feel the difference when riding. Quality bearings reduce maintenance needs. They’re worth the investment. Cable and connector quality matters for reliability. Poor cables fray and break. Quality cables last for years. Good connectors don’t corrode or loosen. These small details affect overall reliability. Here’s why it matters… Quality components prevent frustrating breakdowns. Waterproofing protects against weather. Good scooters have sealed electronics. This prevents water damage and electrical issues. An IP54 rating indicates good water resistance. Waterproofing extends your scooter’s lifespan. It lets you ride in various weather conditions. Component Quality Indicator Impact on Longevity Frame Aluminum alloy, solid welds 5+ years Tires Good tread, proper inflation 2-3 years Bearings Smooth rolling, no noise 3-5 years Cables No fraying, secure connections 5+ years Connectors No corrosion, tight fit 5+ years Waterproofing IP54 or higher rating Extended lifespan 3. What Safety Features Are Essential? Safety should never be compromised. Good scooters include multiple safety features. These features protect you from injury and accidents. Dual-brake systems are the gold standard. Combining electronic and mechanical brakes provides redundancy. If one system fails, the other still works. Dual brakes stop you quickly and reliably. Single-brake systems are less safe. Always choose dual brakes for safety. Lighting is essential for visibility. Front and rear lights help you see and be seen. LED lights are standard on quality scooters. Bright lights improve safety in low light. Reflectors add extra visibility. Good lighting prevents accidents. Grip design prevents slipping. Non-slip grips keep your hands secure. Ergonomic grips reduce hand fatigue. Quality grips are made from durable materials. Good grips improve control and safety. Deck design affects stability. A wide, flat deck provides better balance. Textured surfaces prevent slipping. Good deck design makes riding easier and safer. Poor deck design creates instability. Fender design protects from spray. Good fenders keep water and mud off you. They also protect the wheels. Quality fenders are durable and effective. Headlight brightness matters for night riding. Bright lights illuminate your path. They also make you visible to others. Quality headlights are bright and reliable. The best part? Good lighting lets you ride safely at night.

What Makes a Good Electric Scooter? A Quick Buyer’s Checklist Read More »

What to Look for in an Electric Mountain Bike? Buyer’s Checklist (2026)

Ready to buy an electric mountain bike but overwhelmed by the options? Choosing the right motor, battery, and components can feel like a complex puzzle. If you pick the wrong specs, you could end up with a bike that can’t handle your favorite trails or leaves you stranded with a dead battery. This guide breaks down everything you need to know to select the perfect e-MTB for your adventures. When looking for an electric mountain bike, focus on a powerful mid-drive motor (at least 650W), a high-capacity battery (500Wh or more), and a durable full-suspension frame. Key components like hydraulic disc brakes and a reliable drivetrain from brands like Shimano are essential for safety and performance. Pay attention to tire size, warranty, and waterproof ratings to ensure your bike is ready for any trail. Let’s dive into the details to help you make a confident choice. 1. What Motor Power Do You Need for Trail Riding? The motor is the heart of any electric mountain bike, providing the power you need to conquer steep climbs and ride farther. Understanding motor specifications is crucial to choosing a bike that matches your riding style and the terrain you plan to tackle. Don’t get bogged down in technical jargon; focus on what really matters for performance on the trail. Motor power is measured in watts (W), and torque is measured in Newton-meters (Nm). For serious trail riding, you’ll want a motor with at least 500W of continuous power and 80 Nm of torque. Here’s the key… a powerful motor makes a huge difference on steep inclines. A bike like the Dynamic Bike Electric Mountain Bike Q5 features a 650W high-speed brushless motor that peaks at 1000W, giving you the confidence to tackle 25-degree climbs without hesitation. There are two main types of motors: mid-drive and hub-drive. Mid-drive motors are located at the bike’s crankset, providing a lower center of gravity and a more natural pedaling feel. They are ideal for mountain biking because they leverage the bike’s gears for optimal efficiency. Hub-drive motors are located in the wheel hub and are generally less expensive but can feel less balanced on technical terrain. Pay attention to motor brands and their reputation for reliability. Brands like Bosch, Shimano, and Brose are well-regarded in the industry. A reliable motor ensures you won’t be left without power in the middle of a ride. Look for a bike with a proven motor system to guarantee long-term performance and support. Motor Spec Minimum for Trail Riding Recommended for Performance Continuous Power 250W 650W+ Peak Power 500W 1000W+ Torque 60 Nm 85 Nm+ Motor Type Mid-Drive Mid-Drive 2. How Important Is Battery Capacity and Range? Your e-MTB’s battery determines how far you can ride on a single charge, so it’s one of the most critical components to consider. Battery capacity is measured in watt-hours (Wh), and a larger number means more range. Don’t let “range anxiety” ruin your ride; choosing the right battery will give you the freedom to explore without constantly checking your power levels. For most trail riders, a battery with at least 500Wh is a good starting point. This should provide enough range for a few hours of riding. But here’s the catch… if you plan on all-day epic adventures, you’ll want a larger battery. The Dynamic Bike Q5 comes with a 48V 13Ah battery, which equates to approximately 600Wh. This provides an impressive pedal-assist range of up to 90–100 km, ensuring you have plenty of power for long days on the trail. Consider whether you want a removable or integrated battery. Integrated batteries offer a sleek, clean look, but they can be difficult to charge if you don’t have a power outlet near your bike. Removable batteries, like the one on the Q5, can be unlocked and taken inside for convenient charging at home or the office. This is a huge plus for riders who live in apartments or want to top off their battery at work. Charging time and battery lifespan are also important. Most e-MTB batteries take 4–6 hours to fully charge. Look for a battery with a smart management system that protects against overcharging and overheating. A quality battery should last for 500–1,000 charge cycles, which translates to several years of regular use. Be sure to check the replacement cost, as this will be a long-term expense. Battery Capacity (Wh) Estimated PAS Range Ideal Use Case 400Wh 30–60 km Short, casual rides 500Wh 40–80 km Standard trail riding 600Wh+ 60–100 km+ All-day epic adventures 3. What Frame Material and Geometry Work Best? The frame is the backbone of your electric mountain bike, influencing its handling, durability, and overall ride quality. The material and geometry of the frame are engineered to provide a specific feel on the trail. Understanding these characteristics will help you choose a bike that is stable, responsive, and comfortable for your riding style. E-MTB frames are typically made from aluminum or carbon fiber. Aluminum frames are durable, reliable, and more affordable, making them a popular choice for many riders. Carbon fiber frames are lighter and offer better vibration damping, but they come at a premium price. The real secret is… a well-designed aluminum frame can often outperform a poorly designed carbon one. The Dynamic Bike Q5 features a robust aluminum-alloy frame with a unique bionic “pangolin” design that provides excellent strength and a max load capacity of 100 kg. Frame geometry plays a huge role in how a bike handles. Look for a bike with a slack head tube angle (around 65 degrees) and a long wheelbase. This combination provides stability at high speeds and on steep descents. A steep seat tube angle (around 75 degrees) puts you in an efficient pedaling position for climbing. The right geometry inspires confidence and makes the bike feel more capable on challenging terrain. Proper fit is essential for comfort and control. E-MTBs come in different sizes, so be sure to choose one that matches your height and inseam. A bike that is

What to Look for in an Electric Mountain Bike? Buyer’s Checklist (2026) Read More »

Can You Deliver with an Electric Scooter? Pros, Cons & What You’ll Need

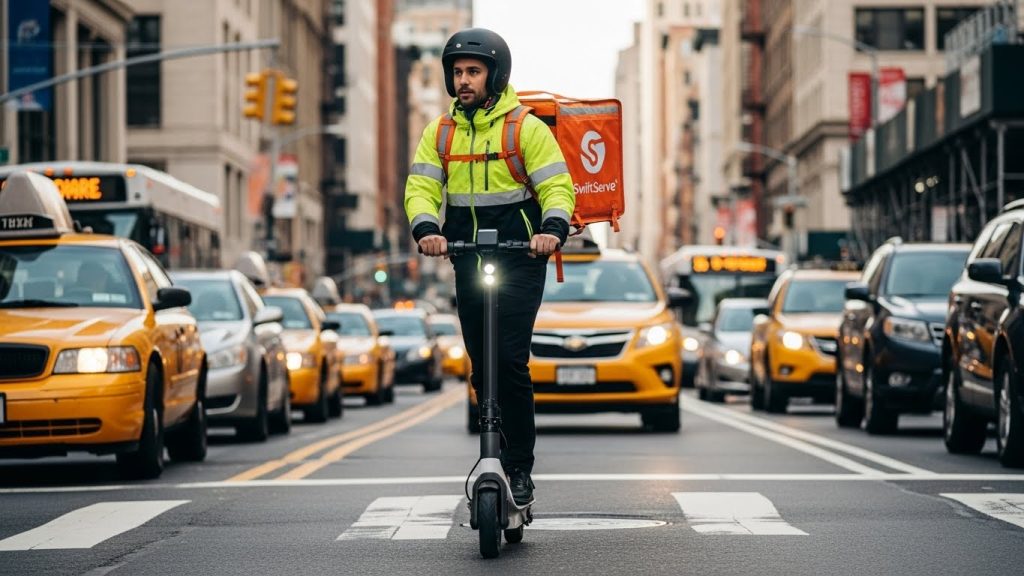
Looking for a flexible way to earn money while staying active? Delivery work offers excellent income potential, but you need reliable transportation. Many people wonder if electric scooters work for delivery services like DoorDash. The answer is yes, and it’s becoming increasingly popular. Electric scooters offer speed, efficiency, and low operating costs for delivery work. This guide explains how to use a scooter for delivery, what requirements you need to meet, and how to maximize earnings. You’ll learn the practical considerations, income potential, and best practices for scooter-based delivery work. Electric scooters are excellent for delivery work, offering speed and affordability that rival bicycles and beat cars. Dynamic Scooter models provide reliable performance for delivery drivers seeking efficient transportation. With proper planning, scooter deliveries generate strong income while keeping costs minimal. Most delivery platforms accept scooters as valid delivery vehicles. Ready to start your delivery business? Here’s the deal… 1. Can You Actually Use an Electric Scooter for DoorDash? Yes, you can absolutely use an electric scooter for DoorDash deliveries. DoorDash accepts multiple vehicle types including scooters, bikes, and cars. The platform doesn’t require a specific vehicle type. You just need reliable transportation that gets you to restaurants and customers on time. Electric scooters meet these requirements perfectly. Many successful DoorDash drivers use scooters as their primary vehicle. DoorDash’s requirements are straightforward. You need to be at least 18 years old and have a valid ID. You need a smartphone to access the DoorDash app. You need reliable transportation, which includes electric scooters. You need to pass a background check. You need a valid phone number and email. These requirements are the same regardless of vehicle type. This is important because scooters meet all these requirements without additional hassles. The platform doesn’t discriminate against scooters. You’ll receive the same delivery offers as car or bike drivers. Your acceptance rate and ratings determine your success, not your vehicle type. A reliable scooter driver gets consistent work. The key is completing deliveries quickly and maintaining high customer satisfaction. Insurance considerations are important. DoorDash doesn’t provide vehicle insurance. You’re responsible for your own coverage. Some homeowner’s or renter’s insurance policies cover scooters. Specialized scooter insurance is available. Delivery-specific insurance also exists. Check your coverage before starting deliveries. The best part? Insurance costs are minimal compared to car insurance. Earnings potential is strong with scooters. You keep most of your delivery fees. Operating costs are low because electricity is cheap. No gas, no parking fees, no expensive maintenance. Your profit margin is higher than car drivers. Many scooter drivers earn $15-25 per hour after expenses. Legal considerations vary by location. Some cities restrict scooter use on sidewalks. Check local laws before starting. Most cities allow scooters on bike lanes and streets. Delivery work doesn’t change these regulations. Follow local laws and you’re good to go. Requirement Car Drivers Bike Drivers Scooter Drivers Age 18+ 18+ 18+ Valid ID Required Required Required Smartphone Required Required Required Background Check Required Required Required Insurance Recommended Optional Optional Vehicle Type Car Bike Scooter 2. What Are the Advantages of Scooter Delivery Work? Electric scooters offer unique advantages for delivery drivers. Understanding these benefits helps you see why scooters are excellent for this work. Speed is a major advantage. Scooters travel faster than bicycles, typically 15-25 mph. This speed lets you complete more deliveries per hour. More deliveries mean higher hourly earnings. In urban areas, scooters often beat cars because they avoid traffic. You can navigate through congested streets easily. Here’s why it matters… Speed directly translates to more money in your pocket. Operating costs are incredibly low. Electricity costs just pennies per charge. No gas purchases, no oil changes, no expensive repairs. A scooter’s maintenance is minimal. Tires might need replacement eventually, but this is inexpensive. Your profit margin is significantly higher than car drivers. After expenses, scooter drivers keep more of their earnings. Parking is effortless. Scooters are small and portable. You can park almost anywhere without paying. No parking meters, no parking lots, no parking tickets. This saves time and money. You spend more time delivering and less time searching for parking. Car drivers waste significant time and money on parking. Physical activity keeps you healthy. Scooter delivery work is more active than sitting in a car. You’re moving, balancing, and engaging your core. This activity burns calories and improves fitness. Many delivery drivers appreciate the health benefits. You earn money while staying active. Flexibility is excellent. You set your own schedule. Work as much or as little as you want. Start and stop whenever you choose. This flexibility is perfect for students, side hustlers, or full-time workers. No boss, no fixed hours, just pure flexibility. Environmental benefits feel good. You’re not burning gas or creating emissions. Electric scooters are eco-friendly transportation. Many customers appreciate environmentally conscious delivery drivers. This can lead to better ratings and tips. Advantage Scooter Bike Car Speed High Medium High Operating Cost Very Low Very Low High Parking Easy Easy Hard Physical Activity Medium High None Flexibility High High High Environmental Excellent Excellent Poor 3. What Challenges Do Scooter Delivery Drivers Face? While scooters are excellent for delivery, they come with challenges. Understanding these obstacles helps you prepare and succeed. Weather is a significant challenge. Rain reduces traction and visibility. Snow and ice make scooters dangerous. Extreme heat affects battery performance. Cold weather reduces range. You might not be able to work during bad weather. This limits your earning potential on rainy or snowy days. The best part? You can plan around weather and work on good days. Battery range limitations affect delivery coverage. Most scooters travel 15-25 miles per charge. In a busy area, this is sufficient. In sprawling cities, range might be limiting. You need to plan routes carefully. Charging during your shift might be necessary. The Dynamic Scooter Model B offers 20 km range, which covers most urban delivery zones. Load capacity is a consideration. Scooters have weight limits, typically 220 lbs including the rider. Large or

Can You Deliver with an Electric Scooter? Pros, Cons & What You’ll Need Read More »

How to Secure Your Electric Scooter? Locks, GPS & Best Practices

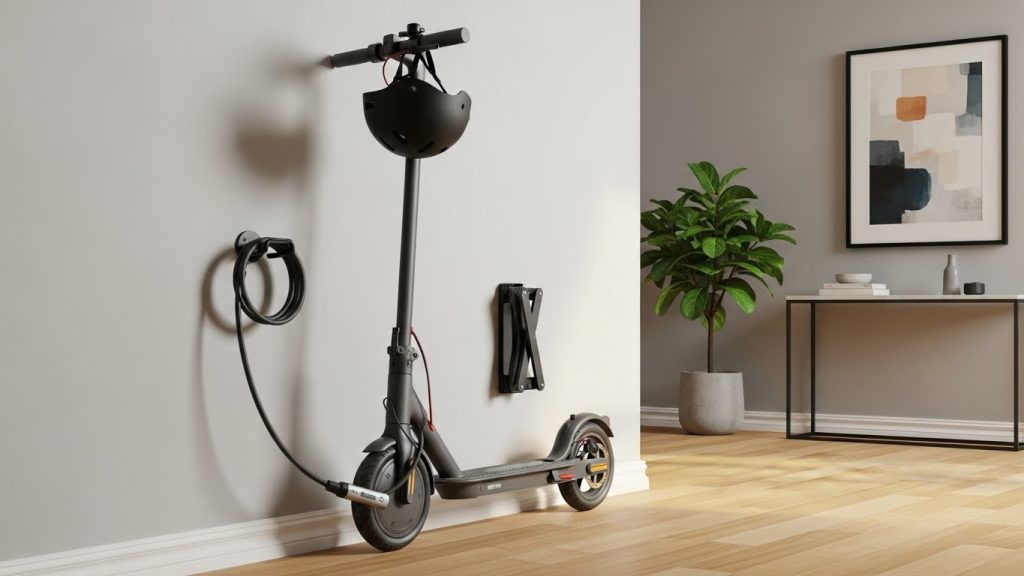
Leaving your electric scooter unattended is risky, and theft is a real concern in urban areas. A stolen scooter means losing your investment and your convenient transportation method. Securing your scooter properly protects your valuable asset and gives you peace of mind. This guide covers the best security practices, lock options, and strategies to prevent theft. You’ll learn how to choose the right locks, where to secure your scooter, and what additional measures keep it safe. By following these recommendations, you can confidently leave your scooter anywhere without worry. Protecting your electric scooter requires multiple security layers, including quality locks, smart storage, and theft prevention tactics. Dynamic Scooter owners benefit from durable construction that resists tampering. Combining a U-lock with a cable lock, parking in visible locations, and using GPS tracking creates comprehensive protection against theft. Ready to learn the best security strategies? Here’s the deal… 1. Why Is Scooter Security So Important? Scooter theft is a growing problem in cities worldwide. Thieves target scooters because they’re portable, valuable, and often left unattended. A stolen scooter costs money to replace and disrupts your transportation routine. Understanding the theft problem helps you take security seriously and implement proper protections. Scooters are attractive theft targets for several reasons. They’re small and light, making them easy to carry away. They have high resale value, especially quality models. Many owners leave scooters unattended in public places. Thieves can quickly remove a scooter and disappear. This is important because recognizing these vulnerabilities helps you protect against them. The financial impact of theft is significant. A quality scooter costs $300-500 or more. Replacing a stolen scooter means spending that money again. If you have multiple scooters or operate a scooter business, theft losses multiply quickly. Insurance might cover theft, but deductibles and claim processes are inconvenient. Beyond financial loss, theft disrupts your life. Losing your scooter means losing your primary transportation method. You might miss appointments or fall back on expensive alternatives like taxis or ride-sharing. The inconvenience extends beyond just the money. Theft also affects your sense of security. Knowing your scooter might be stolen creates anxiety. You might avoid leaving it anywhere, limiting the scooter’s usefulness. Proper security eliminates this worry and lets you use your scooter confidently. Community impact matters too. High theft rates discourage scooter adoption. When people see scooters being stolen, they’re less likely to buy one. Reducing theft helps the entire scooter community thrive. The best part? Securing your scooter contributes to a safer environment for everyone. Theft Risk Factor Impact Level Prevention Method Portability High Use heavy-duty locks High Resale Value High Register and mark your scooter Public Parking High Park in visible, busy areas Quick Theft Time High Use multiple locks Low Detection Medium Use GPS tracking 2. What Are the Best Lock Types for Electric Scooters? Choosing the right lock is fundamental to scooter security. Different lock types offer varying levels of protection. Understanding each type helps you select the best option for your situation. U-locks are the gold standard for scooter security. They’re made from hardened steel and resist cutting and prying. A quality U-lock can withstand bolt cutters and angle grinders. They’re heavy and durable, designed to last years. U-locks typically cost $30-80 depending on quality. A good U-lock is your most important security investment. Here’s why it matters… A U-lock alone deters most casual thieves who want quick, easy targets. Cable locks are lighter and more flexible than U-locks. They wrap around your scooter and a fixed object. Cable locks are easy to carry and use. However, they’re less secure than U-locks because bolt cutters can cut through them relatively easily. Cable locks work best combined with U-locks for layered security. They cost $10-30 and are good supplementary protection. Chain locks offer moderate security. Heavy-duty chains with padlocks resist cutting better than cables. They’re flexible and work well for securing multiple scooters together. Chain locks are heavier than cables but lighter than U-locks. They cost $20-50 and provide solid secondary protection. Folding locks are portable U-locks made from connected segments. They’re lighter than traditional U-locks and easier to carry. Folding locks offer similar security to U-locks when locked properly. They cost $40-100 and are excellent for commuters who value portability. Smart locks with alarms add a technology layer. Some locks emit loud alarms when someone tries to cut them. Others connect to your phone and alert you of tampering. Smart locks cost $50-150 but provide peace of mind and additional deterrence. Combination locks are convenient but less secure. They’re vulnerable to shoulder surfing and brute force attacks. Keyed locks are more secure but require carrying keys. Avoid combination locks for primary security; use them only for secondary protection. Lock Type Security Level Weight Cost Best Use U-Lock Excellent Heavy $30-80 Primary lock Cable Lock Fair Light $10-30 Secondary lock Chain Lock Good Medium $20-50 Secondary lock Folding Lock Excellent Medium $40-100 Primary lock, portable Smart Lock Excellent Medium $50-150 Primary lock, tech-savvy 3. How Should You Lock Your Scooter to a Fixed Object? Proper locking technique is as important as the lock itself. A quality lock used incorrectly provides little protection. Learning the right technique ensures your scooter stays secure. Always lock your scooter to a fixed, immovable object. Good options include bike racks, metal railings, poles, and sturdy fences. The object must be impossible to lift or remove. Avoid locking to objects that can be cut or broken. Check that the object is actually fixed before locking your scooter to it. Lock through the frame and wheel, not just the wheel. Many thieves simply lift the scooter and leave the wheel behind. Locking through the frame prevents this. Pass the lock through the frame triangle and around a wheel if possible. This makes the scooter impossible to carry away. Use a U-lock as your primary lock. Thread it through the frame and around the fixed object. Make sure the lock is tight with minimal space. Thieves use this space to insert tools.

How to Secure Your Electric Scooter? Locks, GPS & Best Practices Read More »

How Much Does Electric Scooter Charging Cost? Real Cost Breakdown & Savings Tips

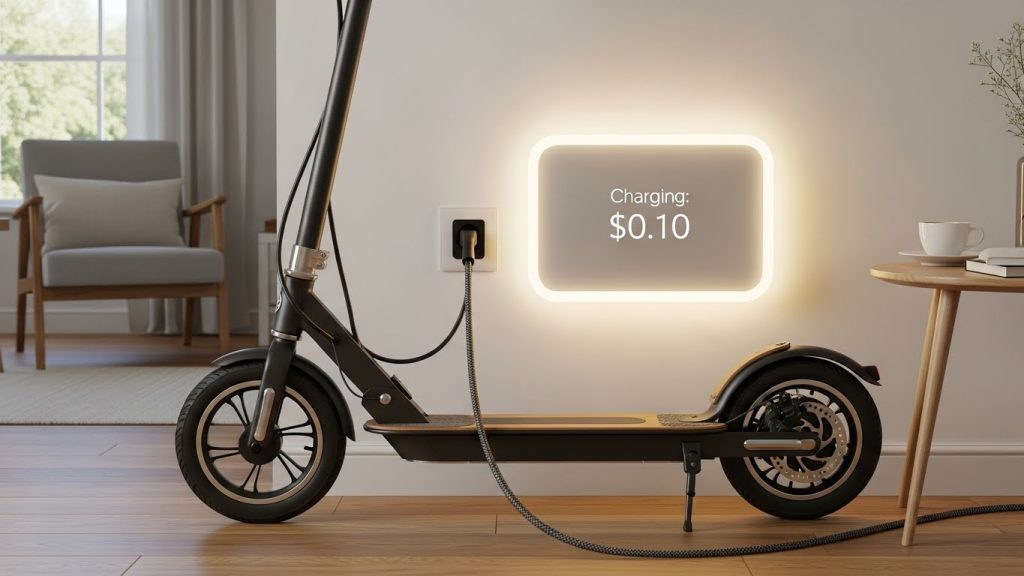
Worried that charging an electric scooter will drain your wallet? Many people assume electric scooters are expensive to operate, but the reality is far different. Charging costs are remarkably low compared to other transportation methods. Understanding the actual expenses helps you make an informed decision about switching to a scooter. This guide breaks down charging costs, explains the factors that affect them, and shows you how to minimize expenses. You’ll discover that electric scooters are one of the most affordable ways to commute in any city. Electric scooter charging costs just pennies per charge, making them incredibly economical. Dynamic Scooter models use efficient lithium-ion batteries that charge quickly and cost very little to operate. Most riders spend between $2 and $5 monthly on electricity. This is significantly less than gas, public transit, or car ownership. Ready to learn how cheap scooter charging really is? Here’s the deal… 1. What Is the Basic Cost to Charge an Electric Scooter? The basic cost of charging an electric scooter is surprisingly low. Most scooters cost between $0.10 and $0.50 per full charge. This depends on your local electricity rates and the scooter’s battery capacity. To calculate your specific cost, multiply your local electricity rate per kilowatt-hour by the scooter’s battery capacity in kilowatt-hours. The math is simple and the result is always affordable. Let’s look at a concrete example. The Dynamic Scooter Model B has a battery capacity of approximately 0.36 kWh. If your electricity costs $0.12 per kWh, a full charge costs just $0.04. Even in expensive areas where electricity costs $0.20 per kWh, a full charge costs only $0.07. These are minimal expenses that barely register on your monthly utility bill. This is important because understanding these numbers shows you how economical scooter ownership truly is. Different scooter models have different battery capacities, which affects charging costs. Smaller scooters with 0.2 kWh batteries cost about $0.02 to $0.04 per charge. Larger scooters with 0.5 kWh batteries cost around $0.06 to $0.10 per charge. The Dynamic Scooter falls in the middle range, offering excellent value. Even the most expensive scooters to charge cost less than a cup of coffee per full charge. Regional electricity rates vary significantly across the country. California has some of the highest rates at around $0.18 per kWh. Louisiana has some of the lowest at around $0.09 per kWh. Most states fall between $0.11 and $0.15 per kWh. Regardless of your location, scooter charging remains incredibly affordable. Even in high-cost areas, monthly charging expenses are minimal. Time of day affects charging costs in some areas. Some utility companies offer lower rates during off-peak hours, typically late evening or early morning. Charging your scooter during these times can reduce costs by 20-30%. If your utility offers time-of-use rates, charging overnight is your best strategy. This simple habit can save a few dollars annually. Scooter Type Battery Capacity Cost at $0.12/kWh Cost at $0.18/kWh Cost at $0.20/kWh Small Scooter 0.2 kWh $0.024 $0.036 $0.040 Dynamic Scooter Model B 0.36 kWh $0.043 $0.065 $0.072 Medium Scooter 0.4 kWh $0.048 $0.072 $0.080 Large Scooter 0.5 kWh $0.060 $0.090 $0.100 2. How Do Daily Charging Costs Compare to Other Transportation? Comparing scooter charging costs to other transportation methods reveals the true value. Most people spend far more on cars, public transit, or ride-sharing services. Understanding these comparisons helps you appreciate how affordable scooters really are. A car costs significantly more to operate. Gasoline alone costs $3-5 per gallon, and most cars use one gallon every 20-30 miles. A typical 10-mile commute costs $0.50-1.50 in gas alone. Add insurance, maintenance, parking, and registration, and daily car costs easily exceed $15-20. Here’s why it matters… A scooter costs just $0.05-0.10 per charge, which covers 15-20 miles of riding. This is 100-200 times cheaper than driving. Public transit passes vary by city but typically cost $2-5 per day or $50-150 monthly. A scooter costs just $2-5 monthly to charge. Even if you ride every single day, your charging costs remain minimal. Over a year, public transit costs $600-1800 while scooter charging costs $24-60. The savings are substantial. Ride-sharing services like Uber or Lyft cost $5-15 per trip. A 3-mile trip typically costs $8-12. An electric scooter covers the same distance for just $0.02-0.05. Even occasional ride-sharing users spend more in a month than scooter owners spend on charging in a year. Bicycles seem cheap initially but require maintenance. Tires, chains, brakes, and repairs cost $50-100 annually. Electric scooters have similar maintenance costs but also require charging. However, the total cost remains far below cars or public transit. Motorcycles and mopeds require gasoline and maintenance. A moped gets better mileage than a car but still costs $0.20-0.40 per mile. A scooter costs just $0.003-0.005 per mile. Over 1000 miles annually, the difference is substantial. Transportation Type Daily Cost Monthly Cost Annual Cost Car $15-20 $300-400 $3600-4800 Public Transit $2-5 $50-150 $600-1800 Ride-sharing $8-15 $160-300 $1920-3600 Electric Scooter $0.05-0.10 $2-5 $24-60 Bicycle $0-0.20 $0-5 $50-100 3. What Factors Affect Electric Scooter Charging Costs? Several factors influence how much you pay to charge your scooter. Understanding these factors helps you minimize costs and maximize efficiency. Some factors are within your control, while others depend on your location or equipment. Battery capacity is the primary factor. Larger batteries hold more energy and cost more to charge. A 0.2 kWh battery costs half as much to charge as a 0.4 kWh battery. However, larger batteries provide longer range, which can reduce the number of charges needed. The Dynamic Scooter Model B balances capacity and cost effectively. Electricity rates vary by location and time. Urban areas often have higher rates than rural areas. Peak hours typically cost more than off-peak hours. Your utility company determines these rates, which you can find on your monthly bill. Charging during off-peak hours saves money if your utility offers time-of-use pricing. Charger efficiency affects costs indirectly. A high-quality charger converts electricity efficiently, wasting minimal energy as heat. Cheap chargers waste 10-20% of energy. Using a

How Much Does Electric Scooter Charging Cost? Real Cost Breakdown & Savings Tips Read More »

What’s Better: Gas or Electric Mountain Bike? Top Picks for 2026

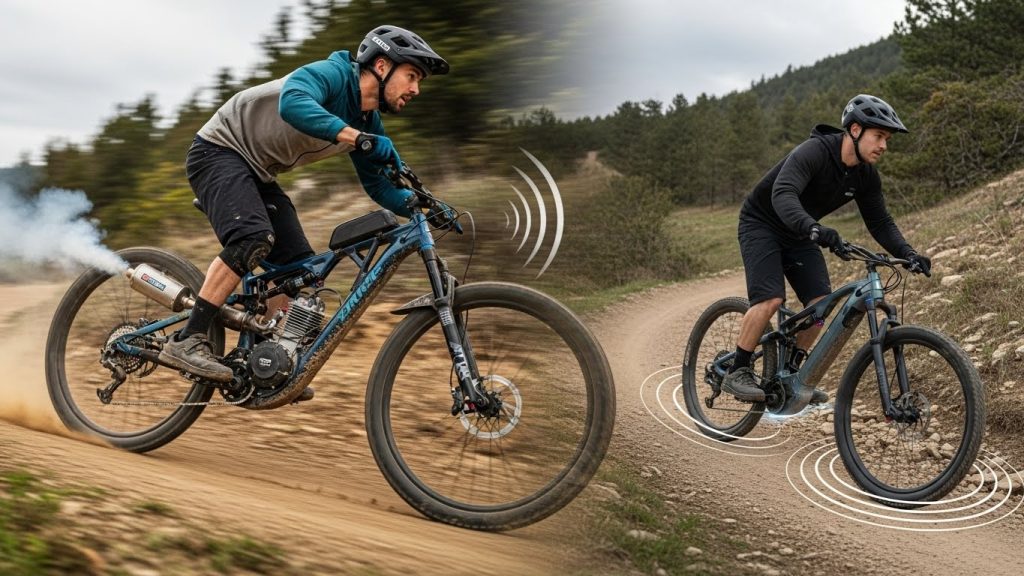
Choosing between a gas and an electric mountain bike is a tough decision. You want power for the trails, but you also care about noise, maintenance, and where you can ride. Making the wrong choice can lead to frustration and limit your adventures. This guide will help you understand the key differences so you can pick the perfect ride. The better choice between a gas and electric mountain bike depends on your priorities. Electric mountain bikes are quieter, more environmentally friendly, and require less maintenance, offering instant torque for climbing. Gas mountain bikes provide higher top speeds and longer range but are noisy, produce emissions, and have more complex maintenance needs. For most riders, especially those who value trail access and a natural riding feel, electric mountain bikes are the superior option. Ready to make a decision? Let’s break it down. 1. What Are the Main Differences Between Gas and Electric Mountain Bikes? The biggest difference is the power source. Gas mountain bikes use a small internal combustion engine that runs on gasoline. Electric mountain bikes, or e-MTBs, use a battery-powered motor that assists your pedaling. This fundamental difference affects everything from performance to maintenance. Gas engines are noisy and produce exhaust fumes. The constant vibration and smell of gasoline can detract from the outdoor experience. Electric motors, in contrast, are nearly silent and produce zero emissions. Here’s the deal… this makes electric bikes much more pleasant to ride. You can enjoy the sounds of nature, have conversations with friends, and ride without disturbing wildlife or other trail users. The lack of noise and fumes creates a more immersive and enjoyable experience in nature. Maintenance needs also vary greatly. Gas engines have many moving parts, like pistons and spark plugs. They require regular oil changes and tune-ups. Electric motors are much simpler. They have fewer moving parts and are virtually maintenance-free. This means less time in the garage and more time on the trail. Weight and its distribution are other key factors. Gas bikes tend to be top-heavy due to the engine and fuel tank, which can make them feel unwieldy in tight corners. Electric bikes have a battery and motor, but this weight is usually centered and low on the frame. This lower center of gravity leads to more balanced and stable handling. A well-balanced bike is easier to control on technical terrain and more confidence-inspiring for the rider. Feature Gas Mountain Bike Electric Mountain Bike Power Source Gasoline Engine Battery-Powered Motor Noise Level Loud Nearly Silent Emissions Yes No Maintenance High (oil, spark plugs) Low (battery, motor) 2. How Do Performance Levels Compare? Performance is where the debate between gas and electric gets interesting. Both types of bikes offer impressive power, but they deliver it in different ways. Gas bikes often have higher top speeds. They can be faster on open fire roads or flat terrain. However, they can be harder to control at low speeds. Electric bikes shine when it comes to torque and acceleration. The best part? The motor provides instant power as soon as you start pedaling. This makes it easier to get up to speed and conquer steep climbs. High-quality e-MTBs, like the Dynamic Bike Electric Mountain Bike Q5, feature powerful motors that can handle tough terrain. The Q5’s 48V/650W motor (peaking at 1000W) provides the torque needed for 25-degree climbs. Range is another important consideration. Gas bikes can typically go farther on a single tank of fuel. You can also carry extra fuel with you. Electric bikes are limited by their battery capacity. However, modern e-MTBs have impressive ranges. The Dynamic Bike Q5 offers up to 90-100 km with pedal-assist, which is more than enough for most trail rides. Power delivery is a key difference. Gas bikes often have a narrow powerband, meaning you need to keep the engine in a specific RPM range for optimal performance. This can result in a jerky, on-or-off power delivery that makes it hard to manage traction on loose or technical trails. Electric bikes offer smooth, proportional power across the entire speed range. The motor assists you based on how hard you pedal, creating a more natural and intuitive riding experience. This makes it easier to tackle tricky sections of trail with confidence. Performance Metric Gas Mountain Bike Electric Mountain Bike Top Speed Generally Higher Lower (regulated) Torque Good Excellent (Instant) Range Longer Shorter (but improving) Power Delivery Can be jerky Smooth and natural 3. What Are the Cost Considerations? Cost is a major factor for any big purchase. When comparing gas and electric mountain bikes, you need to look beyond the initial price tag. You should also consider the long-term costs of ownership. This includes fuel, maintenance, and repairs. Gas mountain bikes often have a lower initial purchase price. You can find entry-level models for less than a comparable electric bike. However, the savings can be quickly offset by ongoing costs. But here’s the thing… you have to constantly buy fuel and oil. You also need to budget for regular engine maintenance. Electric mountain bikes may have a higher upfront cost. However, their operating costs are significantly lower. Electricity is far cheaper than gasoline. A full charge for an e-bike battery costs just a few cents. Maintenance is also less expensive. With fewer moving parts in the motor, there is less that can go wrong. Brands like Dynamic Bike offer great value in this space. The Electric Mountain Bike Q5 is priced competitively at $1,399, making it an affordable entry into the world of high-performance e-MTBs without the high long-term costs of a gas bike. Long-term ownership costs tend to favor electric bikes. Over several years, the savings on fuel and maintenance can add up significantly. You won’t have to worry about expensive engine rebuilds or carburetor issues. The main long-term cost for an e-MTB is an eventual battery replacement, which is typically needed after 3-5 years. Cost Factor Gas Mountain Bike Electric Mountain Bike Initial Price Lower to Moderate Moderate to High Fuel/Energy Cost

What’s Better: Gas or Electric Mountain Bike? Top Picks for 2026 Read More »

Shopping Cart
Scroll to Top