...

October 20, 2026

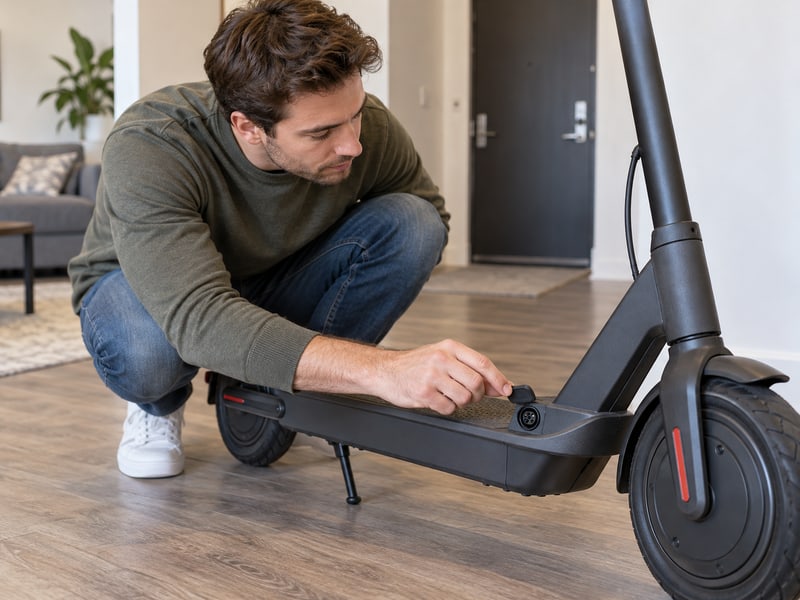
Adult owner inspecting an unplugged scooter charging port at home

Electric Scooter Battery Replacement Cost: What to Budget

Electric scooter battery replacement cost depends on your exact battery and the work required; the Model B replacement pack currently lists at US$99 before checkout charges. Reduced range on your commute can make replacing it seem urgent, especially when you depend on your scooter for work. Check the fault, confirm compatibility, and request a complete quote before buying a pack that might not solve your problem. 1. What does electric scooter battery replacement cost? Your starting price is the approved battery for your exact scooter, followed by any installation, delivery, tax, and disposal charges. Dynamic Scooter’s Model B 36V 5Ah replacement battery was listed at US$99 when checked on October 19, 2026. Use that figure only for the Model B pack and request a separate quote for another model. What can you budget before requesting a quote? Write down your scooter’s model, purchase date, and battery identification before comparing listings. A price without a confirmed part number gives you little basis for ordering. If installation is optional, ask for separate battery-only and installed totals so you can see what the service charge covers. Budget item What you know now Model B replacement pack Listed at US$99 on October 19, 2026 Shipping and tax Check for your destination Diagnosis and installation Request a model-specific quote Keep an order confirmation showing the final total; a screenshot of the product price cannot explain later service charges. 2. What should a complete replacement quote include? A complete quote should separate the battery, diagnosis, installation, delivery, taxes, and any required related work. Ask whether the shop credits its inspection fee toward an approved repair. A cheaper headline price can lose its advantage once the same services are included on both quotes. Which questions prevent an incomplete comparison? Ask the seller to identify the exact battery and describe the work included. For a fixed pack, that could involve opening and closing a compartment, inspecting its connections, and checking operation afterward. An owner-removable pack may need a different service arrangement, so avoid accepting a generic labor estimate without an explanation. Quote line Ask the provider Diagnostic fee Payable even if you decline repair? Labor Fixed charge or estimate? Extra parts Approval required before purchase? Request a spending limit for unapproved work. As a result, the shop has clear instructions if it finds another fault after opening the scooter, and you have time to decide whether the revised repair still makes financial sense. 3. How do you know whether the battery needs replacing? Repeated loss of usable range warrants diagnosis, but a scooter that fails to charge does not automatically need a new battery. The charger, charging port, wiring, or another component may cause similar symptoms. If the pack changes shape, leaks, develops an unusual odor, or becomes excessively hot, stop using it and seek professional guidance. What information helps a technician find the fault? Describe what changed and when it changed. Note whether the scooter stopped during a ride, remained unused for months, or showed a new charging-light pattern. Our guide to a scooter that won’t charge covers the possible causes, but you should leave battery opening and electrical probing to qualified service staff. Observation Useful next step Gradual range loss Request battery assessment No charging response Check the charging system Swelling, leakage, unusual heat Stop use; seek safety advice If smoke or fire appears, move away, leave the area, and call emergency services instead of handling the pack. 4. Why do replacement packs have different prices? Replacement packs differ in their specified capacity, construction, electronics, enclosure, and model requirements. Compare electric scooter battery replacement cost across approved packs with equivalent specifications. A battery’s voltage and amp-hour figures describe only part of what the scooter needs from its power source. Why does a matching voltage leave questions unanswered? For example, the Model B pack is specified as 36V and 5Ah, equivalent to 180Wh of nominal stored energy. Matching that voltage on another listing does not confirm its connector, physical mounting, charging requirements, or approval for your scooter. A larger advertised capacity also needs manufacturer confirmation before you treat it as an upgrade. Specification What it helps establish Voltage and capacity The stated electrical specification Enclosure and mounting Whether the approved pack fits Manufacturer confirmation Suitability for your exact device Battery management electronics form part of the pack’s protection system. Keep the enclosure intact and leave modifications to the manufacturer or its authorized service provider; changing wires or forcing a connector can create a repair problem beyond the original battery fault. 5. Can warranty lower electric scooter battery replacement cost? Warranty coverage may reduce your bill when the diagnosed fault qualifies, so ask about coverage before authorizing a paid replacement. Have support confirm the battery-specific terms that apply to your purchase. Do not assume ordinary capacity loss qualifies as a manufacturing defect or that an inspection automatically leads to free parts. What should you provide with a coverage request? Send your order number, purchase details, symptom description, and clear photographs. Dynamic Scooter’s product guarantee describes its coverage and exclusions, including normal wear and water damage to electrical parts. Request a written decision and ask how inspection, shipping, and installation costs will be handled before sending anything back. Coverage question Why to ask Is this fault covered? Establishes your part cost Who pays shipping? Changes the delivered total What happens if declined? Clarifies inspection charges An approved claim should identify what the provider will repair or replace. Keep that decision with your service record so the promised remedy remains clear if the replacement arrives separately from other parts or instructions. 6. Can you replace the battery yourself? You can consider replacing an intact, owner-removable battery when the manufacturer provides instructions for that task and approves the replacement. A sealed deck pack or damaged installation calls for authorized service. Removing a complete battery from its holder is a different job from opening its casing and working on cells. When does paying for installation make sense? Ask for help if […]

Electric Scooter Battery Replacement Cost: What to Budget Read More »
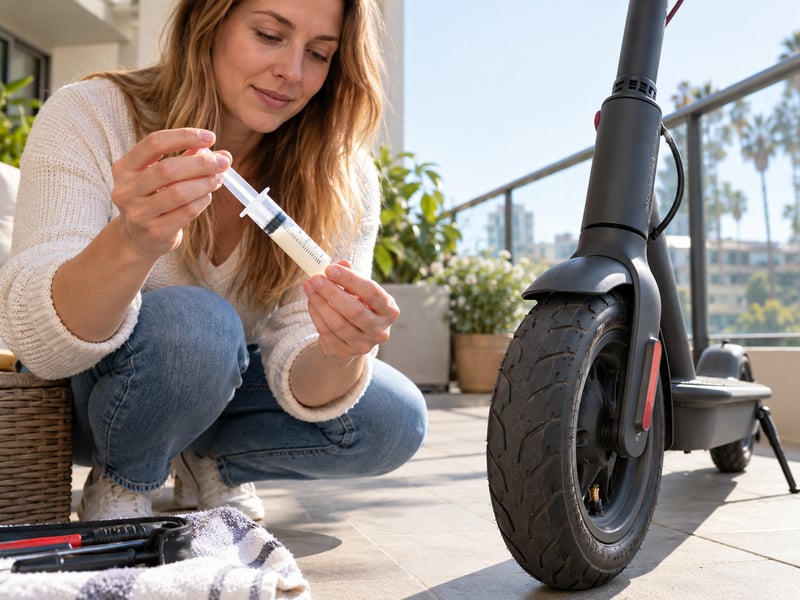
Owner holding a measured sealant injector well away from a pneumatic scooter tire

How Can Electric Scooter Tire Sealant Help Prevent Flats?

Electric scooter tire sealant can reduce flats from small tread punctures when its formula matches an approved pneumatic tire or inner tube. Finding a soft tire before work can leave you walking beside a scooter you expected to ride. The right sealant may close a small tread puncture; the wrong bottle can leave you with the same leaking tire. Check the tire construction, product instructions and source of any leak before adding liquid. 1. What does electric scooter tire sealant do? Electric scooter tire sealant helps close certain small punctures from inside an air-filled tire or tube. It works within the limits of its formula and the condition of the tire. How does the liquid reach a puncture? As a wheel turns, sealant moves around its interior. For particle-based products, escaping air carries material toward a puncture, where it can build a plug. Slime describes this mechanism in its tire and tube sealant information. The liquid goes inside the tube on a tube-type wheel and inside the tire cavity on an approved tubeless wheel. Brushing it across the outside of a tire does not follow that installation method. A bottle of preventive sealant also serves a different purpose from an emergency inflation product, so read the exact product name before use. What result should you expect? Treat puncture-size claims as limits for that formula rather than promises for every scooter. After an eligible puncture seals: Sealant may help with Sealant cannot establish An eligible small tread puncture Whether a damaged tire remains fit for use Certain leaks listed by its manufacturer Whether wheel components are correctly fitted 2. Which scooter tires can use sealant? Only pneumatic tires or tubes approved for the chosen sealant should receive it; solid tires do not need it. Confirm the construction before buying supplies. Can you identify the air chamber? Your manual or replacement-part specification should identify whether the wheel uses an inner tube, a tubeless tire or a solid tire. An inflation valve shows that a wheel holds air, but that clue alone does not identify every component inside it. Our solid versus pneumatic scooter tire guide explains the broader construction choices. For sealant selection, you need the exact tire type rather than a general description such as “rubber wheels.” Does a self-sealing tire need more liquid? A “self-sealing” description calls for checking the scooter maker’s instructions before adding anything. Find out what protection is already fitted and whether another product is permitted. Ask support if the manual leaves that unclear. For a used scooter, check what the previous owner added: Construction Where approved sealant goes Tire with an inner tube Inside the tube Tubeless pneumatic tire Inside the tire cavity Solid or honeycomb solid tire No sealant application 3. How do you choose electric scooter tire sealant? Choose a formula that matches the tire system, permitted application and maintenance instructions. Read the application details even if you have used the brand before. What must the manufacturer approve? Check compatibility with the tire or tube, rim and any existing sealing treatment. Tube and tubeless formulas are not automatically interchangeable. For example, Muc-Off’s tubeless sealant instructions direct users toward a separate inner-tube product for non-tubeless setups. Before choosing a bottle, confirm these details: Which claims deserve a closer look? Read what a puncture claim covers, including location, size and tire construction. Compare instructions for routine prevention with those for an existing puncture. A temporary emergency product may require a later repair even after air loss stops. Check tire warranty guidance too. Stan’s advises that some tire manufacturers restrict liquid sealant under their warranty terms. If you cannot establish compatibility, send the scooter maker the tire specification and proposed product name before installation. Label describes Verify before buying Preventive use Permitted vehicle, tire construction and refill plan Emergency repair Follow-up repair requirement and use limits 4. What tools should you prepare before installation? Prepare the approved sealant, its dosing equipment, suitable valve tools and an inflator with a pressure gauge. Lay out everything before deflating a wheel. Can you reach the valve safely? Check valve access with the scooter switched off and supported as its manual directs. Some wheel layouts leave little room for a nozzle or tool. Test the fit without bending the valve or forcing an adapter against nearby parts. If the instructions require core removal: What information should you keep beside your scooter? Keep the tire specification, sealant instructions and scooter manual together. A saved product page can help, but make sure it describes the formula in your bottle. Two bottles with similar packaging may carry different application limits. Information Where to obtain it Tire construction and size Manual or exact replacement-part listing Approved quantity and method Sealant instructions or manufacturer support Correct inflation pressure Instructions for the exact scooter and tire setup 5. How much electric scooter tire sealant should you add? Add the quantity specified for your tire size, construction and exact sealant formula. There is no reliable single dose for every electric scooter wheel. Why does tire size affect the amount? Sealant manufacturers use tire dimensions or volume when setting quantities. Diameter alone does not describe the whole tire. Read the complete size marking and distinguish a tube application from a tubeless one when using a dosing guide. A bicycle or automotive example on a bottle may not cover your scooter’s size. If a calculator cannot identify the application, ask the manufacturer for a quantity rather than scaling a number from an unrelated vehicle. Save the answer with your maintenance record. How do you keep the measurement clear? Use the bottle graduations or a compatible measuring injector according to the instructions. Check whether the quantity refers to each wheel or the whole vehicle. Measure both wheels separately if their sizes or specified amounts differ. Keep a dosing record for later service: Dosing detail Use Full tire size and construction Find the matching application Exact product instructions Measure the specified quantity 6. How do you install sealant through a removable […]

How Can Electric Scooter Tire Sealant Help Prevent Flats? Read More »

Adult shopper trying on a helmet with help from a store assistant

Best Helmet for Electric Scooter: How to Choose

The best helmet for electric scooter riding fits your head securely, has clear standards information for your type of riding, and works with your riding conditions. A highly rated model can still rock backward, squeeze your temples, or interfere with your glasses. Use the fit checks below to compare actual helmets; CPSC advises wearing a bicycle helmet when riding a micromobility device, and manufacturer instructions explain how each design should be worn. 1. What is the best helmet for electric scooter riding? The best helmet for electric scooter riding is one you can verify, fit correctly, and wear throughout your ride. Start with the intended activity and standards, then compare fit and coverage before comfort extras. A product name containing “scooter” does not answer those questions on its own. What should you decide before browsing products? Describe your usual ride rather than searching for a universal winner. Note your route, riding pace, weather, and whether you wear glasses, then bring that information when asking a retailer or manufacturer about suitability. Our scooter riding clothing guide puts the helmet within your wider equipment choices. Selection question Evidence to seek Is it intended for this use? Manufacturer instructions and labeling Does it fit you? In-person adjustment and fit checks Will it work for your commute? A try-on with your usual eyewear Keep two or three candidates that meet these checks. Comparing a short list gives you room to reject a poor fit without buying another helmet only because its appearance resembles a popular model. 2. Which helmet standards should you check? Check the standard named on the actual helmet and confirm that its manufacturer specifies an appropriate activity. For a US bicycle helmet, look for the compliance statement for the CPSC bicycle helmet standard, 16 CFR Part 1203. Treat a marketplace badge or the word “certified” as a claim to verify against the product and its documentation. What makes a certification claim checkable? The CPSC guidance describes labels identifying the model, who made or imported it, production details, and the compliance statement. Ask the seller for clear product photographs and the manufacturer’s instructions if these details are missing from the listing. Match the documentation to the exact model and version you will receive. Listing detail What to verify Standard name Matches the helmet’s statement Product identity Same model as the documentation Seller information A traceable source for support Certification describes performance under specified testing conditions. It does not promise protection in every crash, establish that every helmet fits you, or allow you to ignore the manufacturer’s restrictions on use. 3. How do you find the right size and head shape? Measure your head circumference and use the size chart for the exact helmet model, then try it on. A size label from your old helmet may not match another design. The correct size should feel snug and stable without creating uncomfortable pressure at one point. What should you notice during a try-on? Use a flexible measuring tape around your head as the manufacturer directs, generally above the eyebrows and ears. Put on the candidate helmet with its fit system loosened, position it correctly, and make the permitted adjustments. If the shell presses your temples while leaving space elsewhere, try another model instead of tightening the dial harder. Try-on result Next step Comfortable and stable Continue with strap checks Localized pressure Compare another shape or size Loose after adjustment Try a different size or model Ask a trained retailer for help when you fall between sizes. Keep the supplied padding in place unless the manual allows changes; removing protective material or adding homemade padding is not a substitute for a properly fitting helmet. 4. How should straps and retention fit? Position the helmet level, adjust its straps as instructed, and buckle it snugly before checking stability. The rear fit dial cannot replace a fastened chin strap. A helmet that rolls far backward or slides forward into your vision needs adjustment or a different fit. How can you check the adjustment while stationary? For a bicycle-style helmet, general fitting guidance places it low over your forehead and the side straps around your ears. Follow the exact manual for buckle position, strap slack, and the final movement check. With the helmet fastened, gently check whether it shifts out of position when you move it forward and backward. Part Check before riding Helmet position Level and correctly covering the forehead Chin strap Buckled and adjusted to the instructions Fit system Snug without forcing a poor shell fit Repeat the check after changing pads or your hairstyle. If the helmet still shifts despite correct adjustment, stop trying to compensate with tighter straps and ask for another size or model before riding. 5. Should you choose an open-face or full-face helmet? Choose the best helmet for electric scooter riding by matching coverage to your conditions and the maker’s intended use. An open-face design leaves the face exposed; a full-face design adds a structure around the chin. The full-face shape alone does not tell you which activities or standards the complete helmet addresses. Which trade-offs should you check in person? Try each design while looking ahead and turning your head as you would when checking your surroundings. For a full-face model, follow its instructions for cheek pads, chin-bar configuration, and fastening. Ask the manufacturer about the intended use if you ride a faster scooter or plan a more demanding route. Design Questions during a try-on Open-face Is coverage appropriate to the intended use? Full-face Does the complete configuration fit correctly? Convertible Which configuration does the documentation cover? Keep route choices part of the decision. Our city traffic riding guide covers everyday riding behavior; a different helmet does not remove the need to slow down, watch the surface, and leave room around others. 6. What makes the best helmet for electric scooter commuting? A practical commuter helmet has clear standards information, fits securely, and stays comfortable throughout your trip. Assess ventilation, weight, adjustment access, and storage alongside your route. […]

Best Helmet for Electric Scooter: How to Choose Read More »

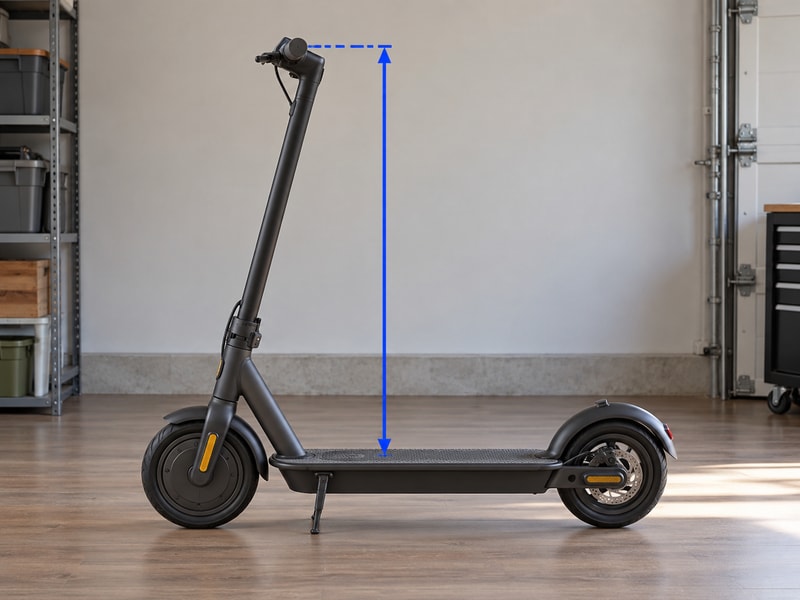
Photo-based diagram measuring vertically from the deck surface to grip height

Electric Scooter for Tall Adults: A Practical Fit Guide

An electric scooter for tall adults should give you usable handlebar height, room for your feet, accessible controls, and a load rating that covers what you carry. Your standing height alone cannot confirm those things. You step onto a compact scooter and reach for the grips, only to find yourself bending forward or crowding the stem with your knees. Product photos rarely reveal that problem. Before buying, compare deck-to-grip measurements and try your normal riding stance. The checks below use manufacturer riding and adjustment instructions alongside practical observations you can make while the scooter is stationary. 1. How should an electric scooter for tall adults fit? A suitable scooter lets you reach both grips and controls while standing comfortably on the deck, within the manufacturer’s rider limits. Two people of equal height can have different arm lengths, leg lengths, and shoe sizes, so a reviewer’s height offers only a starting point. Compare how each scooter positions your hands relative to your feet, then check whether you can move your knees without touching the stem. A tall handlebar on a short deck can still leave you cramped. What should you record before comparing models? Write down your height, usual riding shoes, riding weight with your bag, and the surfaces on your route before comparing models. Ask for usable deck length and width rather than relying on the scooter’s overall length, which includes wheels and other space you cannot stand on. Fit check Compare Hands Grip and control reach Feet Usable deck space 2. How do you measure usable handlebar height? Measure vertically from the top of the standing deck to the center of the grips. Ground-to-handlebar height includes the distance beneath your feet, so it describes a different measurement and cannot be substituted directly. Keep the scooter upright on level ground, with its stem locked into an approved riding position, and use a helper if needed. Record the measurement method beside the number so you can compare scooters on the same basis. What measurements should you ask the seller for? For an adjustable model, request the usable deck-to-grip measurement at its lowest and highest approved settings, plus any fixed steps between them. Measurement Reference Deck-to-grip Deck surface to grip center Ground-to-handlebar A different reference point 3. What should your wrists and shoulders feel like? Your hands should reach the controls without a forced wrist bend or raised shoulders. With power off and the scooter supported, stand in your usual shoes and hold both grips as you would while riding. Notice whether you have to stoop, stretch forward, or pull your shoulders upward to keep contact. These observations help compare fit; they do not establish a universal ideal handlebar height or a medical benefit. How can you check reach with your riding gear? Operate the brake and throttle separately without changing your whole hand position, following the control layout in the model’s manual. Observation Next check Raised shoulders or forced wrists Try an approved setting or another model Difficult control reach Check with riding gloves 4. How much deck space do your feet need? You need enough usable deck space for both feet in a stable riding stance. Check with your actual shoes, since a deck that looks generous in a photograph may feel crowded once you step aboard. Try a staggered stance with one foot ahead of the other, keeping both feet supported and clear of moving parts. You should also be able to reach any rear foot brake in the way the manual describes. Where does usable deck space begin and end? Measure the flat standing surface between obstructions, including any stem base, raised section, or rear fender that reduces where a shoe can sit. Published deck width alone cannot tell you whether your preferred foot placement works, and the widest point may differ from the area beneath your rear foot. Deck detail Inspect Standing area Space between obstructions Shoes Both feet supported and clear of moving parts 5. How do tall adults check electric scooter knee clearance? Check that your knees clear the stem and controls in a comfortable stance on an electric scooter for tall adults. While stationary with power off and the scooter supported, bend your knees gently and move between the positions you would use when starting or slowing. Notice whether a knee contacts the stem, display, or anything attached near the bars. You do not need a claimed minimum gap in inches to recognize repeated contact during this check. What should you check while turning the bars? Turn the handlebars slowly while keeping the scooter stable, checking for contact and whether cables tighten or catch during ordinary steering movement. Clearance check Look for Knees No repeated stem contact Steering No cables tightening or catching 6. Can adjustable handlebars solve a poor fit? Adjustable handlebars can improve your fit only within the manufacturer’s permitted positions. Some stems use locking buttons and holes, while others use a clamp or a different system, so follow the exact model’s instructions. After adjustment, check every required lock and clamp before standing on the scooter or riding it. Never raise a stem beyond an insertion mark, bypass a stop, or assume a clamp alone replaces a required locking button. What can adjustment change? Adjustment changes hand height; it cannot lengthen a deck or create more knee clearance around a crowded stem. A manufacturer’s adjustment manual shows one button-and-clamp design; use the manual for your own model to confirm the approved positions and locking sequence. Adjustment Boundary Handlebar height Approved positions only Deck length Unchanged by handlebar adjustment 7. How should you check the rider weight limit? Check your full riding load against the scooter’s specified capacity, because height and weight answer separate buying questions. Include clothing, a helmet, your bag, and anything else you will carry, following the manufacturer’s definition of its load limit. A tall, light rider may need higher grips without needing a higher payload rating. A shorter, heavier rider can have enough handlebar height and still exceed […]

Electric Scooter for Tall Adults: A Practical Fit Guide Read More »

Shopping Cart
Scroll to Top