Flat tires strike at the worst moments, leaving you stranded and frustrated. Without proper removal knowledge, you risk damaging expensive components or injuring yourself. Learning safe tire removal techniques saves money, prevents damage, and gets you back on the road quickly.
Electric scooter tire removal requires specific tools, safety precautions, and step-by-step procedures that vary by wheel type and motor configuration. Front wheels typically disconnect from brake cables and axle nuts, while rear wheels require motor cable disconnection and chain removal. Proper preparation, tool selection, and careful handling prevent component damage and ensure successful tire replacement.
But here’s the thing – one wrong move can cost hundreds in repairs.
1. What Tools Do You Need to Remove Electric Scooter Tires?
Successful tire removal starts with having the right tools ready before you begin. Basic hand tools handle most electric scooter tire removal jobs effectively.
Socket wrenches and adjustable wrenches remove axle nuts and mounting bolts. Most scooters use 10mm to 17mm nuts for wheel attachment. A complete socket set covers all possible sizes.
Tire levers help separate stubborn tires from wheel rims without damage. Plastic levers work best for delicate rims. Metal levers provide more leverage but risk scratching.
Here’s why it matters – using proper tools prevents expensive component damage and makes the job easier.
Screwdrivers assist with cable disconnection and small fastener removal. Both flathead and Phillips head drivers are needed. Magnetic tips prevent dropped screws in tight spaces.
Allen keys fit many modern scooter fasteners and brake adjustments. A complete metric set from 2mm to 10mm covers most requirements. Ball-end keys work better in tight spaces.
| Tool Category | Specific Tools | Size Range | Purpose |
| Wrenches | Socket/Adjustable | 10-17mm | Axle nuts |
| Tire Tools | Plastic levers | 6-8 inch | Tire removal |
| Drivers | Screwdrivers | Various | Cable work |
Safety equipment protects you during tire removal work. Safety glasses prevent debris from entering your eyes. Work gloves improve grip and protect hands from sharp edges.
A clean workspace with good lighting makes tire removal safer and more efficient. Lay out tools in order of use. Keep a container for small parts to prevent loss.

2. How Do You Prepare Your Electric Scooter for Tire Removal?
Proper preparation prevents accidents and component damage during tire removal. Safety comes before speed in any repair work.
Power disconnection eliminates electrical hazards during tire removal. Turn off the scooter completely and remove the key if equipped. Disconnect the main battery if easily accessible.
Cleaning the work area removes dirt and debris that could enter bearings or motor components. Wipe down the wheel area with a damp cloth. Remove any stuck debris from around fasteners.
The best part? Good preparation makes the actual removal process much faster and safer.
Scooter positioning affects your ability to work safely and efficiently. Place the scooter on a stable, level surface. Use a center stand if available, or lean against a wall.
Documentation helps with reassembly and prevents mistakes. Take photos of cable connections before disconnection. Note the position of washers and spacers for proper reinstallation.
| Preparation Step | Time Required | Safety Benefit | Tools Needed |
| Power Off | 30 seconds | Prevents shock | None |
| Cleaning | 2-3 minutes | Prevents contamination | Cloth |
| Positioning | 1 minute | Improves access | Stand/support |
Battery removal may be necessary for some rear wheel work. Check if the battery blocks access to rear wheel components. Remove only if absolutely needed to avoid unnecessary disconnections.
Workspace organization keeps tools within reach and prevents lost parts. Arrange tools in order of use. Use magnetic trays for small metal parts like screws and washers.
3. What Are the Steps to Remove Front Wheel Tires?
Front wheel tire removal follows a standard sequence that works for most electric scooter designs. Each step builds on the previous one for safe, efficient removal.
Brake cable disconnection comes before any wheel removal attempts. Locate the brake cable connection point near the wheel. Squeeze the brake lever to create slack in the cable.
Cable housing removal requires gentle pressure and proper technique. Pull the cable housing from its mounting bracket. Some designs use quick-release mechanisms for easier disconnection.
Now, you might be wondering – what if the brake cable won’t disconnect easily?
Stuck brake cables often result from corrosion or debris buildup. Apply penetrating oil to the connection point. Work the brake lever several times to distribute the lubricant.
Axle nut removal requires the correct size wrench and proper technique. Most front wheels use 14mm or 15mm axle nuts. Turn counterclockwise to loosen, supporting the wheel as you work.
| Front Wheel Step | Tool Required | Common Size | Difficulty |
| Brake disconnect | Hands | N/A | Easy |
| Axle nut | Wrench | 14-15mm | Medium |
| Wheel removal | Hands | N/A | Easy |
Wheel extraction involves lifting the wheel clear of the fork assembly. Support the wheel weight as you remove the axle. Watch for washers or spacers that may fall during removal.
Tire separation from the rim requires tire levers and patience. Start opposite the valve stem for easier removal. Work around the rim gradually, using multiple levers to maintain progress.
4. How Do You Remove Rear Wheel Tires Safely?
Rear wheel removal presents additional challenges due to motor connections and drive systems. Extra care prevents damage to expensive electrical components.
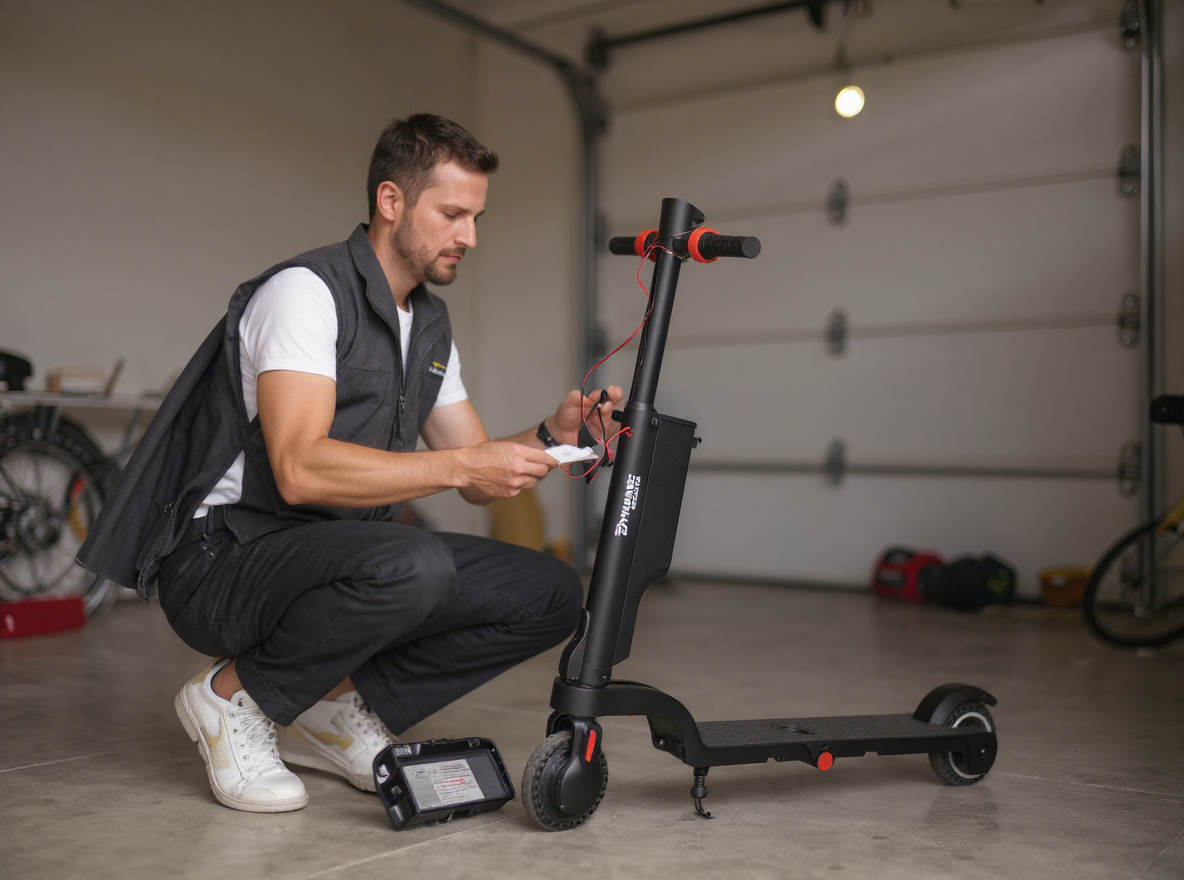
Motor cable disconnection must happen before any wheel movement. Locate the motor connector near the rear wheel. Most connectors have locking tabs that require pressing for release.
Cable marking prevents confusion during reassembly. Use colored tape or take photos to identify each wire’s position. Some connectors are keyed to prevent incorrect connection.
This is important because – wrong connections can damage the motor controller permanently.
Chain or belt removal depends on your scooter’s drive system. Chain drives require master link removal or chain tool use. Belt drives typically slide off after wheel loosening.
Drive system protection prevents contamination during tire work. Cover exposed gears or belts with clean cloth. Keep lubricants and debris away from drive components.
| Rear Wheel Component | Disconnection Method | Special Considerations |
| Motor cables | Connector release | Mark wire positions |
| Chain drive | Master link | Clean before removal |
| Belt drive | Slide off | Inspect for wear |
Rear axle extraction often requires more force than front wheels. The motor weight and drive components create additional resistance. Support all components during removal.
Tire removal from rear wheels follows the same process as front wheels. However, rear wheels may be heavier due to motor integration. Use proper lifting techniques to prevent injury.
5. What Should You Know About Tubeless vs Tube Tires?
Understanding your tire type affects removal techniques and tool requirements. Different tire designs need different approaches for safe, successful removal.
Tire type identification helps choose the correct removal method. Tubeless tires mount directly to the rim with an airtight seal. Tube tires have a separate inner tube inside the tire casing.
Visual inspection reveals tire type in most cases. Tubeless tires have a valve stem that threads directly into the rim. Tube tires have valve stems that come through the tire and rim.
Here’s the deal – using the wrong technique for your tire type can cause damage or injury.
Tubeless tire removal requires breaking the bead seal between tire and rim. This seal keeps air inside without an inner tube. Use tire levers carefully to avoid rim damage.
Bead breaking techniques vary by tire stiffness and age. Newer tires break more easily than old, hardened rubber. Apply steady pressure rather than sudden force to prevent rim damage.
| Tire Type | Identification | Removal Difficulty | Special Tools |
| Tubeless | Valve in rim | Medium | Bead breaker |
| Tube | Valve through tire | Easy | Tire levers |
| Solid | No valve | Hard | Heat/force |
Inner tube tire removal starts with complete deflation. Press the valve core to release all air pressure. This makes the tire soft and easier to manipulate.
Valve stem protection prevents damage during tube tire removal. Support the valve stem when removing tire levers. Bent valve stems require tube replacement even if the tube is undamaged.

6. How Do You Handle Common Tire Removal Problems?
Tire removal problems can frustrate even experienced mechanics. Knowing solutions for common issues saves time and prevents damage.
Seized components result from corrosion, overtightening, or debris buildup. Penetrating oil helps loosen stuck fasteners. Apply oil and wait 10-15 minutes before attempting removal.
Heat application can help with stubborn components. Use a hair dryer to warm metal parts gently. Avoid excessive heat that could damage rubber seals or plastic components.
Let me explain – patience and proper technique work better than brute force for stuck parts.
Damaged tire removal requires special techniques when tires are torn or deteriorated. Cut away damaged sections with a utility knife. Remove pieces gradually to avoid rim damage.
Corroded parts need careful handling to prevent further damage. Use wire brushes to remove surface corrosion. Replace severely corroded fasteners rather than reusing them.
| Problem Type | Solution Method | Tools Needed | Success Rate |
| Seized nuts | Penetrating oil | Oil, wrench | 90% |
| Stuck tire | Heat application | Hair dryer | 85% |
| Corrosion | Wire brushing | Wire brush | 75% |
Emergency removal situations require quick solutions when proper tools aren’t available. Improvised tools can work but increase damage risk. Use only as a last resort when stranded.
Professional help becomes necessary when problems exceed your skill level or tool availability. Complex motor integration or expensive components justify professional service costs.
7. What Are the Best Practices for Tire Installation?
Proper installation techniques ensure your new tire performs safely and lasts as long as possible. Good installation practices prevent premature failure and safety issues.
Tire mounting direction affects performance and safety. Check for directional arrows on the tire sidewall. Mount tires with arrows pointing in the direction of wheel rotation.
Rim inspection before installation prevents problems with new tires. Check for cracks, corrosion, or damage that could cause tire failure. Clean the rim thoroughly before mounting.
What does this mean for you? Proper installation doubles tire life and improves safety significantly.
Inflation procedures vary by tire type and intended use. Start with low pressure and increase gradually. Check manufacturer specifications for correct pressure ranges.
Pressure monitoring prevents overinflation damage and underinflation wear. Use a quality pressure gauge for accurate readings. Check pressure when tires are cool for best accuracy.
| Installation Step | Key Points | Common Mistakes | Prevention |
| Direction check | Follow arrows | Backward mounting | Read sidewall |
| Rim cleaning | Remove all debris | Dirty mounting | Thorough cleaning |
| Pressure setting | Follow specs | Over/under inflation | Use gauge |
Wheel alignment affects tire wear and scooter handling. Ensure wheels track straight when reinstalled. Misalignment causes rapid tire wear and poor handling.
Final safety checks verify all components are properly installed and tightened. Test brake function before riding. Check that all cables are connected and secured properly.
Conclusion
Electric scooter tire removal requires proper tools, safety preparation, and systematic procedures that vary by wheel position and tire type. Front wheels need brake cable disconnection and axle removal, while rear wheels require motor cable disconnection and drive system handling. Understanding tubeless versus tube tires and having solutions for common problems ensures successful tire maintenance. The bottom line? Proper technique prevents expensive damage and keeps you riding safely.
Following these procedures saves $50-150 per tire change compared to shop rates while building valuable maintenance skills. For reliable electric scooters designed for easy maintenance, Dynamic Scooter offers models with accessible components and comprehensive service documentation. Contact our technical support team for specific tire removal guidance and genuine replacement parts that ensure optimal performance and safety.

FAQ
Q1: Can I remove electric scooter tires without special tools? Yes, most electric scooter tires can be removed with basic tools like wrenches, screwdrivers, and tire levers. However, some models may require specific tools for motor disconnection or specialized fasteners.
Q2: How often should I replace my electric scooter tires? Electric scooter tires typically last 1,000-3,000 miles depending on usage, terrain, and tire quality. Replace tires when tread depth reaches 1-2mm or when sidewall damage appears.
Q3: Is it safe to remove tires from electric scooters with hub motors? Yes, but you must disconnect the motor cables properly before removal. Follow manufacturer instructions and mark cable connections for proper reassembly to avoid damage.
Q4: What’s the difference between removing solid and pneumatic tires? Solid tires require more force to stretch over the rim and may need heating or special tools. Pneumatic tires deflate first, making removal easier but requiring careful valve stem handling.
Q5: Can I repair a tire instead of removing it completely? Minor punctures in pneumatic tires can often be repaired with patches without full removal. However, sidewall damage, worn tread, or solid tire cracks require complete tire replacement.