...

Charge

Where Can I Charge My Electric Scooter? Home, Work & Public Options Explained

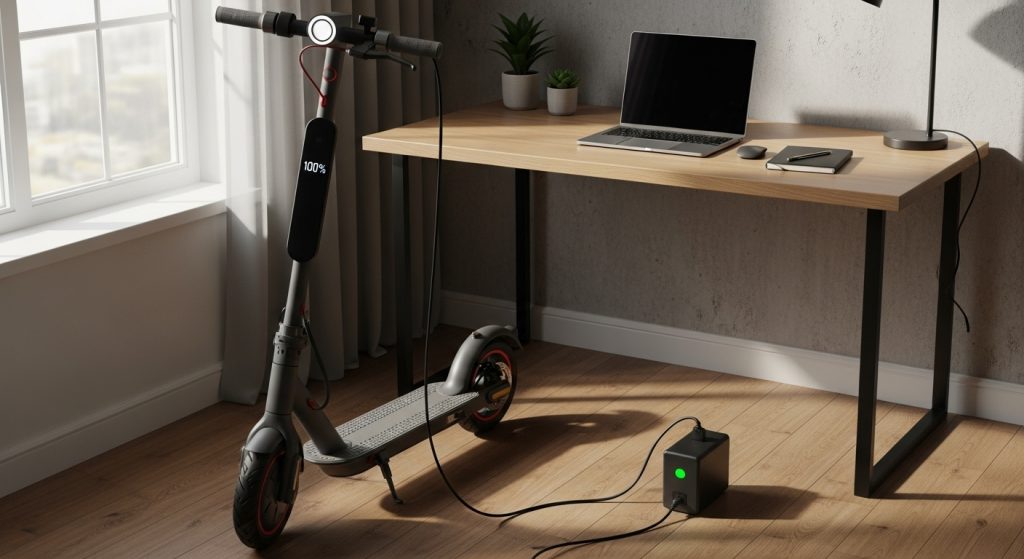
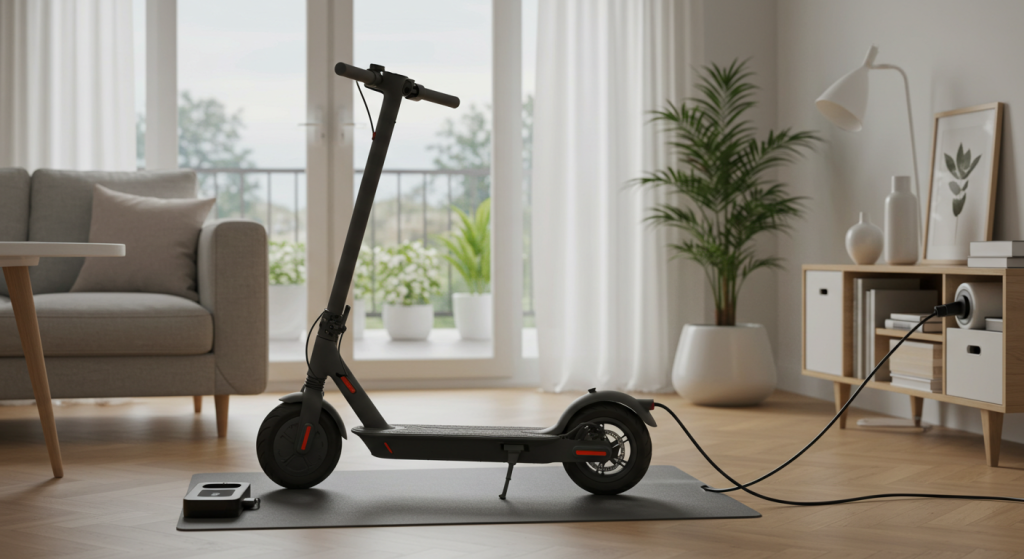
Owning an electric scooter brings an incredible sense of freedom, but it also comes with a nagging question: What happens when the battery gets low? This feeling, often called “range anxiety,” can be stressful, making you second-guess taking longer trips. You might worry about getting stranded far from home, facing a long walk with a heavy, dead scooter. The uncertainty of not knowing where your next charge will come from can turn a fun, convenient ride into a source of constant worry. Fortunately, with a little planning, you can charge your electric scooter in a wide variety of locations, including at home, at work, and even at public charging stations. The key is to know your options and always be prepared. So, where exactly can you plug in and power up? Let me explain… This guide will explore all the potential places to charge your electric scooter, from the most obvious to the surprisingly convenient, ensuring you can ride with confidence. 1. Is charging your electric scooter at home the best option? For most electric scooter owners, charging at home is the most convenient, cost-effective, and safest option. You have easy access to a standard wall outlet, and you can charge your scooter overnight so it’s ready to go in the morning. Setting up a dedicated charging spot in your garage or a corner of your room ensures you have a consistent and safe routine. There’s no need to hunt for a public plug or worry about someone tampering with your scooter. Using your home electricity is also incredibly cheap. Here’s the deal… the most critical aspect of home charging is to always use the official charger that came with your scooter. Your scooter’s battery and its Battery Management System (BMS) are designed to work with the specific voltage and current of its original charger. Using a mismatched charger can damage your battery and even create a fire hazard. To create the perfect home charging setup, choose a spot that is dry, temperature-controlled, and has good ventilation. Avoid cluttered areas and make sure the charging cables don’t create a trip hazard. This simple routine makes your life easier and protects your investment. Home Charging: Pros vs. Cons Description Recommendation Pro: Ultimate Convenience Charge overnight or anytime you are home. Make it a habit to plug in after your last ride of the day. Pro: Maximum Safety You control the environment and can monitor the scooter. Charge in an open, ventilated space away from flammable materials. Con: Not an Option for All Can be difficult for those in apartments without accessible outlets. Consider scooters with removable batteries if you lack easy outlet access. 2. Can I charge my electric scooter at my workplace? Charging your scooter at work is an excellent way to ensure you have a full battery for your commute home, especially if you have a long ride. It effectively doubles your daily range and eliminates any range anxiety. However, you can’t just assume it’s okay to plug in. The first and most important step is to check your company’s policy and ask for permission. Most employers are reasonable and will likely be supportive of eco-friendly commuting. The bottom line? Frame your request in a positive light. Explain that you’re using a green mode of transportation and that the cost of the electricity is negligible. Being transparent and respectful is key. Once you have permission, find a safe and out-of-the-way spot to charge, such as under your desk, ensuring it doesn’t create a safety hazard. Bringing your charger with you every day can be a hassle, so some commuters buy a second official charger to leave at the office. This adds to the convenience and ensures you’re never caught without one. Charging at work is a fantastic perk for any scooter commuter. Asking to Charge at Work Approach What to Say Be Proactive & Respectful Speak to your manager or HR department before you start charging. “I commute on an electric scooter to be more eco-friendly. Would it be okay if I charged it under my desk? The electricity cost is very low.” Highlight the Benefits Mention environmental benefits and your commitment to being on time. “This helps me reduce my carbon footprint and ensures I always have a reliable way to get to and from work.” Address Safety Concerns Assure them you will use a safe, certified charger and place it out of the way. “I will be using the official charger that came with the scooter, and I’ll make sure the cables are safely tucked away.” 3. Are there public charging stations for electric scooters? The landscape of public charging is rapidly evolving. While dedicated public charging stations for electric scooters are still not widespread, they are beginning to appear in progressive cities. These stations often feature secure locking docks and built-in charging cables, providing a safe and convenient way to power up. More commonly, you will find public charging stations for electric vehicles (EVs). But here’s the thing… most of these are Level 2 or DC Fast Chargers designed for cars and are not compatible with your scooter’s standard plug. However, many of these EV charging locations also include standard 120V wall outlets. These are perfect for plugging in your scooter’s charger. To find these opportunities, you can use apps like PlugShare, which allow users to filter for different plug types and often have photos and comments from other users pointing out accessible wall outlets. As more people adopt personal electric vehicles, the demand for this infrastructure will only grow. Type of Public Charging How to Use It Availability Dedicated Scooter Docks Lock your scooter into the station; may require an app or payment. Rare, but growing in some urban centers and private campuses. EV Charging Stations Look for an integrated, standard 120V wall outlet on the station housing. Common, but you must bring your own scooter charger. Public Plugs (Parks, Plazas) Find standard outlets in public spaces, often near benches or pavilions. Varies greatly

Where Can I Charge My Electric Scooter? Home, Work & Public Options Explained Read More »

Why Is My Electric Scooter Not Charging​? Common Causes & Easy Fixes

There’s nothing more frustrating than plugging in your electric scooter after a ride, only to come back later and find that it hasn’t charged at all. You’re left with a dead scooter, a disrupted schedule, and a nagging worry that you’re facing an expensive repair. Is it the charger? The battery? The scooter itself? If your electric scooter isn’t charging, the most common culprits are a faulty charger, a dead or disconnected battery, a damaged charging port, or a tripped Battery Management System (BMS). By following a systematic process of elimination, you can often diagnose and even fix the issue yourself without needing a costly repair. So, where do you start? Let me explain… This comprehensive guide will walk you through a step-by-step troubleshooting process, from checking the obvious to diagnosing more complex issues, helping you get your scooter powered up and back on the road. 1. What are the most common reasons a scooter won’t charge? When your scooter refuses to charge, the problem almost always falls into one of three categories: the charger, the battery, or the scooter’s charging components. The key to a successful diagnosis is to work through the possibilities logically. Don’t immediately assume the worst—that your expensive battery is dead. The issue is often something much simpler and cheaper to fix. The first step is to perform a basic triage to narrow down the possibilities. Is the charger showing any lights? Does the charging port look clean and undamaged? Have you checked the power outlet? Before you begin any troubleshooting, it’s crucial to take some safety precautions. You are dealing with electricity, so always unplug the charger from the wall and the scooter before inspecting any components. This is important because… working with a live electrical system can be dangerous. Start with the simplest and most external component—the charger—and work your way inward to the scooter itself. This process of elimination is the most effective way to pinpoint the exact source of the failure. By following this methodical approach, you can avoid unnecessary guesswork. You’ll test each component in a logical sequence, ruling out potential causes one by one. This not only saves you time but also prevents you from replacing parts that aren’t actually broken. Most charging issues can be identified with just a few simple checks that anyone can perform at home. Component Category Common Issues First Step to Check External Power Faulty outlet, bad extension cord Test the outlet with another device. Charger Damaged cable, internal failure Check the charger’s indicator lights. Scooter Components Dirty port, blown fuse, BMS trip Visually inspect the charging port. 2. How do I properly test my electric scooter charger? The charger is the most common point of failure, and it’s the easiest part to test. The first thing to check is the indicator light on the charger brick itself. Most chargers have a light that will be green when it’s plugged into the wall but not the scooter (or when the scooter is fully charged) and red when it’s actively charging. If the light doesn’t come on at all when you plug it into a known-good outlet, the charger is likely dead and needs to be replaced. If the light turns green but stays green when you plug it into the scooter, it means the charger isn’t detecting the battery. This could be a problem with the charger, the port, or the battery. A more definitive test is to use a multimeter to check the charger’s output voltage. Here’s the deal… set your multimeter to the DC voltage setting and carefully touch the probes to the pins on the charger’s connector. The voltage should be slightly higher than the voltage of your scooter’s battery (e.g., a 42V charger for a 36V battery). If you get no reading or a very low reading, the charger is faulty. Finally, do a thorough visual and physical inspection of the charger. Check the entire length of the cable for any cuts, frays, or sharp bends that could indicate a broken wire inside. Pay close attention to the points where the cable enters the charger brick and the connector, as these are common stress points. If you find any physical damage, stop using the charger immediately and replace it. Charger Light Status Meaning Next Action No Light No power to the charger, or it’s broken Confirm outlet works; if so, replace charger. Stays Green (when plugged into scooter) Charger isn’t detecting the battery Test charger voltage with a multimeter. Stays Red (never turns green) May indicate a battery or BMS issue Leave it for several hours; if no change, investigate battery. 3. Could the scooter’s charging port be the problem? If you’ve confirmed your charger is working correctly, the next logical place to look is the scooter’s charging port. This is the physical connection point, and it’s exposed to dirt, moisture, and physical stress, making it a common source of problems. The first step is a simple visual inspection. Use a flashlight to look inside the port. Is it clean? Or is it clogged with dirt, dust, or other debris? A poor connection due to debris can easily prevent a charge. If the port is dirty, you can clean it carefully. Want to know the secret? Use a can of compressed air to blow out any loose debris. For more stubborn grime, you can use a dry cotton swab or a soft, non-metallic tool like a wooden toothpick to gently clean the contacts. Never use anything metal, as you could short-circuit the pins. Also, check for any signs of corrosion, which often looks like a green or white crusty buildup. Corrosion is a sign of moisture damage and can be a more serious issue. While you’re inspecting the port, look closely at the pins inside. Are they all straight and uniform? A bent or broken pin is a definite cause of charging failure. If a pin is bent, you may be able to gently straighten it with a pair of

Why Is My Electric Scooter Not Charging​? Common Causes & Easy Fixes Read More »

How to Know If My Electric Scooter Is Charging? Step-by-Step Check Guide

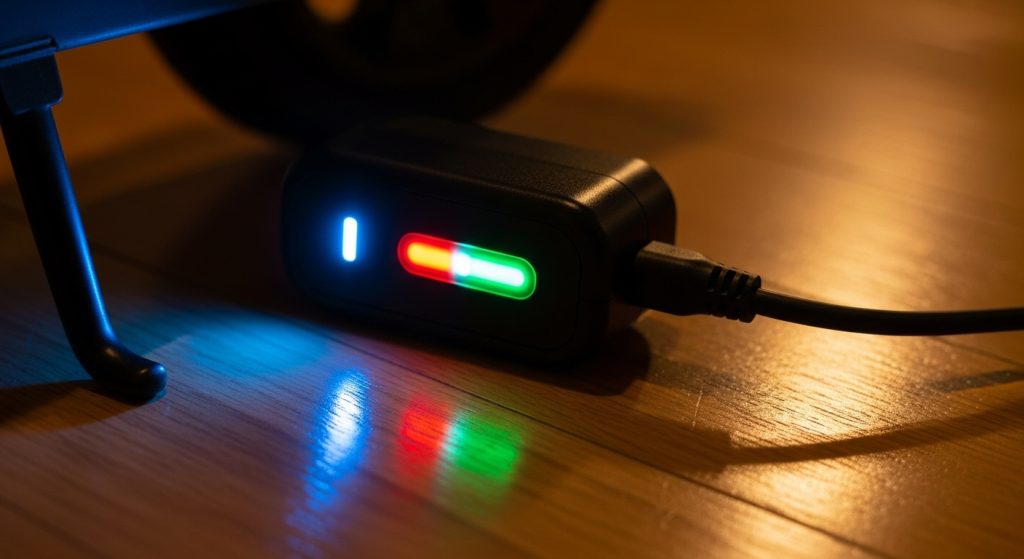
Is your scooter plugged in but you’re not sure it’s actually charging? This uncertainty can be frustrating, especially when you rely on it for your daily commute. A scooter that fails to charge means you could be left stranded, disrupting your plans and causing unnecessary stress. This guide will show you exactly how to confirm your scooter is charging correctly. To know if your electric scooter is charging, look for key visual cues. The most common sign is an indicator light on the charger, which typically turns red during charging and green when full. Your scooter’s display may also show a charging symbol or an increasing battery percentage. A working charger will feel slightly warm to the touch, but not excessively hot. If you see these signs, your scooter is charging properly. Ready to become a charging expert? Here’s the deal… This article will walk you through all the signs and steps to check. 1. What Are the Visual Signs That Your Electric Scooter Is Charging? Confirming that your electric scooter is charging is usually straightforward. Manufacturers design scooters with clear visual indicators to show the charging status. The most common and reliable sign is the LED indicator light found on the charger itself. When you plug the charger into the wall and the scooter, this light will typically turn red. This red light signifies that the charging has started and electricity is flowing to the battery. Your scooter’s own display screen provides valuable information. Most modern scooters have a digital display that will show a charging symbol, such as a lightning bolt or a battery icon filling up. You should also see the battery percentage slowly increasing over time. This provides direct feedback that the battery is accepting a charge. Some scooters might not have a screen, but they often have a series of small LED lights on the handlebars or deck that blink. Color changes are another key indicator. The charger light is usually red during charging. Once the battery is fully charged, this light will change to green. This is your signal to unplug the charger. The blinking lights on the scooter’s deck might turn solid once the charge is complete. This matters because understanding these color codes prevents overcharging and helps you know exactly when your scooter is ready to ride. Here is a breakdown of common light patterns and their meanings: Light Indicator Color/Pattern Meaning Charger LED Solid Red Currently Charging Charger LED Solid Green Fully Charged Scooter Display Blinking Battery Icon Currently Charging Scooter Display Solid Battery Icon Fully Charged 2. How Can You Tell If the Charger Is Working Properly? Sometimes, the problem isn’t the scooter but the charger itself. A faulty charger won’t deliver power to your battery, no matter how long you leave it plugged in. Check the indicator light on the charger. Most chargers have a light that turns on when it’s plugged into a working wall outlet, even before it’s connected to the scooter. If this light doesn’t come on, it could mean the charger is dead or the outlet has no power. Another reliable sign of a working charger is heat. It is perfectly normal for the charger block to become warm to the touch during charging. This heat is a byproduct of the AC to DC power conversion. However, it should only be warm, not excessively hot. If the charger is too hot to hold comfortably, or if you smell burning plastic, unplug it immediately. This indicates a problem that could be a fire hazard. Unusual sounds or smells are red flags. A functioning charger should be nearly silent. You might hear a very faint hum, but any loud buzzing, clicking, or popping sounds are signs of a malfunction. A strong electrical or burning smell is a clear warning that something is wrong. In either of these cases, you should stop using the charger and get a replacement. The bottom line? Your senses are a great tool for diagnosing charger problems. To be absolutely sure your charger is working, you can test its output with a multimeter. This tool measures electrical voltage. Set the multimeter to the DC voltage setting and touch the probes to the metal contacts on the charger’s connector. The reading should match the output voltage printed on the charger’s label. If the reading is zero or much lower than specified, the charger is faulty. Charger Symptom What It Means Action to Take No Indicator Light No power or faulty charger Test outlet, then replace charger if needed Excessive Heat Internal malfunction Unplug immediately and replace Loud Buzzing Sound Electrical fault Unplug immediately and replace Burning Smell Overheating components Unplug immediately and replace 3. What Should the Battery Display Show When Charging? Your scooter’s battery display is your main source of information about the charging. When you plug in the charger, the display should light up and show that charging has begun. The most common indicator is a battery icon that animates, blinks, or shows bars that increase. This visual feedback is a clear sign that the battery is receiving power. Alongside the icon, the display should show the battery percentage. As the scooter charges, you will see this number climb. It might not update in real-time instantly, but it should increase steadily over a few minutes. If the percentage remains stuck or decreases while plugged in, there is a problem. This could be due to a faulty charger, a bad connection, or an issue with the battery itself. Some more advanced scooters provide an estimated time remaining until the battery is full. This is a helpful feature that lets you know how long you need to wait before you can ride again. This estimate is calculated by the scooter’s Battery Management System (BMS) based on the battery’s current level and the charging rate. Keep in mind that this is just an estimate. The best part? It helps you plan your day around your charging schedule. Once the battery reaches 100%, the display

How to Know If My Electric Scooter Is Charging? Step-by-Step Check Guide Read More »

How Do You Know When Your Electric Scooter Is Fully Charged?

Overcharging damages batteries and creates fire risks. Many riders guess when charging is complete and damage their scooters. Knowing the right indicators protects your investment and keeps you safe. Electric scooters show full charge through LED indicator lights, display percentages, charger status changes, and physical signs like reduced heat. Most chargers change from red to green when complete. Display screens show 100% or full battery bars. Charging typically takes 4-8 hours depending on battery size. Chargers become cooler and fans may stop when finished. Some scooters have mobile app notifications. Faulty indicators can give wrong signals, so learn multiple methods to verify full charge. Proper charging habits extend battery life and prevent safety hazards. This guide covers all the ways to identify when your electric scooter has reached full charge safely. 1. What Visual Indicators Show Your Electric Scooter Is Fully Charged? Visual indicators provide the most obvious signs that your electric scooter has finished charging. Most scooters have multiple visual cues that work together to confirm charging status. Here’s the deal… learning to read these indicators correctly prevents overcharging and extends your battery’s life significantly. LED charging lights are the most common visual indicator on electric scooters. Most systems use red lights during charging and green lights when complete. Some models use amber or yellow lights for intermediate charging stages. The lights are usually located on the dashboard, near the charging port, or on the charger itself. Display screen battery percentage readings provide precise charging information when available. Digital displays show exact percentages from 0% to 100%. Some screens also show estimated charging time remaining. These displays are more accurate than simple light indicators but can still have small errors. Charger indicator lights work independently of the scooter’s own indicators. Most chargers have LED lights that change color when charging completes. Red typically means charging, while green indicates completion. Some chargers use different color schemes, so check your manual for specific meanings. Dashboard symbols and charging icons appear on more advanced scooter displays. Battery symbols may show filling animation during charging. Plug icons or lightning bolts indicate active charging status. These symbols disappear or change when charging finishes completely. Indicator Type Charging Status Full Charge Status Reliability Level LED Lights Red/Orange Green High Display Percentage 0-99% 100% Very High Charger Lights Red/Blinking Green/Solid High Dashboard Icons Active symbols Inactive/Changed Medium 2. How Do Charger Indicators Tell You About Charging Status? Charger indicators provide reliable information about charging progress and completion. Understanding your specific charger’s signals prevents confusion and ensures proper charging. This is important because… different charger brands use different indicator systems, and misreading them can lead to incomplete charging or battery damage. Red, green, and amber light meanings vary by manufacturer but follow common patterns. Red usually indicates active charging or connection to power. Green typically means charging is complete and the battery is full. Amber or yellow lights often show intermediate states like initialization or cooling periods. Solid versus blinking light patterns provide additional information about charging status. Solid lights usually indicate stable conditions like active charging or completion. Blinking lights may show initialization, error conditions, or temperature management. Fast blinking often indicates problems that need attention. Charger fan noise and heat changes give physical clues about charging activity. Active charging generates heat that triggers cooling fans. Fans typically run continuously during heavy charging periods. When charging completes, fans may stop or run less frequently as heat decreases. Different charger types use varying indicator systems that require specific knowledge. Smart chargers have multiple lights and complex patterns. Basic chargers may have only one light with simple on/off indication. Fast chargers often have additional indicators for temperature and current levels. Light Color Common Meaning Pattern Type Action Required Red Charging active Solid Continue charging Green Charging complete Solid Safe to disconnect Amber/Yellow Initialization/Cooling Solid or blinking Wait for change Blinking Red Error condition Fast blinking Check connections 3. What Do Battery Level Displays and Gauges Mean? Battery displays provide detailed information about charge levels and charging progress. Understanding how these displays work helps you make better charging decisions. Now, you might be wondering… how accurate are these displays really? The answer depends on the technology used and the age of your battery. Digital percentage readings show specific charge levels from 0% to 100%. These readings are calculated based on voltage measurements and battery algorithms. Accuracy is highest when batteries are new and calibrated properly. Older batteries may show less accurate readings due to capacity degradation. Battery bar indicators use visual bars or segments to show charge levels. Each bar typically represents 10-25% of total capacity. These indicators are less precise than percentage displays but easier to read quickly. Some systems combine bars with percentage numbers for better accuracy. Voltage readings provide technical information about actual battery condition. Fully charged batteries should read specific voltages depending on their type. Lithium batteries typically read 4.2 volts per cell when fully charged. These readings are most accurate but require technical knowledge to interpret. Mobile app notifications send alerts to smartphones when charging completes. Apps can provide detailed charging information and history. Some apps allow remote monitoring of charging progress. These features require compatible scooters and proper app setup to function correctly. Display Type Accuracy Level Information Provided Best Use Case Digital Percentage High Exact charge level Precise monitoring Battery Bars Medium General charge range Quick visual check Voltage Reading Very High Technical battery state Professional diagnosis Mobile App High Detailed charging data Remote monitoring 4. How Long Should Electric Scooter Charging Take? Charging time varies significantly based on battery size, charger type, and current charge level. Understanding normal charging times helps identify problems early. Want to know the secret? timing your charging cycles helps you develop better charging habits and catch issues before they become expensive problems. Standard charging times range from 3-12 hours for most electric scooters. Small batteries (5-10Ah) typically charge in 3-4 hours. Medium batteries (10-15Ah) usually need 4-6 hours. Large batteries (15Ah+) may require 6-12 hours

How Do You Know When Your Electric Scooter Is Fully Charged? Read More »

Are Electric Scooter Chargers Universal? Avoid Charging Mistakes

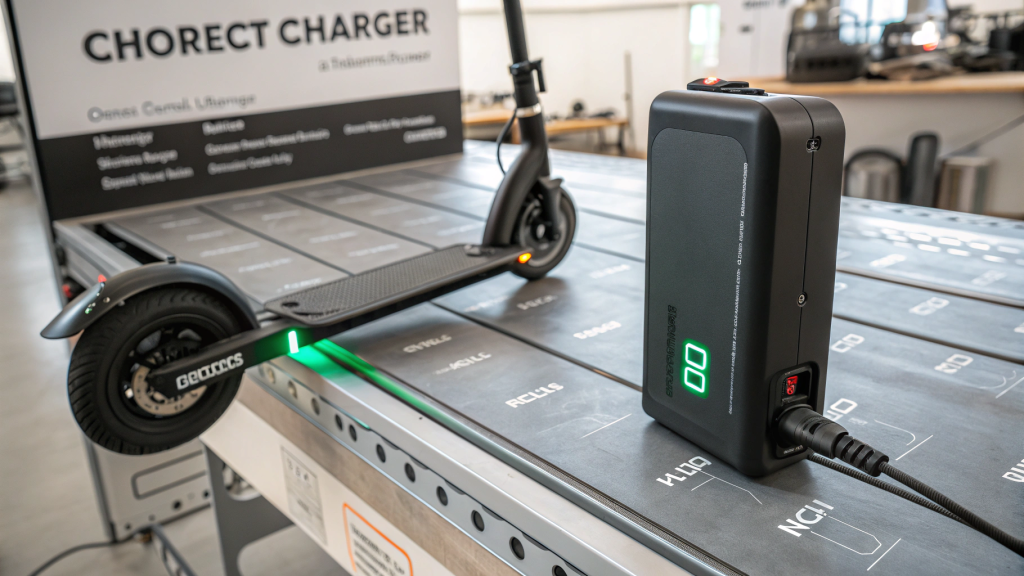
Using the wrong charger can destroy your electric scooter battery and create fire hazards. Many riders assume all chargers work the same way, leading to expensive damage and safety risks. Understanding charger compatibility protects your investment and keeps you safe. Electric scooter chargers are not universal due to different voltage requirements, connector types, and charging protocols across brands. Most scooters use 24V, 36V, or 48V systems with brand-specific connectors and amperage ratings. Using an incompatible charger can damage batteries, void warranties, and create safety hazards. Always match voltage, amperage, and connector type exactly. Some manufacturers offer compatible chargers within their product lines, but cross-brand compatibility is rare. Universal chargers exist but require careful specification matching. Ready to master electric scooter charging compatibility? Let’s decode the mystery. 1. What Makes Electric Scooter Chargers Different From Each Other? Electric scooter chargers vary significantly in their technical specifications and design features. These differences prevent universal compatibility and require careful matching between charger and scooter. Understanding these variations helps you make informed decisions about replacement chargers and avoid costly mistakes. Voltage specifications are the most critical difference between chargers. Most electric scooters operate on 24V, 36V, or 48V systems, with some high-performance models using 60V or higher. Here’s the deal… using a charger with the wrong voltage will either fail to charge your battery or potentially damage it beyond repair. The voltage must match exactly. Amperage ratings determine how quickly your scooter charges and affect battery longevity. Common amperage ratings range from 1A to 5A, with higher amperage providing faster charging but potentially reducing battery lifespan. Some batteries require specific amperage ranges to charge safely and maintain optimal performance over time. Connector types vary widely between manufacturers and even between models from the same brand. Common connector types include barrel plugs, XLR connectors, and proprietary designs. The physical connector must fit perfectly and make proper electrical contact. Even if voltage and amperage match, the wrong connector makes the charger useless. Charging protocols include smart charging features, temperature monitoring, and automatic shutoff functions. Advanced chargers communicate with the battery management system to optimize charging cycles. Basic chargers provide simple constant current/constant voltage charging without smart features. Specification Common Ranges Compatibility Impact Voltage 24V, 36V, 48V, 60V Must match exactly Amperage 1A – 5A Affects charging speed Connector Type Barrel, XLR, Proprietary Must fit physically Smart Features Basic to Advanced Affects charging optimization 2. How Do You Identify Your Scooter’s Charging Requirements? Identifying your scooter’s specific charging requirements is the first step to finding compatible replacement chargers. This information is usually available in multiple locations, but knowing where to look saves time and prevents mistakes. Accurate identification prevents damage and ensures optimal charging performance. Battery specifications provide the most reliable information about charging requirements. Look for labels on the battery pack itself, which typically display voltage, capacity (Ah), and sometimes recommended charging current. This is important because… battery labels are the most accurate source since they reflect the actual power storage system in your scooter. Manufacturer documentation includes user manuals, specification sheets, and online resources that detail charging requirements. Original documentation often provides complete technical specifications including voltage, amperage, connector type, and charging time estimates. Keep this information accessible for future reference. Original charger labels contain all the technical specifications you need for replacement shopping. The output voltage, current rating, and connector type are clearly marked on most quality chargers. Take photos of these labels before your charger fails to have the information readily available. Online model databases and manufacturer websites often provide detailed specifications for specific scooter models. Many manufacturers maintain compatibility charts showing which chargers work with which models. These resources are particularly helpful for older models where original documentation may be lost. Information Source Reliability What to Look For Battery Labels Highest Voltage, Ah capacity Original Charger High Output specs, connector type User Manual High Complete specifications Manufacturer Website Medium Model-specific compatibility 3. Which Electric Scooter Brands Use Similar Charging Systems? Most electric scooter chargers are not universal and require brand-specific compatibility verification. While some manufacturers may use similar components, assuming compatibility without verification creates serious safety risks. Now, you might be wondering… why can’t you just use any charger that fits? The answer is safety and performance protection. Dynamic Scooter prioritizes safety by designing chargers specifically for each model’s requirements. Our chargers include advanced safety features and precise voltage control that generic chargers cannot provide. We strongly recommend using only Dynamic Scooter-approved chargers to maintain warranty coverage and ensure safe operation. Some Razor models within their product line may share charging systems, but even within the same brand, compatibility is not guaranteed. Different models may have different voltage or amperage requirements despite similar appearances. Always contact the manufacturer to verify compatibility before using any non-original charger. Segway and Ninebot products occasionally share components, but this does not mean their chargers are interchangeable. Each model has specific charging requirements that must be met exactly. Using the wrong charger, even from a related brand, can damage your battery or create safety hazards. Third-party “universal” chargers claim broad compatibility but often lack the safety features and precise specifications of original equipment. These chargers may work initially but can cause long-term damage or safety issues. For maximum safety and performance, always use manufacturer-approved chargers. Brand Family Safety Recommendation Notes Dynamic Scooter Use only approved chargers Safety-first design, warranty protection Razor Products Verify with manufacturer Compatibility not guaranteed Segway/Ninebot Contact brand support Model-specific requirements Universal Chargers Not recommended Lack safety features 4. What Happens If You Use the Wrong Charger? Using an incompatible charger can cause serious damage to your electric scooter and create safety hazards. The consequences range from minor performance issues to complete battery failure and fire risks. Understanding these risks emphasizes the importance of using only compatible chargers. Battery damage is the most common result of using wrong chargers. Overvoltage can cause battery cells to overheat, swell, or even rupture. Want to know the secret? lithium-ion batteries are particularly sensitive to charging voltage

Are Electric Scooter Chargers Universal? Avoid Charging Mistakes Read More »

Is It Safe to Charge Your Electric Scooter Overnight? What Experts Say

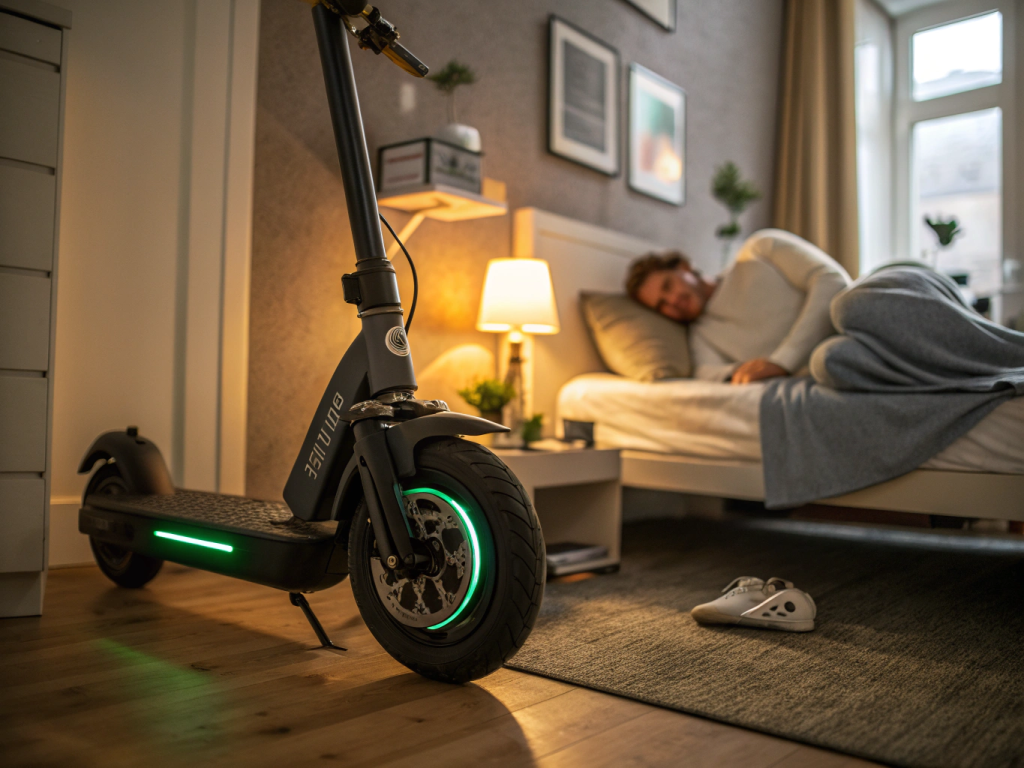
Charging your electric scooter overnight seems convenient. But many riders worry about battery damage, fire risks, and overcharging. Without proper knowledge, you might harm your scooter’s battery. You could also create safety hazards. The key is understanding modern battery management systems. You also need to follow manufacturer guidelines and use proper charging practices to safely charge overnight. Most modern electric scooters can safely charge overnight. They use lithium-ion batteries and built-in Battery Management Systems (BMS). Quality scooters like the Dynamic Scooter Model B include overcharge protection. They also have temperature monitoring and automatic shutoff features. These prevent damage during extended charging periods. However, proper charging habits remain important. Environmental conditions also matter for battery longevity and safety. Here’s the thing – not all scooters are created equal when it comes to charging safety. 1. What Happens When You Charge an Electric Scooter Overnight? Modern electric scooters use sophisticated charging systems that manage power flow automatically. Here’s why it matters – understanding the charging process helps you make informed decisions about overnight charging safety and battery longevity. Lithium-ion batteries charge in three distinct phases that occur automatically during overnight sessions. The first phase delivers constant current until the battery reaches about 80% capacity. This phase typically takes 2-4 hours depending on battery size and charger output. The second phase switches to constant voltage while current gradually decreases. This phase fine-tunes the charge level and typically lasts 1-2 hours. The final phase maintains a trickle charge to keep the battery at 100% without overcharging. Battery Management Systems monitor voltage, current, and temperature throughout charging. These systems prevent overcharging by stopping power flow when batteries reach full capacity. Quality BMS units also balance individual cells and protect against temperature extremes. Charging Phase Duration Safety Features Power Consumption Constant Current 2-4 hours Current limiting High Constant Voltage 1-2 hours Voltage regulation Medium Maintenance Ongoing Overcharge protection Very Low The Dynamic Scooter Model B includes advanced BMS technology with multiple protection layers. Temperature sensors shut down charging if batteries get too hot. Voltage monitors prevent overcharging damage. Current limiters protect against power surges and electrical faults. Heat generation during charging is normal but must stay within safe limits. Proper ventilation prevents heat buildup that could damage batteries or create fire risks. Most quality chargers include thermal protection that reduces charging speed if temperatures rise. Charging efficiency varies throughout the overnight cycle. The initial phases consume more electricity and generate more heat. The maintenance phase uses minimal power and produces little heat, making extended overnight charging relatively safe with quality equipment. Smart charging algorithms in premium scooters optimize the charging process automatically. These systems adjust charging parameters based on battery condition, temperature, and age. The result is safer, more efficient charging that extends battery life. 2. How Do Battery Management Systems Protect Against Overcharging? Battery Management Systems serve as the primary safety mechanism in modern electric scooters. The best part? These systems work automatically without requiring user intervention during normal operation, providing continuous protection throughout overnight charging sessions. Overcharge protection prevents batteries from exceeding safe voltage limits through multiple monitoring systems. When batteries reach 100% capacity, the BMS stops accepting charge current. This prevents the chemical reactions that cause battery degradation and potential thermal runaway situations. Cell balancing ensures all battery cells charge evenly during extended charging periods. Unbalanced cells can create hot spots and reduce overall battery life significantly. Quality BMS units monitor each cell individually and redirect current as needed to maintain optimal balance. Temperature monitoring protects against thermal damage through continuous sensor feedback. If battery temperature exceeds safe limits, the BMS reduces charging current or stops charging completely. This prevents the dangerous conditions that can lead to battery fires or explosions. BMS Protection Function Benefit Response Time Overvoltage Stops charging at full capacity Prevents overcharging Instant Undervoltage Prevents deep discharge Extends battery life Continuous Overcurrent Limits charging speed Reduces heat buildup Milliseconds Temperature Monitors battery heat Prevents thermal runaway Real-time Short circuit protection immediately disconnects power if electrical faults occur during charging. This prevents damage to both the battery and charging system while protecting against fire hazards. Quality BMS units can detect and respond to faults in milliseconds. The Dynamic Scooter Model B uses a sophisticated BMS with redundant safety systems and multiple backup sensors. Multiple sensors provide backup protection if primary systems fail. This multi-layer approach significantly reduces the risk of charging-related problems. Voltage regulation maintains precise control over charging parameters throughout the overnight cycle. The BMS continuously adjusts voltage and current to match battery requirements. This precision prevents overcharging while maximizing charging efficiency and battery longevity. Communication protocols allow the BMS to interact with smart chargers for optimized charging. Advanced systems share battery status information with chargers to adjust charging parameters automatically. This coordination improves safety and extends battery life significantly. 3. What Are the Real Risks of Overnight Charging? While modern scooters include safety features, some risks remain with overnight charging that users should understand. Now, you might be wondering about the actual dangers versus perceived risks when leaving scooters plugged in for extended periods. Fire risk represents the most serious concern with overnight charging, though actual incidents remain rare with quality equipment. Faulty batteries, damaged chargers, or poor ventilation can create dangerous conditions. However, quality scooters with proper BMS significantly reduce these risks through multiple protection layers. Battery degradation occurs faster with poor charging habits and extended high-charge states. Keeping batteries at 100% charge for extended periods can reduce their lifespan by 20-30%. Some manufacturers recommend unplugging chargers once batteries reach full capacity to minimize this effect. Electrical hazards increase with damaged equipment or improper installation in home charging setups. Frayed cables, loose connections, or overloaded circuits create fire and shock risks. Regular equipment inspection prevents most electrical problems before they become dangerous. Risk Factor Likelihood Prevention Method Cost Impact Battery fire Very low with quality BMS Use certified chargers High if occurs Electrical shock Low with proper equipment Inspect cables regularly Medium Battery degradation Moderate with poor

Is It Safe to Charge Your Electric Scooter Overnight? What Experts Say Read More »

Can You Use Any Charger for Your Electric Scooter? Safety Tips You Must Know

Using the wrong charger can destroy your scooter’s battery and create fire hazards. Many riders assume all chargers work the same way, but this mistake costs hundreds in repairs and puts safety at risk. The right charger protects your investment and keeps you riding safely. Electric scooter chargers are not universal and require specific voltage, amperage, and connector matches for safe operation. Using an incompatible charger can damage your battery, void your warranty, and create serious safety risks including fire hazards. But here’s the thing… Most scooter problems start with charging mistakes that could have been avoided. 1. What Makes Electric Scooter Chargers Different? Electric scooter chargers vary significantly in their technical specifications and design features. Each charger is built to match specific battery requirements and safety standards that protect both the rider and equipment from electrical hazards. Voltage requirements form the foundation of charger compatibility and represent the most critical specification to match. Most electric scooters operate on 24V, 36V, or 48V systems, with some high-performance models reaching 60V or higher. Using a charger with incorrect voltage can permanently damage your battery cells or create dangerous overheating conditions that lead to thermal runaway. Higher voltage systems typically provide better acceleration and higher top speeds. Amperage ratings control how fast your battery charges and directly affect the charging experience. Standard ratings range from 1A to 5A, with higher amperage providing faster charging but potentially reducing battery lifespan if not properly managed by sophisticated battery management systems. Here’s why it matters… Connector types create physical barriers to using wrong chargers. Manufacturers design unique charging ports to prevent compatibility issues and protect users from electrical hazards that could result from incorrect connections. Voltage System Common Applications Typical Range Motor Power Charging Time 24V Entry-level scooters 10-15 miles 250-350W 3-4 hours 36V Mid-range models 15-25 miles 350-500W 4-6 hours 48V High-performance scooters 25+ miles 500-1000W 6-8 hours 60V Premium models 30+ miles 1000W+ 8-10 hours Brand-specific charging protocols add another layer of complexity to the charging ecosystem. Some manufacturers include smart charging features that communicate between the charger and battery management system through dedicated data pins in the connector. These protocols monitor temperature, voltage levels, and charging cycles to optimize battery health. Generic chargers often lack these features, leading to suboptimal charging performance. 2. How Do Voltage and Amperage Affect Charger Compatibility? Voltage matching represents the most critical factor in charger compatibility and safety considerations. Your scooter’s battery pack contains multiple lithium-ion cells arranged in series to achieve the target voltage, and each cell has specific voltage limits that must not be exceeded for safe operation. Using a charger with higher voltage than specified can overcharge individual cells, causing them to swell, overheat, or even explode. Lower voltage chargers simply won’t charge your battery effectively. The best part? Most quality chargers include voltage regulation circuits that maintain stable output even when input power fluctuates due to grid conditions, temperature changes, or aging components in the charging system. Voltage Mismatch Potential Consequences Safety Risk Level Repair Cost Recovery Time +5V over spec Cell damage, overheating High $300-500 1-2 weeks +2V over spec Reduced battery life Medium $200-300 None -2V under spec Incomplete charging Low None None -5V under spec No charging None None None Amperage affects charging speed and battery longevity. Higher amperage chargers push more current into your battery, reducing charging time but generating more heat. Heat is the enemy of lithium-ion batteries. Excessive heat during charging can break down the electrolyte, reduce capacity, and shorten overall battery life. Most manufacturers recommend specific amperage ranges for optimal charging. Staying within these limits helps maintain battery health while providing reasonable charging times. Amperage Rating Charging Speed Heat Generation Battery Impact Best Use Case 1A Slow (8-12 hours) Low Minimal wear Overnight charging 2A Medium (4-6 hours) Moderate Normal wear Daily charging 3A Fast (2-4 hours) High Increased wear Quick top-ups 5A Very fast (1-2 hours) Very high Significant wear Emergency only 3. Which Connector Types Work with Your Scooter? Charging connectors serve as the physical interface between your charger and scooter, and their design affects both safety and convenience during the charging process. Different manufacturers use various connector designs to ensure compatibility, prevent reverse polarity, and maintain reliable electrical contact under various environmental conditions. Standard DC barrel connectors are common on entry-level scooters. These round connectors come in different sizes, typically measured by outer diameter and inner diameter. The simplicity of barrel connectors makes them cost-effective and widely available, but they offer limited protection against incorrect insertion and may wear out over time. Now, you might be wondering… why manufacturers don’t standardize on one connector type. The answer involves safety considerations, branding strategies, technical requirements, and the desire to control the replacement parts market for ongoing revenue. Connector Type Diameter (mm) Common Brands Voltage Range Durability Rating Cost DC 5.5×2.1 5.5 outer, 2.1 inner Generic models 24V-36V Fair Low DC 5.5×2.5 5.5 outer, 2.5 inner Razor, some Xiaomi 24V Fair Low XLR 3-pin Varies Segway, Ninebot 36V-48V Excellent Medium Proprietary Custom Premium brands All voltages Good High XLR connectors provide more robust connections and better electrical contact than barrel connectors in demanding applications. These three-pin connectors are borrowed from professional audio equipment and offer superior durability, positive locking mechanisms, and resistance to environmental contamination. The three-pin design allows for power positive, power negative, and communication or sensing connections that enable advanced charging features. This configuration provides better safety through proper grounding and communication protocols that allow the charger and battery management system to work together. XLR connectors also feature a locking mechanism that prevents accidental disconnection during charging, which is particularly important for scooters that may be moved or experience vibration while plugged in. The secure connection reduces the risk of arcing and connector damage. Proprietary connectors give manufacturers control over replacement parts and accessories while enabling custom features that differentiate their products. Brands like Segway and some premium manufacturers use custom designs that only work with their chargers and accessories. These custom

Can You Use Any Charger for Your Electric Scooter? Safety Tips You Must Know Read More »

Is It Safe to Charge Your Electric Scooter at Home?

Worried about charging your electric scooter at home but unsure about safety risks? Improper charging can lead to fires, electrical damage, or battery failure costing thousands in repairs. This comprehensive guide shows you how to charge safely, save money, and protect your investment at home. Yes, you can safely charge your electric scooter at home using the original charger, proper ventilation, and basic safety precautions. Most electric scooters are designed for home charging with standard 110V outlets. Follow manufacturer guidelines, avoid overcharging, and charge in well-ventilated areas away from flammable materials. Proper setup prevents fires, extends battery life, and reduces electricity costs significantly. But here’s the thing – knowing the right setup prevents costly mistakes and keeps your family safe while maximizing convenience. 1. What Are the Basic Requirements for Home Charging? Most electric scooters work perfectly with standard household electrical systems. Your home’s 110V electrical infrastructure provides sufficient power for safe, efficient charging. Modern scooters are specifically designed to work with residential power systems. Check your scooter’s power requirements before setting up charging. Most models specify voltage, amperage, and wattage needs in the user manual. These specifications help you choose the right outlet and circuit for safe operation. Power consumption varies significantly by model and battery size. Lightweight scooters typically use 100-300 watts during active charging cycles. Mid-range models consume 200-400 watts. Heavy-duty scooters may require 400-600 watts for optimal charging speed. Here’s why it matters – using inadequate electrical systems or overloading circuits creates serious fire risks and equipment damage. Your home’s electrical circuits can easily handle scooter charging loads. Standard 15-amp household circuits support up to 1,800 watts safely. Most scooters use less than one-third of this capacity. However, avoid charging multiple high-power devices on the same circuit simultaneously. Scooter Type Power Draw Outlet Type Circuit Requirement Charging Time Lightweight (24V) 100-200W Standard 110V 15A circuit 2-4 hours Mid-range (36V) 200-400W Standard 110V 15A circuit 3-6 hours Heavy-duty (48V) 400-600W Standard 110V 20A circuit 4-8 hours Indoor charging locations work best in garages, basements, utility rooms, or dedicated storage areas. These spaces offer excellent ventilation, hard flooring, and separation from living areas. Good ventilation prevents heat buildup that damages batteries and creates safety hazards. Outdoor charging requires weatherproof electrical outlets and covered areas protecting equipment from rain. GFCI outlets provide additional safety for outdoor installations. Never charge in direct sunlight or during storms. Safety equipment should include smoke detectors, fire extinguishers, and adequate lighting in charging areas. Keep charging spaces clean, organized, and free from clutter. Remove flammable materials like gasoline, paint, or cleaning supplies from charging zones. 2. How Do You Set Up a Safe Charging Station at Home? Choose locations with concrete, tile, or other non-flammable flooring for your charging station. Hard surfaces resist fire better than wood, carpet, or vinyl flooring. Concrete garage floors provide ideal charging surfaces with excellent fire resistance. Proper ventilation prevents dangerous heat buildup during charging cycles. Open windows, doors, or use exhaust fans to maintain air circulation. Avoid small closets, tight spaces, or areas without adequate airflow that trap heat and potentially toxic fumes. Cable management keeps your charging setup organized, safe, and professional-looking. Use cable ties, cord organizers, or cable trays to secure charging cords. Route cables away from walkways, doorways, and high-traffic areas to prevent tripping hazards. The best part? A well-designed charging station makes daily use more convenient while dramatically improving safety for your entire household. Dedicated charging areas should include adequate lighting for safe operation during evening hours. Install motion-activated LED lights or permanent fixtures providing clear visibility. Good lighting helps you spot potential problems quickly. Location Type Ventilation Rating Floor Type Safety Score Setup Cost Garage Excellent Concrete 9/10 $50-100 Basement Good Concrete 8/10 $75-150 Utility room Good Tile 7/10 $100-200 Covered patio Excellent Concrete 8/10 $150-300 Fire safety equipment should remain easily accessible from your charging area. Install smoke detectors if none exist in the charging space. Keep a Class C fire extinguisher rated for electrical fires within 10 feet of charging equipment. Temperature control significantly impacts battery health, charging efficiency, and safety. Maintain charging areas between 50-80°F when possible. Extreme temperatures damage batteries, reduce charging efficiency, and create safety risks. Storage solutions keep charging accessories organized and readily available. Install shelves, hooks, or cabinets for chargers, cables, and safety equipment. Organized storage prevents damage and makes equipment easy to find. 3. What Charging Equipment Do You Need? Original manufacturer chargers provide the safest, most reliable charging experience available. Manufacturers design these chargers specifically for your scooter’s battery chemistry, voltage, and capacity requirements. Using original equipment prevents compatibility issues and safety hazards. Third-party chargers may seem cost-effective but often lack proper safety features. Cheap alternatives may use incorrect voltages, inadequate current regulation, or poor-quality components. These deficiencies can damage batteries, create fire hazards, or void warranties. Extension cords work safely when chosen and used correctly. Select heavy-duty cords rated for your scooter’s maximum power draw plus 25% safety margin. Use 12-gauge cords for most scooters. Avoid lightweight household extension cords that overheat under load. Now, you might be wondering about smart charging accessories that add convenience, safety features, and automated control to your charging setup. Surge protectors guard expensive electronics against power spikes, lightning strikes, and electrical fluctuations. Choose models rated for your scooter’s wattage with adequate joule ratings. Replace surge protectors every 3-5 years as protection capabilities degrade over time. Equipment Type Primary Purpose Safety Benefit Typical Cost Replacement Interval Original charger Primary charging Maximum compatibility $30-80 3-5 years Heavy-duty extension Reach distant outlets Prevents overheating $15-30 5-10 years Surge protector Spike protection Prevents damage $20-50 3-5 years Smart timer Automated control Prevents overcharging $15-40 10+ years Smart timers prevent overcharging by automatically cutting power after predetermined periods. Program timers for your battery’s full charging time plus 30-60 minutes buffer. This prevents leaving chargers connected indefinitely while ensuring complete charging. Power strips with individual switches provide convenient control over multiple devices. Choose models with built-in surge protection and adequate amp ratings

Is It Safe to Charge Your Electric Scooter at Home? Read More »

How Long Does It Take to Charge an Electric Scooter? Quick Guide (2026)

No power in your scooter? Breaking down on the road wastes time and can be unsafe. Understanding how long it takes to charge an electric scooter is essential for anyone using this convenient transport mode. Electric scooters take 3-12 hours to charge. This depends on battery size and charger type. This guide explains key factors and offers tips to improve charging speed. Want to know how to charge faster without harming the battery? How to extend battery life? Keep reading for answers. 1. How Long Does an Electric Scooter Take to Charge? Most electric scooters require 3-12 hours for a full charge, depending on several factors. Let’s get straight to it. Different Brand Charging Times ● Entry-level scooters with smaller batteries typically charge in 3-5 hours, while high-performance models with larger batteries may need 8-12 hours. Dynamic Scooter’s Model B strikes a balance, charging fully in about 4-5 hours with its standard charger, making it practical for daily commuters. Main Factors Influencing Charge Time ● Battery capacity (measured in Ah or Wh) is crucial – larger capacity means longer charging time. Charger power (in Watts) directly affects speed – higher power delivers energy faster. Current battery level and health also matter – charging from empty takes longer, and older batteries charge less efficiently. Dynamic Scooter Charging Advantage ● The Model B features an advanced Battery Management System that optimizes charging, making it approximately 20% faster than comparable scooters. Here’s the real kicker: its removable battery design allows users to purchase a spare, eliminating downtime completely – use one battery while charging another. Scooter Category Battery Type Typical Capacity Standard Charge Time Notes Dynamic Scooter Model B Li-ion Medium 4-5 hours Removable battery, optimized BMS Entry-Level Commuter Li-ion Small 3-5 hours Basic features Mid-Range Commuter Li-ion Medium 5-8 hours Balanced performance High-Performance Li-ion Large 8-12+ hours Extended range Older Models Lead-Acid Medium 6-12 hours Older technology Seasonal changes also impact charging. Cold temperatures can add 1-2 hours to charging time, while the optimal range (15-25°C) ensures maximum efficiency. 2. How Does Battery Capacity Affect Charging Time? Battery capacity significantly determines charging duration. It’s a straightforward relationship, mostly. Common Electric Scooter Battery Capacities ● Entry-level scooters feature 4-6Ah batteries, mainstream commuters like Dynamic Scooter Model B typically have 5-15Ah, while high-performance models can reach 30Ah or more. Larger capacity means longer range but also longer charging time. Relationship Between Capacity and Charge Time ● The relationship is generally linear – double the capacity roughly doubles charging time with the same charger. However, most lithium-ion batteries charge faster initially (up to 80%) and then slow down for the final 20% to protect battery health. Determining Your Scooter’s Battery Capacity ● Check your user manual, specification sheet, or the battery label itself. As a rough estimate, 1Ah typically provides 3-5 miles of range, though this varies with riding conditions. Battery Capacity Charging Time (Standard) Charging Time (Fast) Estimated Range 4-6Ah 3-5 hours 1.5-3 hours 9-25 miles 7.5-10Ah 4-6 hours 2-4 hours 12-30 miles 10-15Ah 5-8 hours 2.5-5 hours 15-40 miles 15-20Ah 7-10 hours 3.5-6 hours 21-50 miles Remember that battery capacity degrades over time, affecting both charging time and range. 3. Will Charger Type Change Charging Speed? The charger type significantly impacts charging speed. This is where things get interesting. Standard vs. Fast Chargers ● Standard chargers (typically 1.5-2A output) prioritize battery longevity with slower charging. Fast chargers (3-5A or more) can reduce charging time by 40-60% but may affect long-term battery health. Dynamic Scooter provides an efficient standard charger, with faster options available for those prioritizing speed. Charging Time Differences by Wattage ● Higher wattage means faster charging. For example, doubling the charger’s wattage from 84W to 168W could potentially halve the charging time, assuming the battery can handle the increased power safely. Choosing the Right Charger ● Safety and compatibility are paramount. Always ensure the charger’s voltage matches your scooter’s battery voltage, the connector is compatible, and the current doesn’t exceed what your battery can safely handle. Stick with manufacturer-recommended chargers whenever possible. Charger Type Typical Power Charging Speed Impact on Battery Best For Standard Charger Low Slow Minimal Regular overnight charging Official Fast Medium-High Fast Moderate Occasional quick charging Third-Party Fast Very High Very Fast Potentially High Emergency use only (risky) Smart/Adjustable Variable Flexible Minimal-Moderate Optimizing charge/health For everyday charging, standard chargers are best for battery longevity. Save fast charging for when time is critical. 4. What Special Attention is Needed for the First Charge? The first charge sets the foundation for your battery’s health. Think of it as conditioning your battery. New Scooter First Charge Recommendations ● Most manufacturers recommend an extended first charge of 8-12 hours, even after the indicator shows full. This allows the Battery Management System to properly balance all cells in the battery pack, optimizing future performance. Optimal Duration for First Charge ● For lithium-ion batteries, 8-12 hours is typical; lead-acid batteries may need 12-24 hours. The key takeaway: don’t unplug when the light turns green – follow the manufacturer’s recommended duration for this critical first charge. Avoiding Common First Charge Mistakes ● Don’t use the scooter before the first full charge, don’t interrupt the charging process, always use the original charger, and ensure a suitable charging environment (moderate temperature, dry, well-ventilated). First Charge Action Recommendation Why It Matters Duration 8-12 hours (or per manual) Ensures proper cell balancing Charger Original only Guarantees compatibility and safety Environment 15-25°C, dry, ventilated Optimizes charging efficiency Interruptions None – complete cycle Allows full conditioning This small investment of time during the first charge pays dividends in battery performance and longevity. 5. How Can Electric Scooter Charging Time Be Shortened? Several strategies can reduce charging time when you’re in a hurry. Ready for the good part? Practical Fast Charging Techniques ● Using an official fast charger is the most direct method, potentially cutting charging time by 40-60%. Another approach is partial charging – since batteries charge fastest up to about 80%, stopping at this level can save 30-40% of

How Long Does It Take to Charge an Electric Scooter? Quick Guide (2026) Read More »

How Long Does an Electric Scooter Battery Last Per Charge?

Electric scooters have become a popular transportation option for short-distance travel. Let me break this down for you – understanding battery life helps you plan trips better and avoid getting stranded. Electric scooter batteries typically last between 5 to 40 miles per charge depending on various factors. Most commuter models average 15-25 miles under normal conditions. The actual range depends on battery capacity, rider weight, terrain type, weather conditions, and riding habits. But wait, there’s more to discover! Let’s explore exactly how these battery factors affect your daily rides. 1. What factors affect electric scooter battery range? You might be surprised by how many variables impact your electric scooter’s range. Battery performance is affected by numerous factors working together. The battery type and capacity serve as the foundation for range potential. Most electric scooters use lithium-ion batteries, measured in watt-hours (Wh). Higher capacity batteries store more energy, allowing for longer rides. Rider weight directly impacts range because heavier loads require more power. Most manufacturers test with riders weighing around 150-165 pounds. For every 20-30 pounds above this, expect a 5-10% decrease in range. Terrain dramatically affects battery consumption. Flat surfaces allow efficient energy use, while hills demand significantly more power. A 10% grade hill can reduce range by 50% compared to flat terrain. Factor Impact on Range Approximate Range Reduction Rider Weight Each 20-30 lbs over test weight 5-10% decrease Incline 10% grade hills Up to 50% decrease Speed Maximum speed vs. moderate speed 30-40% decrease Cold Weather Below 40°F/4°C 20-30% decrease Wind Strong headwind 10-15% decrease Speed significantly impacts range. Higher speeds require exponentially more power due to increased air resistance. Aggressive riding with frequent full-throttle acceleration can reduce range by 30-40%. Weather conditions play a crucial role. Cold temperatures particularly affect lithium-ion chemistry, temporarily reducing capacity. Riding in temperatures below 40°F (4°C) can decrease range by 20-30%. 2. What is the average battery runtime for different types of electric scooters? Here’s something you should know – not all electric scooters offer the same range capabilities. The market divides into three categories. Entry-level electric scooters typically offer ranges between 12-15 miles (19-24 km) per charge. These budget-friendly models usually feature smaller battery packs (250-300Wh) and take 4-5 hours to charge. Commuter electric scooters represent the mid-range segment with ranges between 15-30 miles (24-48 km). Battery capacities typically range from 350-600Wh with 5-7 hour charging times. Scooter Category Typical Range Battery Capacity Charging Time Average Price Entry-level 12-15 miles (19-24 km) 250-300Wh 4-5 hours $300-$500 Commuter 15-30 miles (24-48 km) 350-600Wh 5-7 hours $600-$1,200 Performance 30-60+ miles (48-97+ km) 700-1600Wh 8-12 hours $1,200-$3,000+ Dynamic Scooter Model B Up to 20 km (12 miles) Detachable lithium battery 3-4 hours $375.37 Performance electric scooters deliver impressive ranges between 30-60+ miles (48-97+ km). These premium models feature battery capacities exceeding 700Wh and weigh 60-100+ pounds. Dynamic Scooter Model B offers competitive range in the commuter category with up to 20 km (12 miles) per charge. Its detachable lithium battery allows convenient charging without moving the entire scooter. 3. How can you maximize your electric scooter’s battery life? Want to know the secret to getting more miles from each charge? Proper battery care and riding techniques can significantly extend your range. Adopt proper charging habits. Avoid letting your battery completely drain – lithium-ion batteries prefer partial discharge cycles. Maintain charge levels between 20% and 80% for optimal longevity. Use only the manufacturer-provided charger. Prevent complete discharge to protect your battery from damage. Lithium-ion batteries can suffer permanent capacity loss when fully depleted. Optimization Strategy Potential Range Increase Implementation Difficulty Maintain 20-80% charge 10-15% longer battery lifespan Easy Ride at moderate speeds 20-30% more range per charge Easy Proper tire inflation 5-10% more range per charge Easy Reduce unnecessary weight 5-15% more range per charge Moderate Coast whenever possible 10-20% more range per charge Easy Store your scooter at appropriate temperatures. Lithium-ion batteries prefer moderate temperatures between 50-77°F (10-25°C). Extreme heat accelerates degradation even when not in use. Adjust your riding habits. Accelerate gradually rather than applying full throttle. Maintain steady speeds instead of constantly varying pace. Keep tires properly inflated to reduce rolling resistance. 4. How long does it take to charge an electric scooter battery? You might wonder how long you’ll need to wait before riding again after depleting your battery. Charging times vary based on battery capacity and charger specifications. Different capacity batteries require different charging times. Entry-level scooters with 250-300Wh batteries typically charge in 3-5 hours. Mid-range commuter scooters with 350-600Wh batteries generally require 5-7 hours. High-performance models with 700-1600Wh packs may need 8-12 hours. Charger specifications significantly impact charging duration. Standard chargers typically output 1.5-2A, while fast chargers may deliver 3-5A or more. Battery Capacity Standard Charger (2A) Fast Charger (4A) Ultra-Fast Charger (6A) 250Wh (Small) 3-4 hours 1.5-2 hours 1-1.5 hours 500Wh (Medium) 6-7 hours 3-3.5 hours 2-2.5 hours 1000Wh (Large) 10-12 hours 5-6 hours 3.5-4 hours 1500Wh (XL) 15-18 hours 7.5-9 hours 5-6 hours Lithium-ion batteries charge in three main phases. The first phase (constant current) occurs when the battery is mostly depleted, charging relatively quickly to about 80% capacity. The second phase (constant voltage) slows down as the battery approaches full. The final phase (trickle charging) tops off the remaining capacity very slowly. First-time charging requires special attention. Many manufacturers recommend an initial charge of 8-12 hours to calibrate the battery management system. 5. How many charging cycles can an electric scooter battery last? Let’s talk about the long-term durability of your investment. Battery lifespan is measured in charging cycles. The average lifecycle of lithium-ion batteries typically ranges from 300 to 500 complete charging cycles before capacity noticeably decreases. After these cycles, batteries don’t suddenly fail but gradually lose capacity to about 70-80% of original. Several factors affect cycle life. Charging habits significantly impact lifespan – consistently charging from empty to full causes more stress than partial charging between 20% and 80%. Operating temperature plays a crucial role, with extreme heat accelerating degradation. Battery Usage Pattern

How Long Does an Electric Scooter Battery Last Per Charge? Read More »

Shopping Cart
Scroll to Top