There’s nothing more frustrating than plugging in your electric scooter after a ride, only to come back later and find that it hasn’t charged at all. You’re left with a dead scooter, a disrupted schedule, and a nagging worry that you’re facing an expensive repair. Is it the charger? The battery? The scooter itself?
If your electric scooter isn’t charging, the most common culprits are a faulty charger, a dead or disconnected battery, a damaged charging port, or a tripped Battery Management System (BMS). By following a systematic process of elimination, you can often diagnose and even fix the issue yourself without needing a costly repair.
So, where do you start? Let me explain… This comprehensive guide will walk you through a step-by-step troubleshooting process, from checking the obvious to diagnosing more complex issues, helping you get your scooter powered up and back on the road.
1. What are the most common reasons a scooter won’t charge?
When your scooter refuses to charge, the problem almost always falls into one of three categories: the charger, the battery, or the scooter’s charging components. The key to a successful diagnosis is to work through the possibilities logically. Don’t immediately assume the worst—that your expensive battery is dead. The issue is often something much simpler and cheaper to fix. The first step is to perform a basic triage to narrow down the possibilities. Is the charger showing any lights? Does the charging port look clean and undamaged? Have you checked the power outlet?
Before you begin any troubleshooting, it’s crucial to take some safety precautions. You are dealing with electricity, so always unplug the charger from the wall and the scooter before inspecting any components. This is important because… working with a live electrical system can be dangerous. Start with the simplest and most external component—the charger—and work your way inward to the scooter itself. This process of elimination is the most effective way to pinpoint the exact source of the failure.
By following this methodical approach, you can avoid unnecessary guesswork. You’ll test each component in a logical sequence, ruling out potential causes one by one. This not only saves you time but also prevents you from replacing parts that aren’t actually broken. Most charging issues can be identified with just a few simple checks that anyone can perform at home.
| Component Category | Common Issues | First Step to Check |
| External Power | Faulty outlet, bad extension cord | Test the outlet with another device. |
| Charger | Damaged cable, internal failure | Check the charger’s indicator lights. |
| Scooter Components | Dirty port, blown fuse, BMS trip | Visually inspect the charging port. |

2. How do I properly test my electric scooter charger?
The charger is the most common point of failure, and it’s the easiest part to test. The first thing to check is the indicator light on the charger brick itself. Most chargers have a light that will be green when it’s plugged into the wall but not the scooter (or when the scooter is fully charged) and red when it’s actively charging. If the light doesn’t come on at all when you plug it into a known-good outlet, the charger is likely dead and needs to be replaced.
If the light turns green but stays green when you plug it into the scooter, it means the charger isn’t detecting the battery. This could be a problem with the charger, the port, or the battery. A more definitive test is to use a multimeter to check the charger’s output voltage. Here’s the deal… set your multimeter to the DC voltage setting and carefully touch the probes to the pins on the charger’s connector. The voltage should be slightly higher than the voltage of your scooter’s battery (e.g., a 42V charger for a 36V battery). If you get no reading or a very low reading, the charger is faulty.
Finally, do a thorough visual and physical inspection of the charger. Check the entire length of the cable for any cuts, frays, or sharp bends that could indicate a broken wire inside. Pay close attention to the points where the cable enters the charger brick and the connector, as these are common stress points. If you find any physical damage, stop using the charger immediately and replace it.
| Charger Light Status | Meaning | Next Action |
| No Light | No power to the charger, or it’s broken | Confirm outlet works; if so, replace charger. |
| Stays Green (when plugged into scooter) | Charger isn’t detecting the battery | Test charger voltage with a multimeter. |
| Stays Red (never turns green) | May indicate a battery or BMS issue | Leave it for several hours; if no change, investigate battery. |
3. Could the scooter’s charging port be the problem?
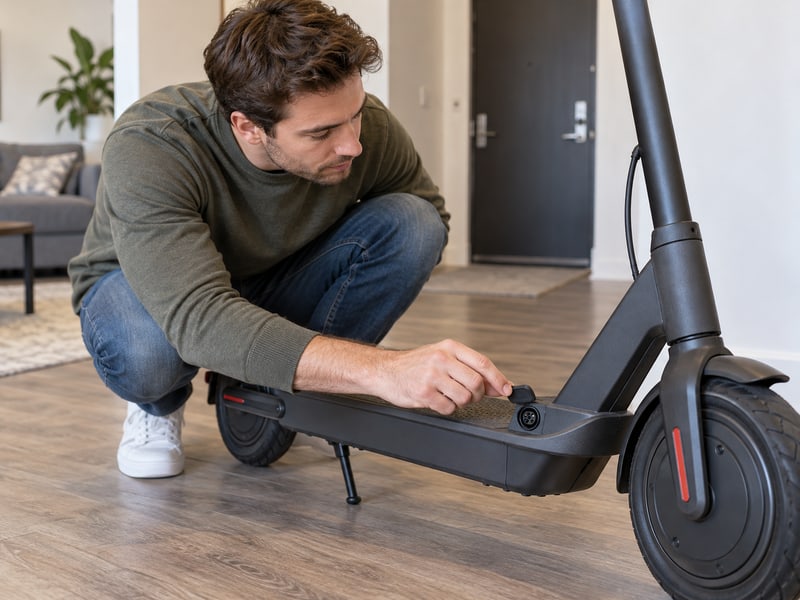
If you’ve confirmed your charger is working correctly, the next logical place to look is the scooter’s charging port. This is the physical connection point, and it’s exposed to dirt, moisture, and physical stress, making it a common source of problems. The first step is a simple visual inspection. Use a flashlight to look inside the port. Is it clean? Or is it clogged with dirt, dust, or other debris? A poor connection due to debris can easily prevent a charge.
If the port is dirty, you can clean it carefully. Want to know the secret? Use a can of compressed air to blow out any loose debris. For more stubborn grime, you can use a dry cotton swab or a soft, non-metallic tool like a wooden toothpick to gently clean the contacts. Never use anything metal, as you could short-circuit the pins. Also, check for any signs of corrosion, which often looks like a green or white crusty buildup. Corrosion is a sign of moisture damage and can be a more serious issue.
While you’re inspecting the port, look closely at the pins inside. Are they all straight and uniform? A bent or broken pin is a definite cause of charging failure. If a pin is bent, you may be able to gently straighten it with a pair of fine-tipped tweezers, but be extremely careful not to break it. If a pin is broken or the port is heavily corroded, it will need to be replaced, which is a job best left to a professional.
| Charging Port Issue | How to Identify | Solution |
| Debris or Dirt | Visible obstruction inside the port | Clean with compressed air and a non-metallic tool. |
| Bent Pin(s) | One or more pins are not straight | Carefully attempt to straighten with tweezers; replace if it breaks. |
| Corrosion/Moisture | Green or white crusty buildup | Clean with isopropyl alcohol; if severe, port needs replacement. |

4. Is a completely dead battery preventing a charge?
Sometimes, the problem isn’t that the battery is faulty, but that it’s too dead. Lithium-ion batteries have a safety feature in their Battery Management System (BMS) that prevents them from being charged if their voltage drops below a certain critical level. This is known as a deep discharge or hibernation state. If you’ve left your scooter sitting unused for many months, the battery’s natural self-discharge may have drained it to this point. When you plug in the charger, the BMS refuses to accept a charge to protect the battery cells from damage.
In this situation, the charger light will typically stay green, just as it would if it weren’t connected to anything. The charger doesn’t “see” the battery because the BMS has effectively disconnected it. But here’s the thing… it is sometimes possible to revive a battery from this state, but it must be done with extreme caution. One method is to leave the charger plugged in for an extended period (8-12 hours). Sometimes, the charger can deliver a very small trickle of current that can slowly bring the battery voltage back up to a level where it will accept a normal charge.
Another method, which should only be attempted by those with experience, involves using a variable DC power supply to manually feed a very low current into the battery to “wake it up.” This is a risky procedure that can damage the battery or even cause a fire if done incorrectly. If leaving the charger plugged in doesn’t work, the safest option is to take the battery to a professional repair shop that has the proper equipment to safely revive it.
| Battery State | Voltage Level | Charger Behavior |
| Normal Discharge | Above the low-voltage cutoff | Charges normally (red light). |
| Deep Discharge (Hibernation) | Below the low-voltage cutoff | Charger light stays green; no charging. |
| Damaged/Dead Cells | May have voltage, but won’t hold a charge | May charge briefly then stop, or not charge at all. |
5. How does the Battery Management System (BMS) stop a charge?
The Battery Management System (BMS) is the brain of your scooter’s battery pack. It’s a small circuit board that monitors the health and status of all the individual battery cells. Its primary job is to protect the battery from dangerous conditions, including over-charging, over-discharging, overheating, and short circuits. If the BMS detects any of these conditions, it will trip and cut off the connection between the battery and the rest of the world, including the charging port.
This is a protective measure, but it can sometimes be the reason your scooter isn’t charging. For example, if the battery gets too hot during a ride and you immediately plug it in, the BMS may prevent charging until the temperature returns to a safe level. Similarly, if there’s a voltage imbalance between the cells, the BMS might shut down to prevent further damage. The bottom line? The BMS is doing its job, but you need to figure out why it was triggered.
In some cases, a BMS can be reset. This can sometimes be as simple as leaving the scooter unplugged for 30 minutes to allow the BMS to reset itself. For some models, there may be a specific reset procedure outlined in the user manual. However, if the BMS has tripped due to a persistent fault, such as a group of dead cells, it will likely trip again immediately. A faulty BMS itself can also be the problem, in which case it will need to be replaced by a technician.
| BMS Fault Condition | What It Means | Potential User Action |
| Over-Voltage Protection | BMS detected voltage is too high during charging | Use the correct charger; may indicate a faulty charger or BMS. |
| Under-Voltage Protection | Battery voltage dropped too low (deep discharge) | Try trickle charging; may require professional revival. |
| Over-Temperature Protection | Battery is too hot or too cold to charge safely | Let the scooter rest at room temperature before charging. |

6. Can a simple blown fuse be the culprit?
Many electric scooters have one or more fuses integrated into their electrical system as a safety device. A fuse is designed to be a weak link; it contains a thin wire that will melt and break the circuit if the electrical current exceeds a safe level. This protects more expensive components like the battery and controller from being damaged by a power surge or short circuit. A blown fuse is a very common and inexpensive reason for a scooter to fail to charge or power on.
Locating the fuse can sometimes be tricky. It’s often housed in a small, inline plastic container along the wiring that connects the charging port to the battery or controller. You may need to remove a deck panel to access it. Let me explain… once you find the fuse holder, you can usually open it by hand or with a small screwdriver. The fuse itself is typically a small glass or plastic cylinder with metal caps on each end.
To check if the fuse is blown, simply remove it and hold it up to the light. You should be able to see a thin wire running through the center. If that wire is broken or if the inside of the glass looks burnt or cloudy, the fuse is blown and needs to be replaced. It is absolutely critical that you replace it with a new fuse of the exact same amperage rating, which is always printed on the fuse itself. Using a fuse with a higher rating can lead to catastrophic damage to your scooter’s electronics.
| Fuse Troubleshooting Step | Purpose | Instructions |
| Locate the Fuse | Find the fuse holder in the scooter’s wiring | Look for an inline plastic case near the charging port or battery. |
| Inspect the Fuse | Check if the internal wire is broken | Remove the fuse and hold it up to the light. |
| Replace the Fuse | Restore the electrical circuit | Use a new fuse with the exact same amperage rating. |
7. Are external factors like the power outlet to blame?
It’s a step that’s so simple it’s often overlooked, but you should always verify that the power source itself is working correctly. The problem might have nothing to do with your scooter or charger at all. The wall outlet you’re using could be faulty, or the circuit breaker connected to it could have tripped. The easiest way to check this is to unplug your scooter charger and plug in another device that you know works, like a lamp or a phone charger.
If the other device doesn’t work either, you’ve found your problem. Check your home’s circuit breaker box to see if a breaker has been tripped. If it has, reset it and try again. If the outlet still doesn’t work, you’ll need an electrician to fix it. This is why… you should always start your troubleshooting with the simplest, most external factors first. It can save you a lot of time and unnecessary testing of the scooter itself.
It’s also important to consider the quality of the power source. Ideally, you should plug your charger directly into a wall outlet. Avoid using long extension cords or overloaded power strips if possible. A long or low-quality extension cord can have a voltage drop that may prevent the charger from operating correctly. A stable, grounded power source is always the best choice for ensuring a safe and effective charge.
| External Factor | How to Test | Solution |
| Faulty Wall Outlet | Plug in a different, working device | If it doesn’t work, check the circuit breaker or call an electrician. |
| Tripped Circuit Breaker | Check your home’s breaker box | Flip the tripped breaker back to the ‘On’ position. |
| Bad Extension Cord | Plug the charger directly into the wall | If it works, replace the extension cord. |
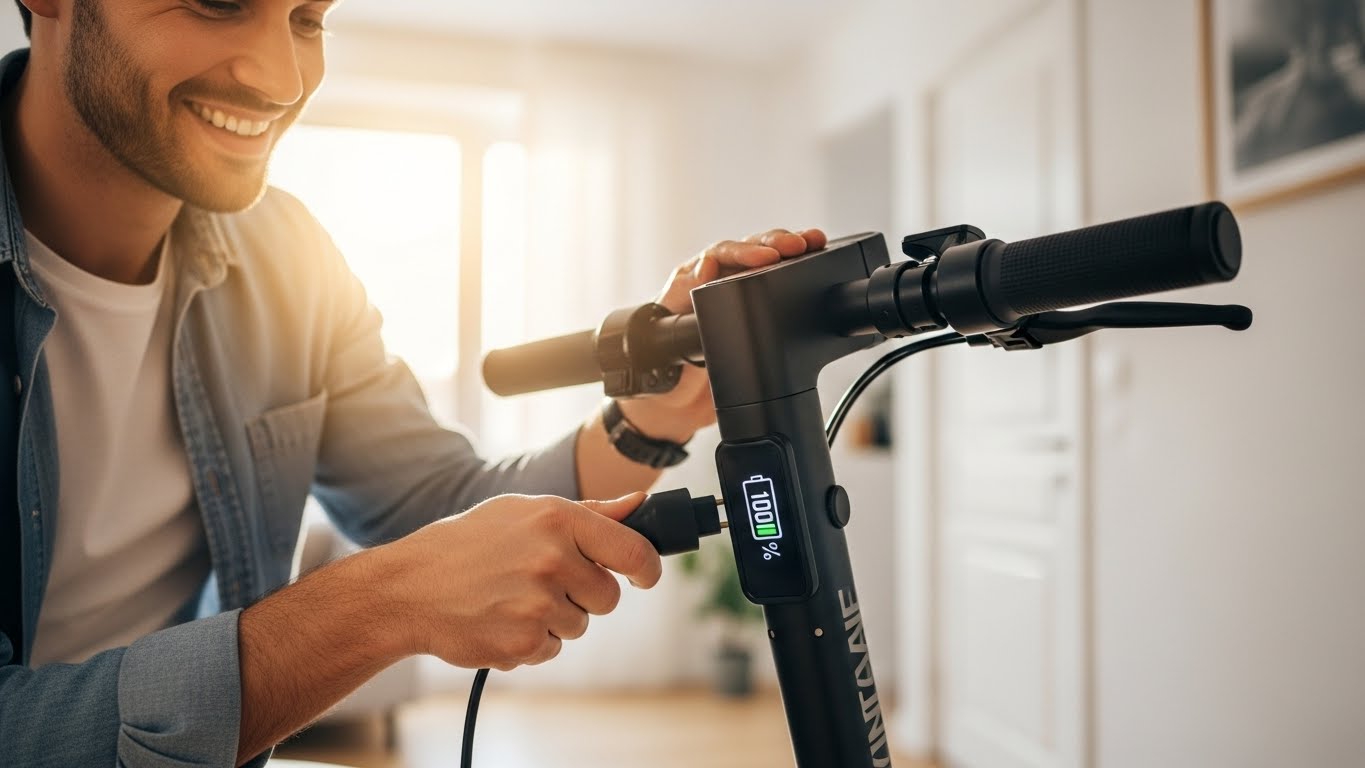
8. What is a step-by-step guide to troubleshooting at home?
Facing a non-charging scooter can be daunting, but a methodical approach makes it manageable. Here is a simple, step-by-step guide you can follow at home before deciding to call a professional. You’ll need a few basic tools: a multimeter, a flashlight, and possibly some screwdrivers to access your scooter’s deck. Remember to perform these steps with the charger unplugged from both the wall and the scooter.
Step 1: Check the Power Source. Plug a lamp into the wall outlet to confirm it has power. Check your circuit breaker.
Step 2: Inspect the Charger. Plug the charger into the confirmed-working outlet. Does the indicator light turn on? Inspect the full length of the cable and the brick for any damage.
Step 3: Test the Charger Output. Use a multimeter to test the DC voltage output of the charger’s connector. It should be a few volts higher than your battery’s rating. You need to know this… if you get no voltage, the charger is your problem.
Step 4: Inspect the Charging Port. Use a flashlight to look for debris, corrosion, or bent pins inside the scooter’s port. Clean it carefully if needed.
Step 5: Check the Fuse. If you can access it, remove and inspect the fuse. Replace it if it’s blown with one of the same rating.
Step 6: The Long Charge. If all of the above checks out, plug the scooter in and leave it for 8-12 hours. This can sometimes revive a deeply discharged battery. If it still doesn’t charge after all these steps, the problem is likely a faulty battery or BMS, and it’s time to seek professional help.
| Step | Action | Purpose |
| 1 | Test the wall outlet | Rule out an external power issue. |
| 2 & 3 | Inspect and test the charger | Isolate the problem to the charger itself. |
| 4 & 5 | Inspect the port and fuse | Check for simple, physical connection issues on the scooter. |
9. When is it time to call a professional for repairs?
While many charging issues can be solved at home, there are definite signs that indicate you should stop troubleshooting and call a professional. The most serious red flag is any issue related to the battery pack itself. If you notice that your battery casing is swollen, bulging, or has any cracks, stop immediately. A swollen lithium-ion battery is a serious fire hazard and must be handled by an expert. Similarly, if you smell a strange chemical or burning odor coming from the scooter, or if you see any smoke, disconnect all power and move the scooter to a safe outdoor location away from flammable materials.
Attempting to perform advanced electrical work without the proper knowledge and tools is extremely risky. You need to understand this… opening a sealed battery pack or attempting to solder wires connected to the BMS can lead to a short circuit, which can cause a fire, damage the scooter’s electronics, or result in personal injury. The high voltage in some scooter systems can also deliver a dangerous electric shock.
If you have followed the basic troubleshooting guide and have ruled out the outlet, charger, port, and fuse, the problem is almost certainly with the battery or the BMS. At this point, your diagnostic work is done. You can confidently take your scooter to a qualified repair technician and tell them exactly what steps you’ve already taken. This will save them time and save you money on the repair. Don’t risk your safety or your scooter’s health by venturing into repairs you’re not equipped to handle.
| Warning Sign | What It Means | Action to Take |
| Swollen Battery | Internal cell failure; high risk of fire | Stop, unplug, and take to a professional immediately. |
| Burning Smell or Smoke | A component is shorting out and burning | Disconnect power and move the scooter to a safe place. |
| Problem Persists After Basic Checks | The issue is likely the battery or BMS | Stop troubleshooting and consult a qualified technician. |

10. How can I prevent charging problems from happening?
Preventing problems is always better than fixing them. With proper care and good habits, you can significantly reduce the likelihood of ever facing a charging issue. The most important rule is to always use the official charger that came with your scooter. Chargers are not universal. Using a charger with the wrong voltage or current rating is one of the fastest ways to destroy your battery and BMS. At Dynamic Scooter, our chargers are specifically designed to optimize the health and lifespan of our batteries.
Develop good charging habits. Avoid letting your battery drain completely to 0%. It’s best to charge it after each use, or at least before it drops below 20%. Also, don’t leave it on the charger for days on end after it’s already full. While smart chargers do shut off, it’s still best practice to unplug it. The best part? After a long ride, let your scooter cool down for about 30 minutes before plugging it in. Charging a hot battery can accelerate its degradation.
Finally, keep your equipment clean and dry. Regularly inspect your charging port for debris and clean it out. Store your scooter and charger in a dry, temperature-controlled environment. Don’t leave your scooter out in the rain, and if you do get caught in a downpour, make sure the scooter is completely dry, especially the charging port, before you attempt to charge it. These simple habits will go a long way in ensuring your scooter charges reliably for years to come.
| Prevention Habit | Why It’s Important | Simple Action |
| Use the Correct Charger | Prevents damage to the battery and BMS | Only use the charger that came with your scooter. |
| Smart Charging | Preserves long-term battery health | Avoid full drains and let the scooter cool before charging. |
| Keep It Clean and Dry | Prevents corrosion and short circuits | Regularly inspect and clean the charging port. |
Conclusion
A scooter that won’t charge can be a major inconvenience, but it’s often a problem you can solve yourself. By systematically checking the power source, charger, charging port, and fuses, you can identify and fix the most common issues without a trip to the repair shop. Understanding how the battery and BMS work helps you recognize when the problem is more serious and requires professional attention. Remember that the key to a long and healthy life for your scooter is prevention.
Using the correct charger, adopting smart charging habits, and keeping your scooter clean and dry will minimize problems down the road. If you’re ever in doubt, the service team at Dynamic Scooter is here to help you diagnose the issue and get you back to riding safely.
FAQ
Q1: What do the different colored lights on my charger indicate?
Typically, a red light means the scooter is actively charging, and a green light means the battery is fully charged or the charger is not connected to the scooter. If there is no light, the charger is not receiving power or is broken.
Q2: Is it safe to use a charger from a different scooter brand?
No, you should never use a charger that was not specifically designed for your scooter model. Even if the connector fits, the voltage and current ratings may be different, which can severely damage your battery and create a fire hazard.
Q3: My scooter charges, but the battery drains extremely fast. What’s the issue?
This is a classic sign of a degraded battery. Over time, all batteries lose their ability to hold a full charge. If your range has decreased significantly, the battery pack is likely nearing the end of its life and will need to be replaced.
Q4: Why does my charger get hot when plugged in? Is that normal?
It is normal for a charger to become warm during the charging process, as some energy is always lost as heat. However, if it becomes uncomfortably hot to the touch, it could be a sign that the charger is faulty or is working too hard, and you should unplug it and have it inspected.
Q5: How much does it typically cost to replace an electric scooter battery?
The cost can vary widely depending on the brand and capacity, but you can generally expect a replacement battery to cost between $150 and $500. It is the most expensive component of the scooter, which is why proper care is so important.