Overcharging damages batteries and creates fire risks. Many riders guess when charging is complete and damage their scooters. Knowing the right indicators protects your investment and keeps you safe.
Electric scooters show full charge through LED indicator lights, display percentages, charger status changes, and physical signs like reduced heat. Most chargers change from red to green when complete. Display screens show 100% or full battery bars. Charging typically takes 4-8 hours depending on battery size. Chargers become cooler and fans may stop when finished. Some scooters have mobile app notifications. Faulty indicators can give wrong signals, so learn multiple methods to verify full charge. Proper charging habits extend battery life and prevent safety hazards.
This guide covers all the ways to identify when your electric scooter has reached full charge safely.
1. What Visual Indicators Show Your Electric Scooter Is Fully Charged?
Visual indicators provide the most obvious signs that your electric scooter has finished charging. Most scooters have multiple visual cues that work together to confirm charging status. Here’s the deal… learning to read these indicators correctly prevents overcharging and extends your battery’s life significantly.
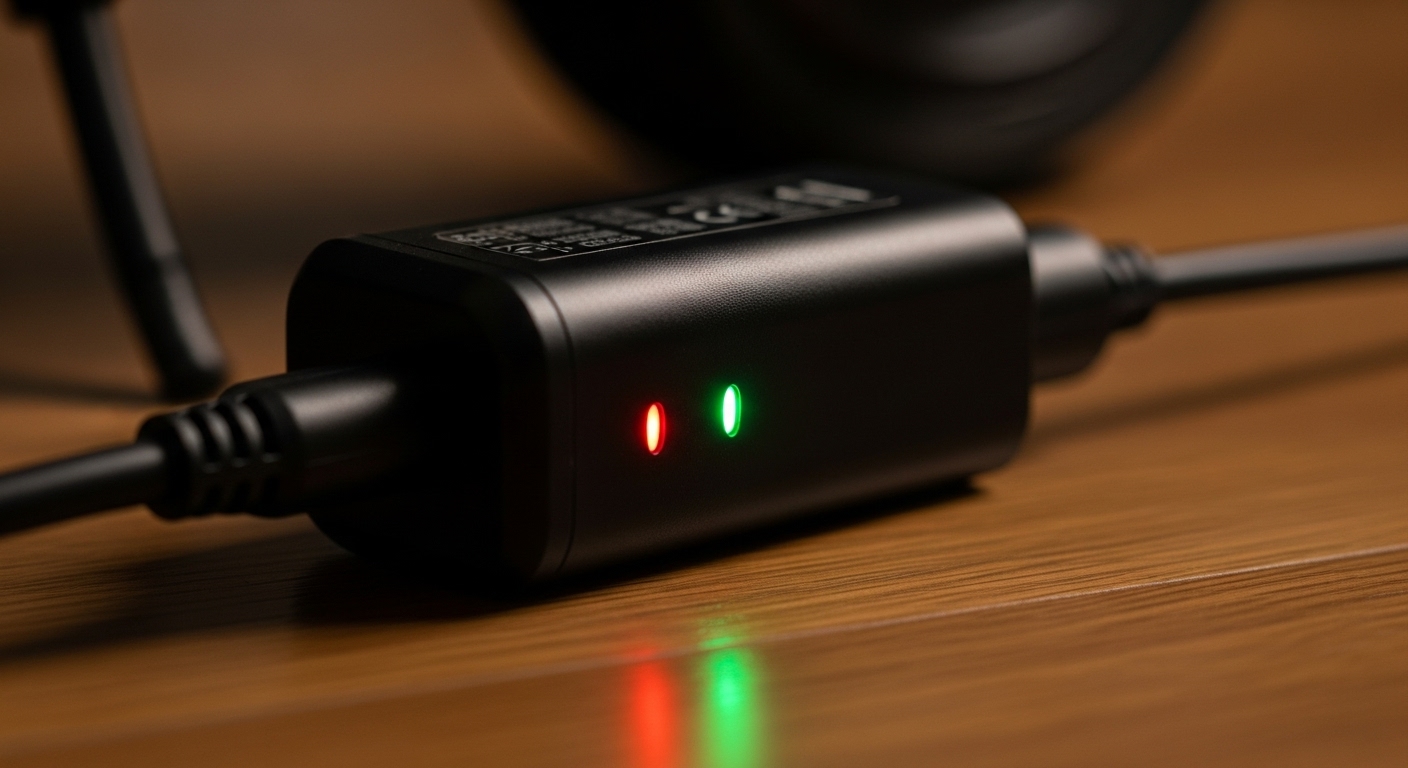
LED charging lights are the most common visual indicator on electric scooters. Most systems use red lights during charging and green lights when complete. Some models use amber or yellow lights for intermediate charging stages. The lights are usually located on the dashboard, near the charging port, or on the charger itself.
Display screen battery percentage readings provide precise charging information when available. Digital displays show exact percentages from 0% to 100%. Some screens also show estimated charging time remaining. These displays are more accurate than simple light indicators but can still have small errors.
Charger indicator lights work independently of the scooter’s own indicators. Most chargers have LED lights that change color when charging completes. Red typically means charging, while green indicates completion. Some chargers use different color schemes, so check your manual for specific meanings.
Dashboard symbols and charging icons appear on more advanced scooter displays. Battery symbols may show filling animation during charging. Plug icons or lightning bolts indicate active charging status. These symbols disappear or change when charging finishes completely.
| Indicator Type | Charging Status | Full Charge Status | Reliability Level |
| LED Lights | Red/Orange | Green | High |
| Display Percentage | 0-99% | 100% | Very High |
| Charger Lights | Red/Blinking | Green/Solid | High |
| Dashboard Icons | Active symbols | Inactive/Changed | Medium |

2. How Do Charger Indicators Tell You About Charging Status?
Charger indicators provide reliable information about charging progress and completion. Understanding your specific charger’s signals prevents confusion and ensures proper charging. This is important because… different charger brands use different indicator systems, and misreading them can lead to incomplete charging or battery damage.
Red, green, and amber light meanings vary by manufacturer but follow common patterns. Red usually indicates active charging or connection to power. Green typically means charging is complete and the battery is full. Amber or yellow lights often show intermediate states like initialization or cooling periods.
Solid versus blinking light patterns provide additional information about charging status. Solid lights usually indicate stable conditions like active charging or completion. Blinking lights may show initialization, error conditions, or temperature management. Fast blinking often indicates problems that need attention.
Charger fan noise and heat changes give physical clues about charging activity. Active charging generates heat that triggers cooling fans. Fans typically run continuously during heavy charging periods. When charging completes, fans may stop or run less frequently as heat decreases.
Different charger types use varying indicator systems that require specific knowledge. Smart chargers have multiple lights and complex patterns. Basic chargers may have only one light with simple on/off indication. Fast chargers often have additional indicators for temperature and current levels.
| Light Color | Common Meaning | Pattern Type | Action Required |
| Red | Charging active | Solid | Continue charging |
| Green | Charging complete | Solid | Safe to disconnect |
| Amber/Yellow | Initialization/Cooling | Solid or blinking | Wait for change |
| Blinking Red | Error condition | Fast blinking | Check connections |
3. What Do Battery Level Displays and Gauges Mean?
Battery displays provide detailed information about charge levels and charging progress. Understanding how these displays work helps you make better charging decisions. Now, you might be wondering… how accurate are these displays really? The answer depends on the technology used and the age of your battery.
Digital percentage readings show specific charge levels from 0% to 100%. These readings are calculated based on voltage measurements and battery algorithms. Accuracy is highest when batteries are new and calibrated properly. Older batteries may show less accurate readings due to capacity degradation.
Battery bar indicators use visual bars or segments to show charge levels. Each bar typically represents 10-25% of total capacity. These indicators are less precise than percentage displays but easier to read quickly. Some systems combine bars with percentage numbers for better accuracy.
Voltage readings provide technical information about actual battery condition. Fully charged batteries should read specific voltages depending on their type. Lithium batteries typically read 4.2 volts per cell when fully charged. These readings are most accurate but require technical knowledge to interpret.
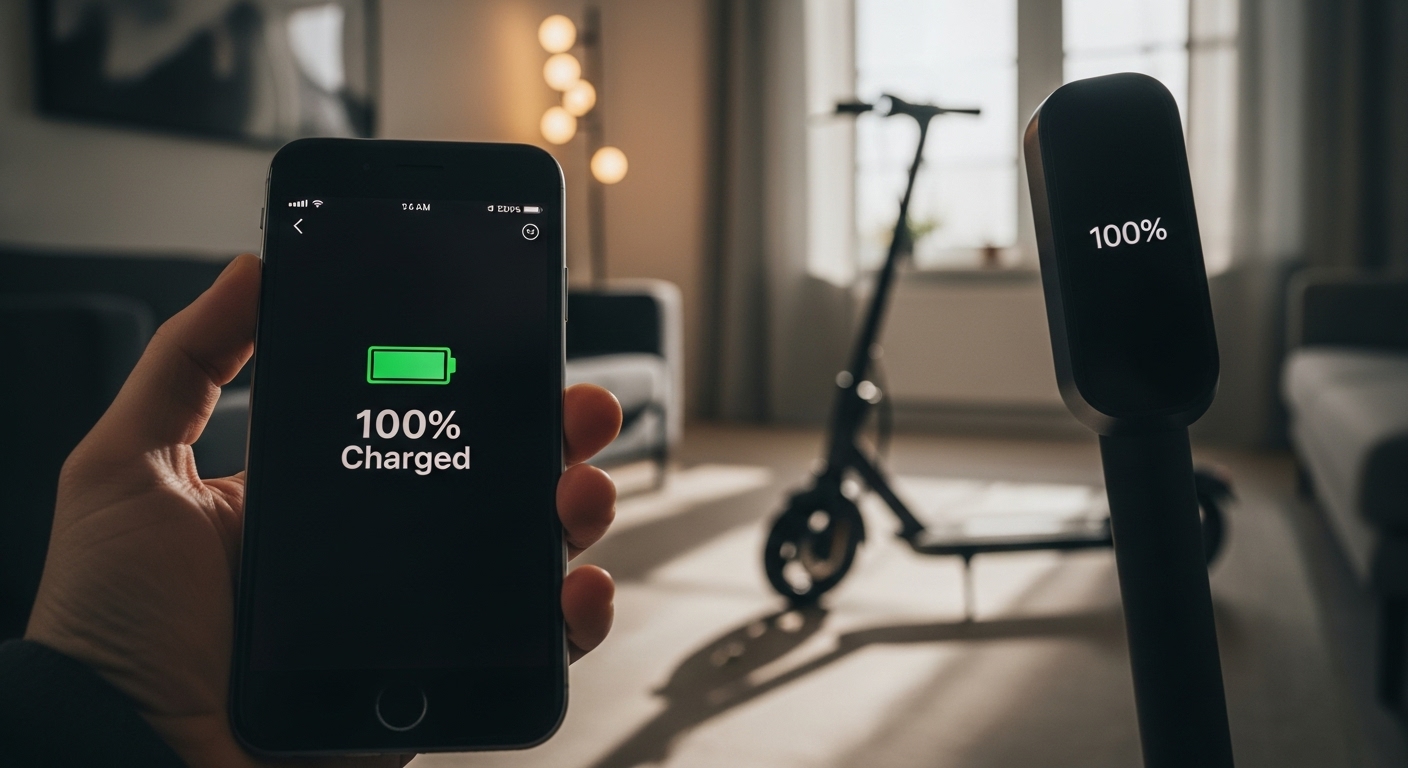
Mobile app notifications send alerts to smartphones when charging completes. Apps can provide detailed charging information and history. Some apps allow remote monitoring of charging progress. These features require compatible scooters and proper app setup to function correctly.
| Display Type | Accuracy Level | Information Provided | Best Use Case |
| Digital Percentage | High | Exact charge level | Precise monitoring |
| Battery Bars | Medium | General charge range | Quick visual check |
| Voltage Reading | Very High | Technical battery state | Professional diagnosis |
| Mobile App | High | Detailed charging data | Remote monitoring |
4. How Long Should Electric Scooter Charging Take?
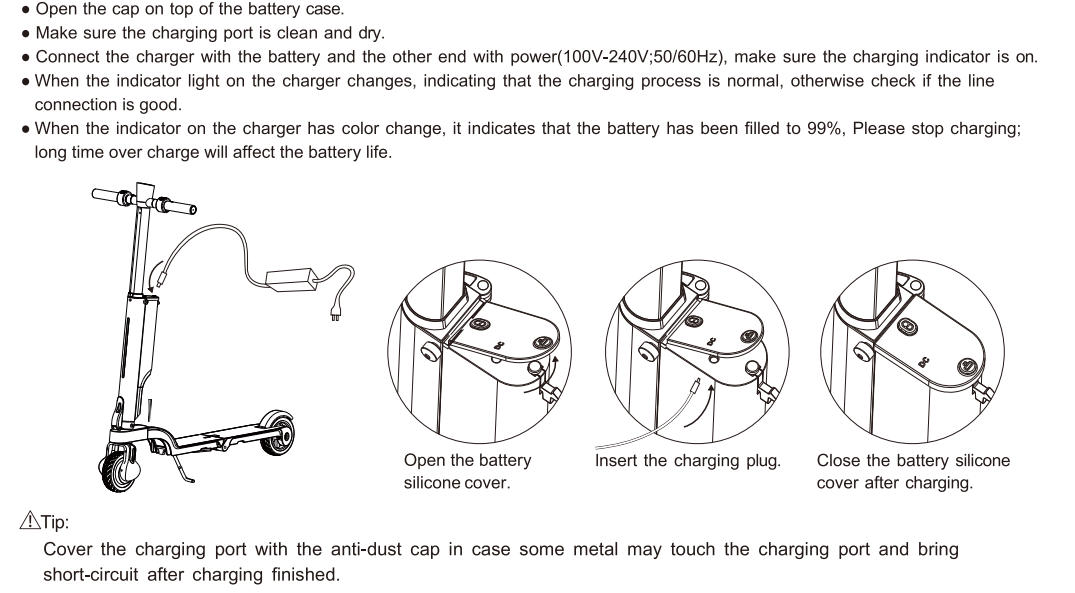
Charging time varies significantly based on battery size, charger type, and current charge level. Understanding normal charging times helps identify problems early. Want to know the secret? timing your charging cycles helps you develop better charging habits and catch issues before they become expensive problems.
Standard charging times range from 3-12 hours for most electric scooters. Small batteries (5-10Ah) typically charge in 3-4 hours. Medium batteries (10-15Ah) usually need 4-6 hours. Large batteries (15Ah+) may require 6-12 hours or more for complete charging.
Fast charging systems can reduce charging times by 30-50% with compatible equipment. Fast chargers use higher currents to charge batteries more quickly. Not all scooters support fast charging safely. Using incompatible fast chargers can damage batteries or create safety hazards.
Factors affecting charging duration include temperature, battery age, and starting charge level. Cold temperatures slow chemical reactions and extend charging times. Hot temperatures may trigger thermal protection that slows charging. Older batteries take longer to charge and may never reach full capacity.
Signs of abnormally slow or fast charging indicate potential problems requiring attention. Charging that takes much longer than normal suggests battery degradation or charger problems. Unusually fast charging may indicate faulty charge indicators or dangerous charging conditions that need immediate attention.
| Battery Size | Standard Charge Time | Fast Charge Time | Temperature Impact |
| 5-10Ah | 3-4 hours | 2-3 hours | +/- 1 hour |
| 10-15Ah | 4-6 hours | 3-4 hours | +/- 1.5 hours |
| 15-20Ah | 6-8 hours | 4-6 hours | +/- 2 hours |
| 20Ah+ | 8+ hours | 6+ hours | +/- 2+ hours |
5. What Sounds and Physical Changes Indicate Full Charge?
Physical changes in chargers and batteries provide reliable indicators of charging completion. These changes are often more reliable than visual indicators alone. Let me explain… physical changes result from actual charging processes, making them harder to fake than electronic indicators that can malfunction.
Charger fan stopping or slowing down indicates reduced heat generation from completed charging. Active charging creates heat that requires cooling fan operation. When charging current decreases near completion, heat generation drops significantly. Fans may stop completely or run at reduced speeds when charging finishes.
Heat reduction in chargers and batteries shows decreased electrical activity. Chargers become noticeably cooler when charging completes. Battery areas may also feel less warm to the touch. This temperature change is gradual but noticeable when checked carefully.
Clicking sounds from charging systems may indicate relay operations during charge completion. Some chargers have internal relays that switch when charging finishes. These clicks are normal and indicate proper charger operation. Unusual clicking patterns may suggest charger problems requiring attention.
Vibration changes during charging occur in some scooter models with active cooling systems. Cooling fans create slight vibrations during operation. When fans stop or slow down, vibration levels decrease noticeably. These changes are subtle but can be felt when touching the scooter.
| Physical Change | What It Indicates | How to Check | Reliability Level |
| Fan Stopping | Reduced heat/completion | Listen for fan noise | High |
| Heat Reduction | Lower charging current | Feel charger temperature | High |
| Clicking Sounds | Relay switching | Listen near charger | Medium |
| Vibration Changes | Fan speed changes | Touch scooter frame | Low |
6. How Can You Verify Full Charge Without Indicators?
Alternative verification methods help when indicators fail or seem unreliable. These methods provide backup confirmation of charging status. The best part? these techniques work with any scooter regardless of indicator quality or functionality, giving you confidence in your charging status.
Voltage testing with multimeter readings provides the most accurate charge verification method. Fully charged lithium batteries read approximately 4.2 volts per cell. A 36V battery should read about 42V when fully charged. These readings are more accurate than any built-in indicator system.
Timing methods use known charging durations to estimate completion. Track how long your scooter normally takes to charge from empty. Set timers based on starting charge level and expected completion time. This method works well once you establish baseline charging times.
Physical inspection techniques involve checking connections and charger behavior. Ensure all connections are secure and clean. Look for signs of overheating or damage. Check that charger lights and fans behave normally throughout the charging process.
Professional testing equipment provides laboratory-level accuracy for charge verification. Battery analyzers can measure actual capacity and charge state. Load testers verify battery performance under actual use conditions. These tools are expensive but provide definitive answers about battery condition.
| Verification Method | Accuracy Level | Equipment Needed | Skill Required |
| Voltage Testing | Very High | Multimeter | Basic electrical |
| Timing Method | Medium | Timer/clock | None |
| Physical Inspection | Low | Visual/touch | Basic observation |
| Professional Testing | Highest | Specialized equipment | Technical expertise |
7. What Problems Prevent Proper Charging Indication?
Indicator problems can mislead riders about actual charging status. Understanding common failures helps you identify and work around these issues. Here’s why it matters… faulty indicators can cause overcharging, undercharging, or dangerous conditions that damage batteries or create safety hazards.
Faulty indicator lights and display issues create false charging status information. LED lights may stick in one color or fail completely. Display screens can show incorrect percentages or freeze during charging. These problems often develop gradually and may not be immediately obvious.
Charger malfunctions cause incorrect signals about charging progress and completion. Internal charger circuits may fail while continuing to charge. Indicator circuits can fail independently of charging circuits. These failures can show completion when charging continues or show charging when it has stopped.
Battery management system problems affect how charge status is calculated and displayed. BMS circuits monitor individual cell voltages and calculate overall charge levels. Faulty BMS units may provide incorrect information to displays. These problems often require professional diagnosis and repair.
Connection issues between charger and scooter can affect charge status accuracy. Loose connections may cause intermittent charging that confuses indicators. Corroded contacts can create resistance that affects charging efficiency. Poor connections may prevent proper communication between charger and scooter systems.
| Problem Type | Symptoms | Safety Risk | Solution |
| Faulty Indicators | Wrong colors/readings | Medium | Use alternative methods |
| Charger Malfunctions | Inconsistent signals | High | Replace charger |
| BMS Problems | Erratic displays | High | Professional service |
| Connection Issues | Intermittent charging | Medium | Clean/tighten connections |

Conclusion
Electric scooters show full charge through LED lights, display percentages, charger indicators, and physical changes. Most chargers change from red to green when complete. Display screens show 100% or full battery bars. Charging takes 4-8 hours typically. Chargers become cooler and fans may stop when finished. Voltage testing provides the most accurate verification method. Faulty indicators can mislead about charging status. Learn multiple verification methods for safety. Time your charging cycles to establish normal patterns.
Dynamic Scooter designs reliable charging systems with clear indicators and robust battery management. Choose Dynamic Scooter for dependable charging performance and accurate status information that keeps your battery healthy.

FAQ
Q1: Why does my scooter show 100% but the charger light is still red?
This usually indicates a battery management system issue or a faulty charger indicator. The scooter’s display may be inaccurate, or the charger may have a defective light. Try using a multimeter to check actual voltage levels.
Q2: How accurate are the battery percentage displays on electric scooters?
Battery percentage displays are estimates and can be off by 10-20%. They’re most accurate when the battery is fully charged or nearly empty. Mid-range readings are less reliable due to voltage curve characteristics.
Q3: Is it normal for the charger to get hot during charging?
Yes, chargers normally generate heat during operation. However, excessive heat that’s too hot to touch may indicate a problem. Ensure proper ventilation and stop charging if the charger becomes dangerously hot.
Q4: Can I leave my scooter plugged in after it’s fully charged?
Most modern scooters have overcharge protection, but it’s still best practice to unplug after full charge. Continuous charging can reduce battery lifespan and increase fire risk, especially with cheaper scooters.
Q5: What should I do if my scooter never shows fully charged?
This could indicate battery degradation, charger problems, or faulty indicators. Try a different charger first, then check connections. If problems persist, have the battery and charging system professionally tested.