E1 error codes frustrate electric scooter riders worldwide. Your scooter stops working suddenly without warning. Ignoring this error can damage expensive components and leave you stranded miles from home. Quick diagnosis and proper repair get you back on the road safely.
E1 error on electric scooters typically indicates throttle or controller communication problems. Fix it by checking throttle connections, cleaning contacts, resetting the controller, or replacing faulty components. Most E1 errors can be resolved with basic tools and simple troubleshooting steps within 30 minutes.
But here’s the thing – not all E1 errors have the same cause or solution.
1. What Does E1 Error Mean on Electric Scooters?
E1 error codes signal communication breakdowns between your scooter’s throttle and controller. The controller can’t read throttle input properly. This safety feature prevents uncontrolled acceleration that could cause accidents.
Modern electric scooters use sophisticated diagnostic systems. These systems monitor dozens of components every millisecond. The controller checks throttle position, motor temperature, battery voltage, and brake status continuously.
Here’s why it matters – error codes protect both rider and equipment. Without proper communication, your scooter might accelerate unexpectedly. The E1 error forces the system into safe mode immediately.
Different manufacturers use varying error code systems for their models. Xiaomi scooters show E1 specifically for throttle communication failures. Segway models display similar codes for controller malfunctions. Razor scooters use E1 for speed sensor problems.
| Brand | E1 Error Meaning | Common Triggers | Display Method |
| Xiaomi | Throttle communication failure | Loose connections, water damage | LCD screen |
| Segway | Controller malfunction | Firmware issues, voltage problems | LED indicators |
| Razor | Speed sensor error | Magnetic sensor misalignment | Beeping pattern |
| Ninebot | Brake system fault | Brake lever issues | App notification |
The diagnostic system runs continuous self-checks during operation. It monitors throttle position accuracy within 0.1 degrees. Motor speed sensors track rotation within 1 RPM precision. Battery voltage monitoring detects fluctuations above 0.5 volts.
E1 errors appear on your scooter’s display screen immediately when detected. Some models flash LED lights in specific red patterns. Others beep repeatedly with distinct sound codes. Advanced models send notifications to smartphone apps.
Error logging helps technicians diagnose intermittent problems later. Controllers store the last 50 error events with timestamps. This data reveals patterns that point to root causes.

2. What Are the Main Causes of E1 Error?
Throttle connection problems cause approximately 40% of all E1 errors. Loose wire connections create intermittent signals that confuse controllers. Corroded contacts block electrical flow completely. Water damage shorts circuits and triggers false readings.
Vibration from riding gradually loosens electrical connections over time. Poor manufacturing quality creates weak solder joints that fail early. Rough handling during transport damages delicate throttle assemblies.
The best part? Most throttle-related E1 causes are fixable with basic maintenance. Regular cleaning prevents corrosion buildup. Proper storage in dry locations avoids water damage. Gentle handling protects delicate electronic connections.
Controller malfunctions rank as the second leading cause at 25% frequency. Firmware bugs create communication errors between components. Overheating damages internal circuits permanently. Power surges from faulty chargers corrupt controller memory.
| Cause Category | Frequency | Difficulty to Fix | Typical Cost | Time Required |
| Loose connections | 40% | Easy | $0-20 | 15 minutes |
| Water damage | 25% | Medium | $50-150 | 1-2 hours |
| Controller failure | 20% | Hard | $100-300 | 2-4 hours |
| Wiring problems | 15% | Medium | $30-100 | 1 hour |
Wiring harness issues develop gradually through normal use. Constant flexing stresses wire insulation until it cracks. Sharp turns create stress concentrations at connection points. Poor cable management allows wires to rub against sharp edges.
Battery voltage irregularities confuse sensitive controller circuits. Low voltage below 32V triggers protection modes automatically. Unbalanced lithium cells create unstable power delivery. Aging batteries lose capacity and voltage stability over time.
Temperature extremes affect all electronic components significantly. Cold weather below 32°F reduces battery performance by 30%. Hot conditions above 100°F overheat controllers and trigger thermal shutdowns. Rapid temperature changes stress solder joints until they crack.
Manufacturing defects account for 10% of E1 errors in new scooters. Poor quality control allows defective components to reach customers. Inadequate testing misses intermittent problems that appear later. Cost-cutting measures use substandard materials that fail prematurely.
3. How Do You Diagnose E1 Error Step by Step?
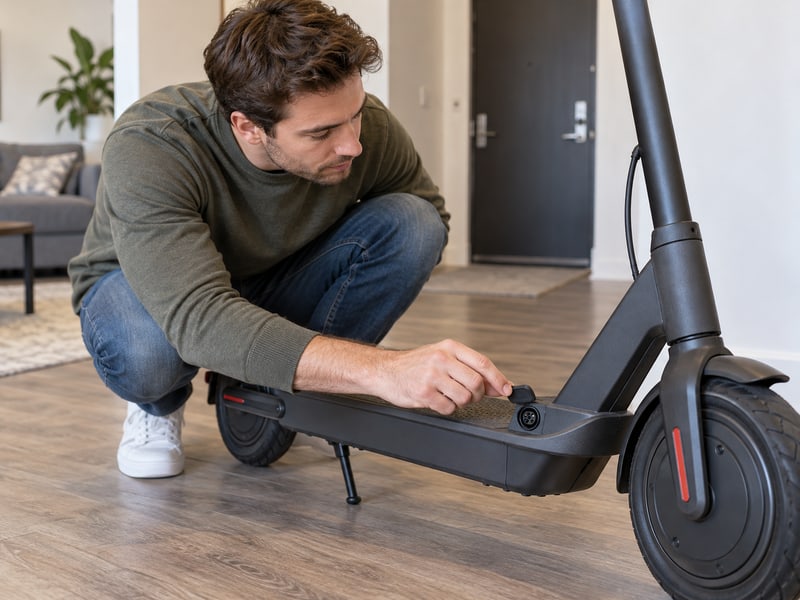
Start with visual inspection of all visible connections and components. Look for loose plugs, damaged wires, or green corrosion signs. Check the throttle assembly for cracks, water intrusion, or physical damage.
Power off your scooter completely before beginning any inspection work. Remove the battery if possible to prevent accidental activation. Wait 5 minutes for capacitors to discharge safely.
Now, you might be wondering about proper testing procedures. Use a systematic approach that checks obvious problems before complex diagnostics. Simple fixes solve 70% of E1 errors quickly.
Document your findings with photos before making any changes. This helps track what you’ve tried and provides reference for reassembly. Note any unusual smells, sounds, or visual abnormalities.
Test throttle connections by unplugging and reconnecting each connector carefully. Clean contacts with electrical contact cleaner and soft brushes. Wiggle wires gently to find loose connections that cause intermittent problems.
| Diagnostic Step | Tools Needed | Time Required | Success Rate | Skill Level |
| Visual inspection | Eyes, flashlight | 5 minutes | 30% | Beginner |
| Connection check | None | 10 minutes | 50% | Beginner |
| Voltage testing | Multimeter | 15 minutes | 80% | Intermediate |
| Component swap | Spare parts | 30 minutes | 95% | Advanced |
Check controller status lights if your model includes them. Solid green lights indicate normal operation. Flashing red patterns show specific error conditions. No lights suggest complete power failure or blown fuses.
Measure battery voltage with a quality digital multimeter. Healthy 36V batteries show 42V when fully charged. Readings below 35V indicate charging problems or damaged cells. Voltage that drops rapidly under load suggests internal resistance problems.
Test individual wire continuity from throttle to controller. Infinite resistance indicates broken wires inside the cable. High resistance above 10 ohms suggests corroded connections. Perfect continuity near 0 ohms confirms good connections.
Advanced diagnosis requires oscilloscope testing of signal quality. Throttle signals should be clean square waves without noise. Distorted signals indicate electromagnetic interference or component failure.
4. What Tools Do You Need to Fix E1 Error?
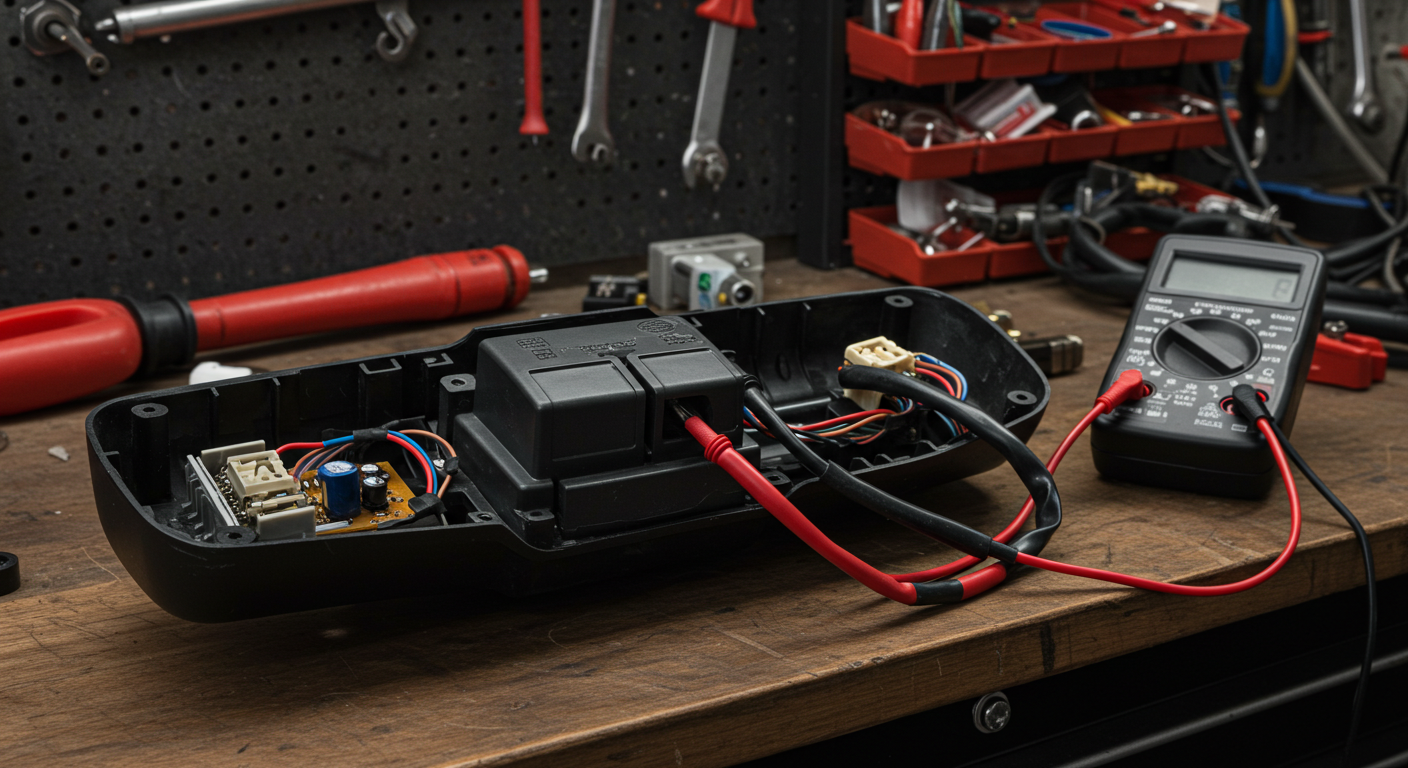
Basic repair tools handle most E1 error fixes effectively. Phillips and flathead screwdrivers open scooter panels safely. Metric Allen keys remove bolts and mounting brackets. Wire strippers prepare replacement wires to proper lengths.
A quality digital multimeter becomes your most valuable diagnostic tool. It measures voltage, resistance, and continuity accurately. Professional-grade meters cost $50-100 but provide reliable readings for years.
Let me explain why investing in proper tools matters significantly. Wrong tools damage delicate plastic components permanently. Cheap tools break during critical repairs. Quality tools make repairs faster, safer, and more reliable.
Electrical contact cleaner removes corrosion and oxidation safely. Choose cleaners specifically designed for electronics. Avoid harsh solvents that damage plastic housings. Dielectric grease protects connections from future moisture intrusion.
| Tool Category | Specific Items | Price Range | Necessity Level | Durability |
| Basic tools | Screwdrivers, Allen keys | $10-30 | Required | 10+ years |
| Test equipment | Digital multimeter | $20-50 | Highly recommended | 5+ years |
| Cleaning supplies | Contact cleaner, grease | $15-25 | Recommended | 2+ years |
| Safety gear | Gloves, safety glasses | $10-20 | Required | 3+ years |
Safety equipment protects you during electrical repairs. Insulated gloves prevent dangerous electrical shocks. Safety glasses shield eyes from chemical splashes and debris. Work in well-ventilated areas when using chemical cleaners.
Replacement parts should match original specifications exactly. Wrong voltage ratings damage expensive controllers permanently. Incompatible connectors create new connection problems. Keep spare throttles and basic components for quick emergency repairs.
Heat shrink tubing provides professional-quality wire repairs. It insulates connections better than electrical tape. Choose tubing with adhesive lining for waterproof seals. Use a heat gun for proper shrinking without damage.
Torque wrenches prevent over-tightening that strips threads. Electric scooter bolts require specific torque values. Too loose allows vibration damage. Too tight cracks plastic housings or strips aluminum threads.
5. How Do You Fix Throttle-Related E1 Errors?
Cleaning throttle connections solves approximately 60% of E1 errors quickly and cheaply. Disconnect the throttle cable carefully by pressing release tabs. Spray contacts with electrical cleaner and let it penetrate for 2 minutes.
Scrub contacts gently with a soft-bristled brush to remove stubborn corrosion. Avoid steel brushes that scratch delicate surfaces. Use cotton swabs for tight spaces and detailed cleaning.
This is important because throttle assemblies contain sensitive Hall effect sensors. Rough handling breaks internal magnetic components permanently. Excessive force damages plastic housings that can’t be repaired.
Dry connections completely before reconnecting anything. Moisture causes immediate new problems and corrosion. Use compressed air to blow out hidden moisture. Apply thin coats of dielectric grease for long-term protection.
Replace throttle assemblies when cleaning fails to restore proper operation. Remove old throttles by disconnecting cables and unscrewing mounting bolts. Take photos before removal for proper reassembly reference.
| Throttle Fix Method | Success Rate | Time Required | Skill Level | Cost Range |
| Connection cleaning | 60% | 15 minutes | Beginner | $5-10 |
| Contact adjustment | 75% | 30 minutes | Intermediate | $10-20 |
| Throttle replacement | 95% | 45 minutes | Intermediate | $30-80 |
Install new throttles in reverse order of removal. Route cables away from moving parts and sharp edges. Secure cables with zip ties to prevent future damage. Leave slight slack for handlebar movement.
Calibrate new throttles according to manufacturer instructions carefully. Some models require specific button sequences during power-up. Others need computer programming with special software. Follow procedures exactly for proper operation.
Test throttle response thoroughly after repairs are complete. Gradual acceleration should feel smooth and predictable. Jerky movement indicates remaining connection problems. No response suggests incorrect wiring or programming errors.
Check throttle operation at different temperatures if possible. Cold weather can reveal intermittent connection problems. Hot conditions may cause thermal expansion issues. Proper repairs work reliably in all conditions.

6. How Do You Resolve Controller E1 Issues?
Controller reset procedures clear temporary errors and corrupted memory. Turn off the scooter completely and remove the key. Disconnect the main battery connector for exactly 10 minutes. This allows capacitors to discharge completely.
Some controllers have dedicated reset buttons hidden under panels. Check your manual for exact locations and procedures. Press reset buttons for 5-10 seconds while power is off.
Here’s the deal – firmware updates fix many controller bugs and compatibility issues. Download updates only from official manufacturer websites. Use genuine software and follow installation instructions exactly.
Backup existing firmware before updating if possible. This allows recovery if updates fail. Some controllers become permanently damaged by interrupted updates. Stable power supply prevents update failures.
Controller replacement becomes necessary when resets and updates fail. Mark wire positions clearly before disconnecting anything. Take detailed photos for reference during reassembly. Label wires with masking tape if needed.
| Controller Solution | Complexity | Success Rate | Cost Range | Time Required |
| Soft reset | Low | 40% | Free | 5 minutes |
| Firmware update | Medium | 70% | Free | 30 minutes |
| Hard reset | Medium | 60% | Free | 15 minutes |
| Replacement | High | 95% | $100-300 | 2-3 hours |
Match replacement controllers to your exact scooter model. Voltage ratings must be identical to prevent damage. Connector types should fit perfectly without modification. Wrong controllers damage motors, batteries, and other expensive components.
Professional programming may be required for new controllers. Some models need dealer activation codes. Others require special diagnostic software tools. Factor these additional costs into repair decisions.
Test new controllers thoroughly before final assembly. Check all functions including lights, brakes, and speed settings. Verify error codes clear properly. Ensure smooth acceleration and braking response.
Store old controllers as emergency spares if they’re partially functional. Intermittent problems may worsen over time. Having backup controllers prevents extended downtime during busy periods.

7. When Should You Seek Professional Help?
Complex electrical problems often exceed typical DIY capabilities. Multiple simultaneous error codes suggest system-wide issues. Intermittent problems are extremely difficult to diagnose without professional equipment. Technicians have specialized tools that find hidden faults quickly.
Warranty considerations significantly affect repair decisions. DIY repairs may void manufacturer coverage completely. Authorized service centers maintain warranty protection. Check warranty terms carefully before attempting any repairs.
What does this mean for you? Professional diagnosis typically costs $50-100 but prevents expensive mistakes. Experienced technicians identify problems in minutes that might take hours to find. Their expertise saves time and prevents additional damage.
Safety risks increase dramatically with high-voltage battery systems. Controllers handle dangerous currents that can cause fires. Improper repairs create shock hazards and property damage. Professional service protects you, your family, and your property.
| Situation | DIY Recommended | Professional Needed | Risk Level | Urgency |
| Simple connection issues | Yes | No | Low | Low |
| Water damage | Maybe | Preferred | Medium | Medium |
| Controller replacement | Maybe | Recommended | Medium | Medium |
| Multiple errors | No | Yes | High | High |
Cost-benefit analysis guides smart repair decisions. Simple connection fixes cost under $20 in materials. Professional repairs range $100-400 depending on complexity. New replacement scooters cost $300-2000. Compare all options carefully.
Time constraints often favor professional service for busy people. Experienced technicians complete most repairs in 2-4 hours. DIY attempts may take entire weekends. Consider your available time and skill level honestly.
Insurance coverage may require professional repairs for claims. Some policies exclude DIY electrical work. Others require certified technician documentation. Check your coverage before making repair decisions.
Conclusion
E1 errors on electric scooters primarily stem from throttle and controller communication problems that disrupt normal operation. Most issues resolve through systematic connection cleaning, component replacement, or controller resets performed with basic tools. Proper diagnosis identifies root causes quickly and prevents expensive secondary damage to other components.
Dynamic Scooter provides comprehensive technical support for all E1 error situations through our expert service team. Our certified technicians offer free diagnosis consultations and maintain complete inventories of genuine replacement parts. Contact Dynamic Scooter today for professional assistance with your E1 error repair needs and return to safe, reliable riding immediately.
FAQ
Q1: Can I ride my scooter with E1 error showing?
No, never attempt to ride with E1 error displayed on your scooter. This error indicates serious throttle or controller problems that could cause sudden uncontrolled acceleration or complete loss of power. Stop riding immediately and diagnose the problem before continuing to prevent accidents.
Q2: How much does it cost to fix E1 error professionally?
Professional E1 error repairs typically cost $100-300 depending on the underlying root cause. Simple connection cleaning and adjustment costs $50-100, while complete controller replacement ranges $200-400 including labor and genuine parts.
Q3: Will E1 error void my scooter warranty?
E1 errors themselves don’t void manufacturer warranties, but improper DIY repair attempts might. Always check specific warranty terms before attempting any repairs. Use only authorized service centers to maintain full warranty coverage and protection.
Q4: How long does E1 error repair typically take?
Simple E1 fixes like connection cleaning take 15-30 minutes for experienced technicians. Controller replacement requires 2-3 hours including diagnosis time. Professional shops typically complete most E1 repairs within one business day.
Q5: Can E1 error damage other scooter components?
Yes, ignoring E1 errors can cause expensive damage to motors, batteries, and other electrical components. The error indicates system communication problems that may worsen over time. Address E1 errors promptly to prevent costly secondary damage throughout the electrical system.